TO ASSIGN THE MODULATION
: simply tweak the knobs while holding the
MODULATION
(23) button. Doing the same with SHIFT /* enabled will assign the
modulation to secondary parameters.
The amount by which you tweak a knob from center to side positions while holding
the
MODULATION
button (23) sets the depth of the selected
[LFO] SHAPE
(22),
which will be applied to the assigned parameter.
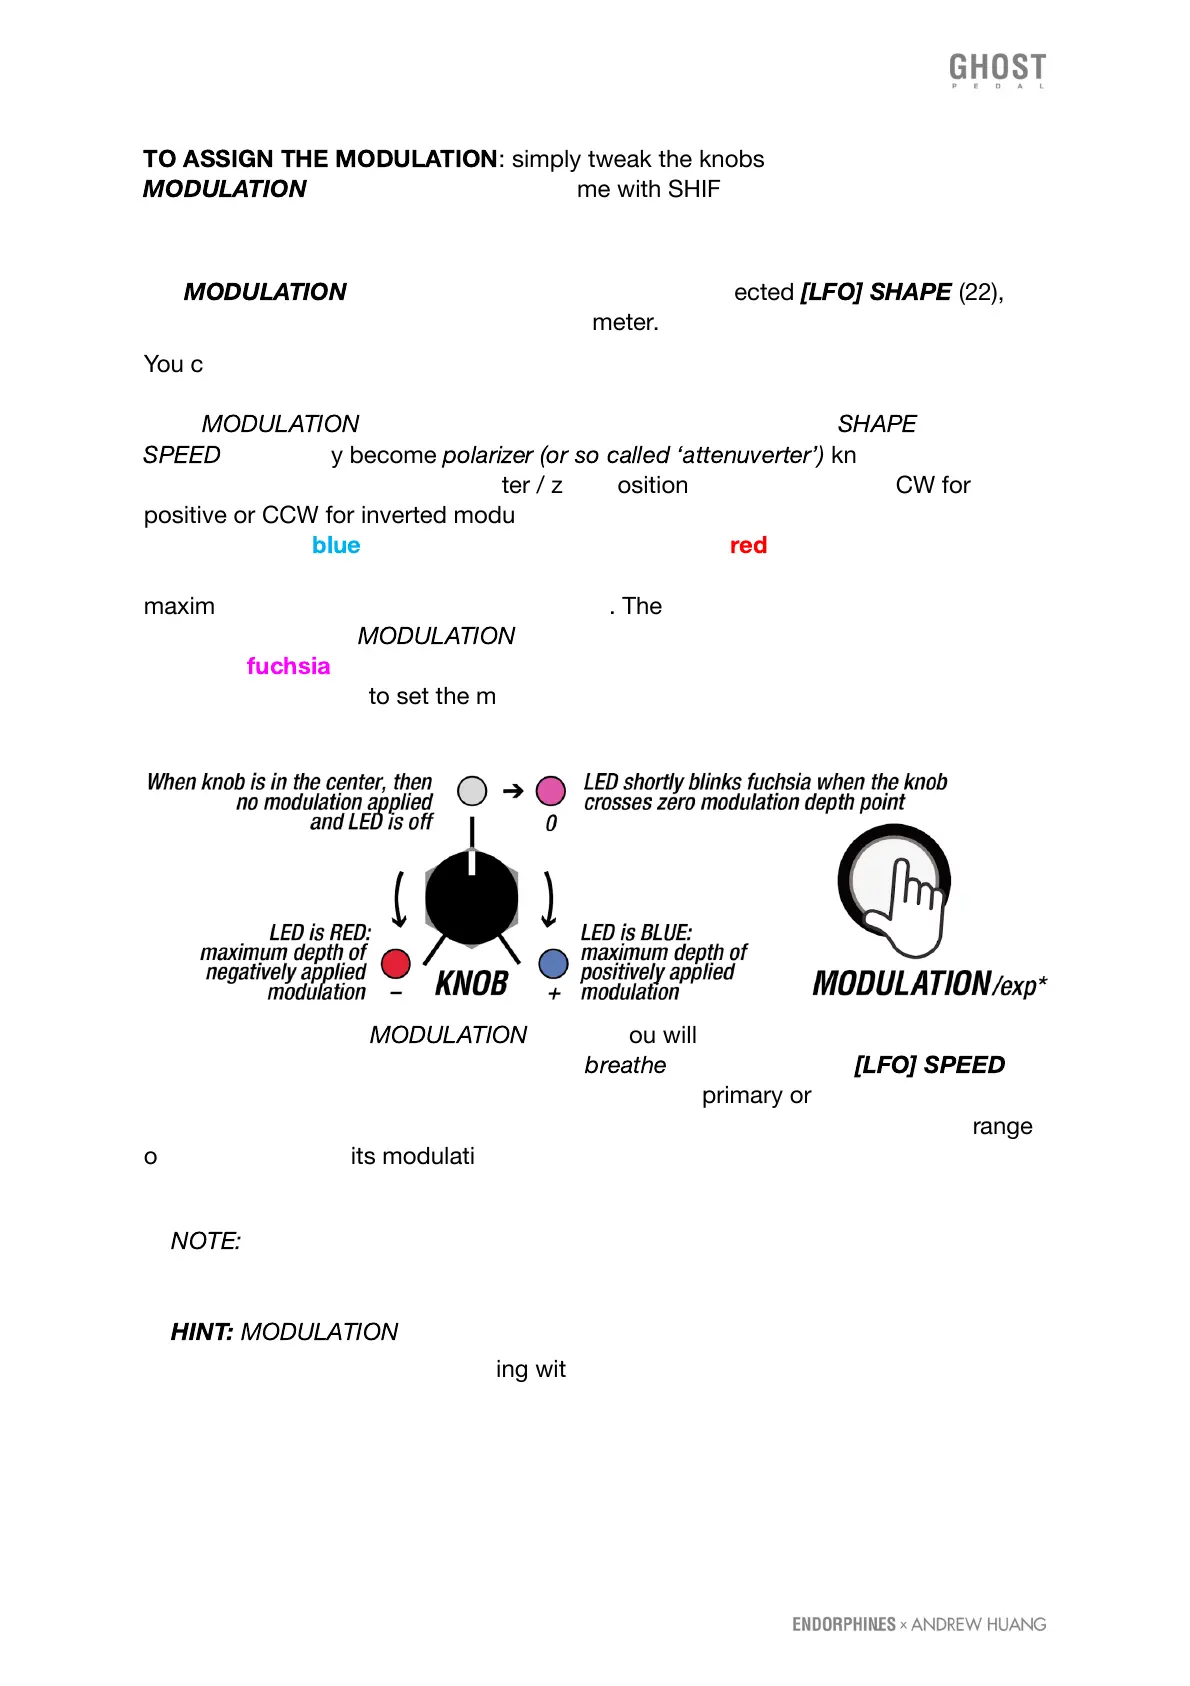
You can apply modulation so the LFO will move the knob from its current position
directly (positive modulation) or inverted (negative modulation). When you hold or
latch
MODULATION
(23) button, all the parameter knobs (except
SHAPE
and
SPEED
) temporary become
polarizer (or so called ‘attenuverter’)
knobs which set
the depth of modulation from center / zero position (no modulation) to CW for
positive or CCW for inverted modulation. Amount of positive modulation depth is
shown with the
blue
and negative modulation with the
red
brightness of the LED
which stands next to the parameter we apply modulation and increases to
maximum when the knob reaches the sides. There is no modulation applied when
the LED is off when
MODULATION
button (23) is active. Parameter LED blinks
shortly in
fuchsia
when the knob crosses the center point - that’s convenient to
know when we want to set the modulation to zero depth.
After you release the
MODULATION
button, you will see the modulation applied with
the LED brightness near the knob - it will
breathe
according to the
[LFO] SPEED
knob (21). You may assign those movements to any primary or certain secondary
parameters to the LFO with various depths. To have the LFO covering the full range
of the knob, adjust its modulation in maximum or minimum (full blue or red) and
then add a manual knob offset.
🠚
NOTE:
you can’t modulate discrete values with LFO (e.g. selecting MIDI
CHANNEL or enabling MIDI SYNC).
🠚
HINT:
MODULATION
(23) button can also be pressed once (latched) so you can
adjust the modulation depth playing with various parameters with one hand.