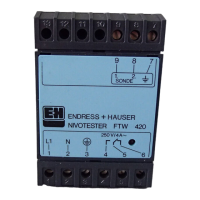
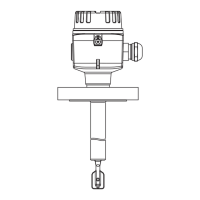
Level Limit Switch
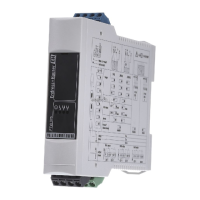
nivotester FTC 420
Quick Installation Guide
• Switch not suitable for use with
probes operating in explosion
hazardous areas.
• Do not install if your power
supply does not tally with that
quoted on the rating plate.
• First time users please consult
the "Installation and Operating
Instructions", BA 021, before
attempting to install.
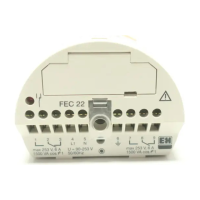
Electronic Insert Wiring
Product Tendency to
conductive build-up
Bridge at
Terminals 1-2
Dry bulk solids low no
Moist bulk
solids
medium no
Water-containing
liquids
dilute: low
pasty, sticky: high
dilute: no
pasty, sticky: yes
Sludge very high yes
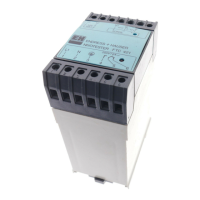
Nivotester Wiring
➀ Select Failsafe mode
No bridge 12-13: Minimum
Bridge 12-13: Maximum
Adjustment
• Calibration for uncovered probe
– for other possibilities, see BA 021
➃ Adjuster –> 0. Turn slowly clockwise:
For minimum: When red LED lights,
turn up another half division.
For maximum: When red LED goes out,
turn up another half division.
Range Setting Input voltage Capacitance
I 3 … 6.6 V 10 … 100 pF
II 6 … 8.8 V 80 … 180 pF
III 8 … 12 V 160 … 350 pF
Hauser+Endress
➁ Connect Terminals
8, 9, 10, to electronic
insert EC 61 Z,
see below
➄ Green LED lights
when unit operates
➅ Red LED lights
when relay
de-energised
➂ Connect alarm, relay,
hooter etc. to
Terminals 4, 5, 6.
Ratings see BA 021
➃ Connect power to
Terminals 1, 2, 3.
Switch off first!
Nivotester
FTC 420
10 9 8
➀ Wire Nivotester
to EC 61 Z insert
with screened
installation cable
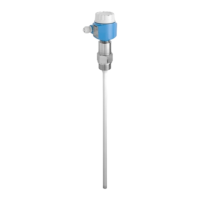
➁ Ground probe
head to Terminal 6
➂ If conductive built-up
is likely, short-circuit
Terminals 1 and 2
➀ Check that green
LED is lit
➁ Switch –> Range I,
Adjuster: 0 –> 10
➂ If red LED changes
status –>
➃, otherwise
–>
➁ at next
 Loading...