12
CHAPTER 5: ANALYZER CUSTOMIZATION. It is a good idea to use the
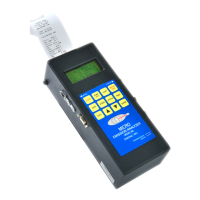
STATUS button to check the battery voltage before you begin a test. The unit will
display a warning and shut down when the battery voltage drops to 4.0 volts.
4. If the instrument temperature is below 40°F. Allow a few minutes for the
unit to warm up.
5. With the probe connected to the unit, the probe tip at room temperature, and
the instrument aspirating clean air, press the ZERO button to execute an
AUTOZERO.
6. If at the end of the autozero period there are no warning or error messages,
insert the probe into the stack. Wait approximately two minutes before
taking data.
7. Press the DATA button to display the first group of measurements. By
depressing this button again you display the second group of data, and by
depressing it again you will display the third group of data. The data are
grouped as follows:
Toggle the DATA button to view the measurement data in sequence.
NOTE: Depending on the options enabled for your analyzer some of the entries
in one or more of the displays shown above will display “N.A.” if that option is
not available. When the O
2
level is above 20% the efficiency will read “OVER”.
8. If you want a printed record of the current data, press the PRINT button on
the analyzer. You will get a complete printout of all data, including time and
date, fuel and customer information.
OX: 5.8 DFT: 5.5
ST: 460 CMB: 3.0
CO: 146 NO2: 126
NO: 37 SO2: 250
CO2: 7.8 %
Ex.Air: 35.0 %
Combust: 3.0 %
Draft: 5.5 "
NOX: 163 PPM
NO: 37 PPM
NO2: 126 PPM
SO2: 250 PPM
Effic: 85.7 %
Oxygen: 5.8 %
CO: 146 PPM
Stack T: 460 F