Installing and Connecting a Redundant Power System
2-24 Installation
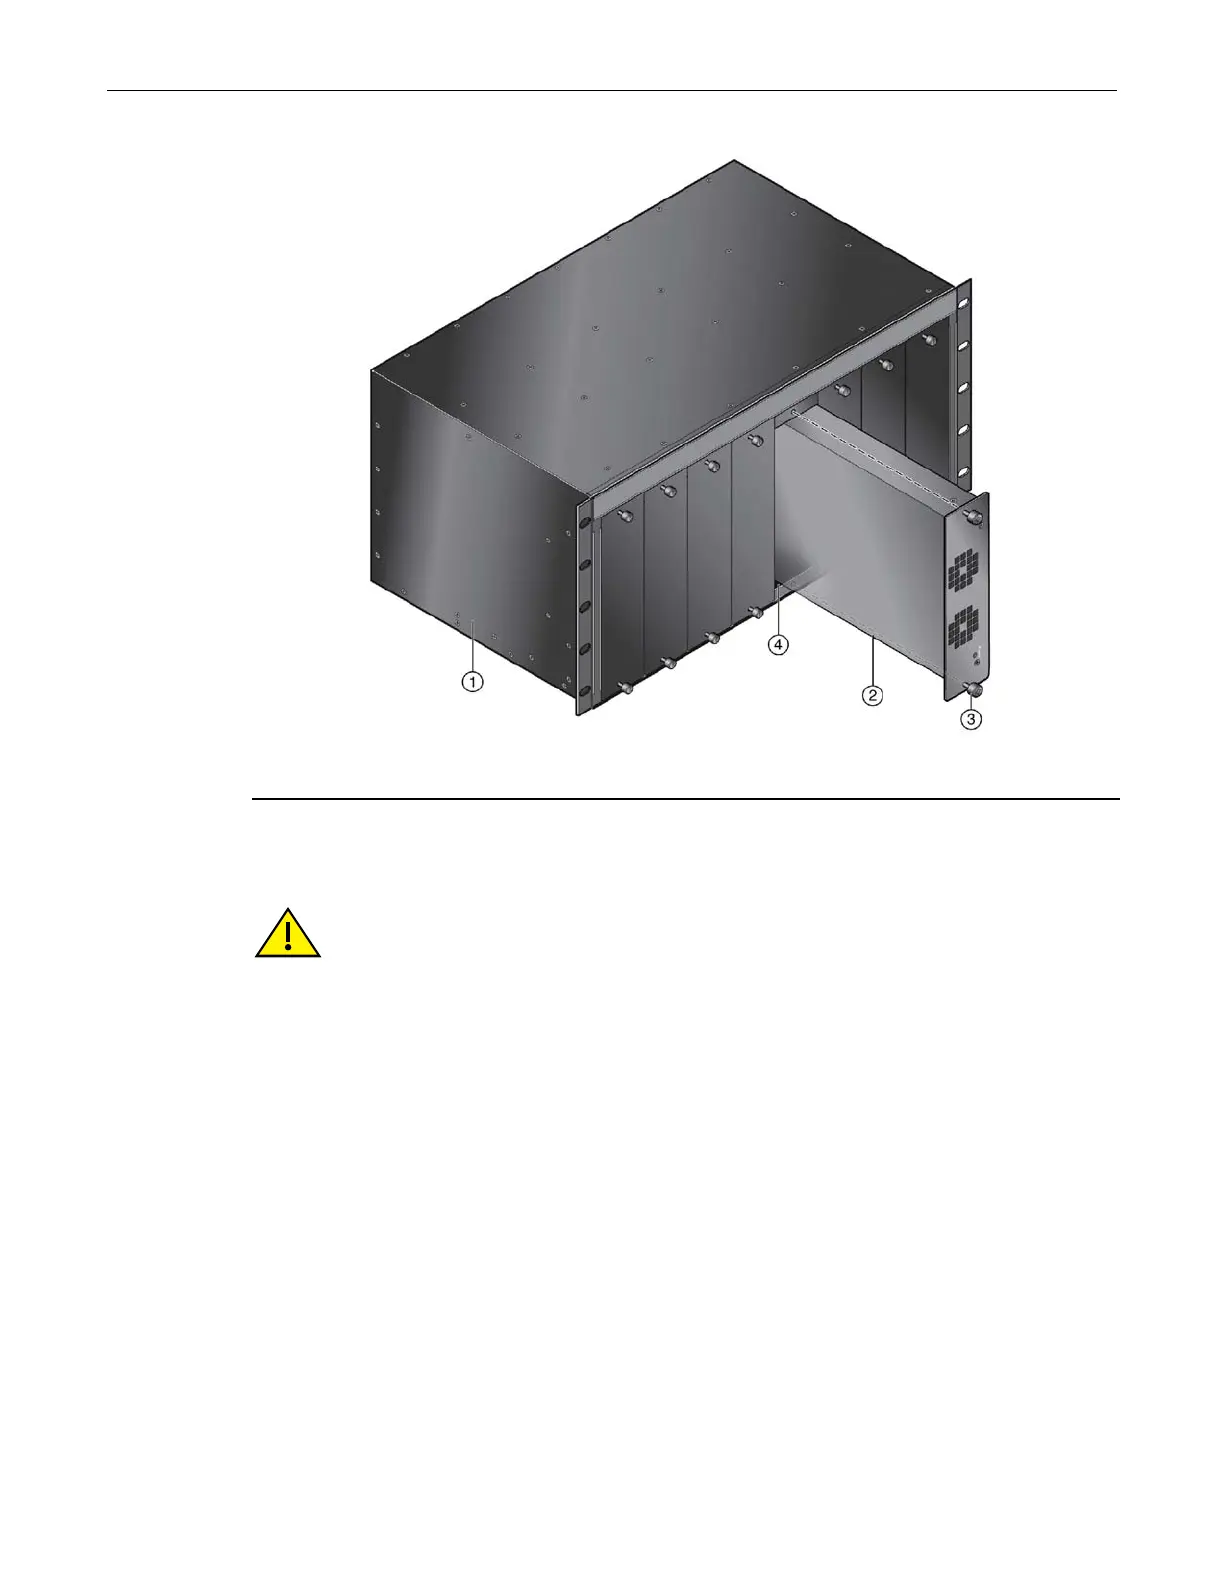
Figure 2-18 08A-RPS-150P Installation in an STK-RPS-150CH8 Shelf
Removing an Installed 08A-RPS-150P
To remove a power supply installed in an operating system, proceed as follows:
1. Unplug the AC power cord of the power supply from the AC power source first, then from the
rear of the power supply.
2. Loosen the captive screws securing the power supply until it is released from the chassis front
panel.
3. Pull the power supply out and remove it from the chassis.
4. Repeat steps 1 through 3 for each additional power supply you plan to remove.
5. Optionally, reinstall coverplates over empty slots. Coverplates are not required.
Installing the Shelf into the Rack
To install an STK-RPS-150CH2 or STK-RPS-150CH8 into a 19-inch (48.3-cm) rack, you need the
following:
• For the STK-RPS-150CH2: four customer-supplied screws to fasten the shelf to the rack rails
• For the STK-RPS-150CH8: ten customer-supplied screws to fasten the shelf to the rack rails
1 STK-RPS-150CH8 shelf 3 Captive screws (2)
2 08A-RPS-150P power supply 4 Chassis power supply slot
Caution: Observe all Electrostatic Discharge (ESD) precautions when handling sensitive electronic
equipment.
Precaución: Al trabajar con equipos electrónicos sensibles, tome todas las precauciones de
seguridad para evitar descargas de electricidad estática.
 Loading...