This document is the Operator's Manual for the Enthermics Titan & Comfort Series Fluid Warmers, specifically models EC250L, DC250L, EC350L, EC400L, and DC400L. Enthermics Medical Systems is an ISO 13485:2016 certified company based in Menomonee Falls, WI, USA. The manual, identified as MN-39361, Rev. 03, dated 8/20, provides comprehensive information for the safe and effective operation and maintenance of these medical fluid warmers.
Function Description
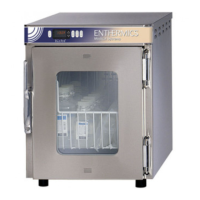
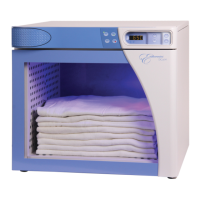
The Enthermics Titan & Comfort Series Fluid Warmers are designed for warming irrigation or injection fluids. They are intended for use in medical settings, ensuring that fluids are brought to a safe and effective temperature for patient use. The warmers are not intended for warming blood or blood products. Users must follow facility and solution manufacturer guidance regarding warming temperatures for any item placed in the warmer.
Important Technical Specifications
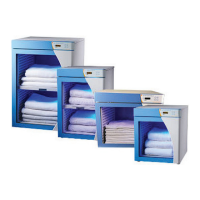
The fluid warmers come in several models with varying capacities and dimensions:
Models: EC/DC 250L, EC350L, EC/DC 400L
Intended Use: Warming irrigation or injection fluids.
Weight (Net/Ship):
- EC/DC 250L: Net 67 lb (30 kg) / Ship 116 lb (53 kg)
- EC350L: Net 91 lb (41 kg) / Ship 144 lb (65 kg)
- EC/DC 400L: Net 100 lb (45 kg) / Ship 158 lb (72 kg)
Storage Cavity Capacity:
- EC/DC 250L: 16 1-liter bags (8 bags per shelf or basket) or 12 1-liter bottles. (1 basket standard for EC250L, 2 baskets standard for DC250L)
- EC350L: 24 1-liter bags (12 bags per shelf or basket) or 24 1-liter bottles (12 bottles per shelf or basket). (1 basket and 1 shelf standard for EC350L)
- EC/DC 400L: 28 1-liter bags (14 bags per shelf or basket) or 20 1-liter bottles.
Temperature Range:
- Irrigation fluids (IRR): 90°F to 150°F (32°C to 66°C)
- Injection fluids (INJ): 90°F to 104°F (32°C to 40°C)
Clearance Requirements:
- 3" (76mm) from rear
- 1" (25mm) from top
- 1" (25mm) from sides
- 3/4" (19mm) from bottom
Transportation and Storage Conditions:
- Ambient temperature: -40°F to +159°F (-40°C to +70°C)
- Relative humidity: 10% to 95%, non-condensing
- Atmospheric pressure: 7.25 psi to 15.37 psi (50kPa to 106kPa)
Operating Conditions:
- The warmer must acclimate to room temperature (24 hours recommended).
- Recommended environmental temperature: 60°F to 90°F (15°C to 32°C)
- Recommended relative humidity: above 20%, non-condensing
Electrical Specifications:
- EC/DC 250L & EC350L:
- 120V, 1 Ph, 60Hz, 0.44 kW
- 220V, 1 Ph, 60Hz, 0.44 kW
- 230V, 1 Ph, 50/60Hz, 0.44 kW
- EC/DC 400L:
- 120V, 1 Ph, 60Hz, 0.7 kW
- 220V, 1 Ph, 50Hz, 0.7 kW
- 230V, 1 Ph, 50/60Hz, 0.7 kW
Standards: Medical equipment listed by Underwriters Laboratories (UL) with respect to electrical shock, fire, and mechanical hazards only, in accordance with UL 61010-1 and CAN/CSA C22.2 No. 61010-1. Grounding reliability requires connection to an equivalent receptacle marked "Hospital Grade." IP-XO ordinary.
Usage Features
Installation:
- The warmer must be installed on a level surface, away from steam, dripping water, high temperatures, or other adverse conditions.
- It should be within five feet of an appropriate electrical outlet.
- Casters, if equipped, must be locked after positioning.
Operation:
- Turning On/Off: The warmer is turned on by setting the power switch to the ON (I) position and then pressing the standby button. To turn off, press and hold the standby button until the screen turns off.
- Selecting Operation Mode: Users can select between irrigation (IRR) and injection (INJ) modes using dedicated buttons. The selected mode illuminates.
- Setting Temperature: Temperature is adjusted using arrow buttons. The irrigation mode has a set-point range of 90°F - 150°F (32°C - 66°C), while the injection mode has a range of 90°F – 104°F (32°C - 40°C).
- Temperature Recall: Pressing the temperature recall button displays the measured cavity temperature for five seconds, then reverts to the set-point temperature.
- Changing Temperature Scale: The temperature scale (°F or °C) can be changed by pressing and holding the standby button until the screen turns off, then pressing and holding the temperature recall button until only 'F' or 'C' displays, then using the arrow buttons to toggle, and finally pressing the standby button to turn the screen on.
- Changing Sound Settings: Sound volume (0-12) can be adjusted by pressing and holding the temperature recall button and the down arrow button simultaneously until the volume setting displays, then using the arrow buttons to adjust, and pressing the standby button to turn the screen on.
- Locking/Unlocking Controller: The controller can be locked to prevent accidental temperature changes by pressing and holding the standby button and the up arrow button. The lock indicator illuminates. To unlock, press and hold the standby button and the down arrow button.
- Adjusting Interior Light (if equipped): The interior light has three settings (high, low, off) and can be adjusted by pressing the interior light button.
- Downloading Temperature Data (if equipped): The warmer stores multiple years of data, automatically downloading only new data to a SanDisk Cruzer Glide USB drive (larger than 4 GB). Data is recorded every five minutes when on, and each time the temperature set-point is changed, the fluid door is opened, or the fluid operation mode is changed.
Maintenance Features
Daily Maintenance:
- Check: Ensure air vents in airflow insert panels and all fan guards are unobstructed. Verify the number of bottles/bags or blankets does not exceed maximum capacity.
- Clean: Wipe any spills with a clean, lint-free cloth using approved cleaners (stainless steel cleaner for stainless steel panels, approved cleaning agent for painted panels). Avoid abrasive compounds, chloride-based cleaners, commercial/household cleaners containing ammonia, or quaternary salts.
Monthly Maintenance:
- Check: Inspect door gasket for tears/holes and ensure it's firmly attached and seals when closed. Verify guards around the air temperature sensor are in place and secure. Check hardware securing the warmer(s) to the wall (if applicable).
- Clean: Clean the outside of the warmer with stainless steel cleaner. Vacuum fan openings, fan sail switch, and vent openings (if applicable).
Yearly Maintenance:
- Check: Compare set-point temperature to actual displayed temperature. Check cavity air temperature with a thermocouple 1" (25mm) from the cavity sensor for approximately one hour in an empty cavity. Inspect the condition of the plug and cord. Check the controller screen for excessive wear and proper operation.
- Clean: Clean shelves and interior of the warmer. This involves removing the shelf(s) and basket(s), side panels, and bottom shelf, cleaning them with a damp cloth, drying, and then re-installing them. Ensure all components are re-installed before operating to prevent overheating.
Troubleshooting:
- Power Interruption: If a power interruption occurs, the ON/OFF status indicator LED decimal flashes. Press the standby button to clear. If an error code displays, refer to the error codes section.
- Alarm Indicator Light Flashes: If the alarm indicator light flashes and an alarm sounds, press the standby button to acknowledge and mute. Then refer to the troubleshooting section for the error code.
- Error Codes: The manual provides a comprehensive list of error codes (e.g., E-10 for cavity sensor shorted, E-30 for under temperature, E-50 for Analog to Digital Converter Error) with corresponding actions required. Non-critical errors can be cleared with the standby button, while critical errors require setting the power switch to OFF and allowing the warmer to cool.
- Fuse Replacement: Instructions are provided for replacing fuses (UL listed 10A, 250V fast acting fuses, 5mm x 20mm). This process requires setting the power switch to OFF, unplugging the cord, pinching and pulling out the fuse drawer, replacing the fuse, and re-installing the drawer.
Warmer Disposal/Decommissioning: The product and accessories must be disposed of according to local laws and regulations, not as unsorted municipal waste.
Warranty: Enthermics provides a warranty to the original purchaser for defective materials or workmanship. For warming cabinets shipped to the US or Canada, labor warranty is 1 year (or 15 months from shipping) and parts warranty is 5 years (or 63 months from shipping). For international shipments, parts warranty is 1 year (or 15 months from shipping). The warranty does not cover calibration, damage from improper installation/alteration, abuse, misuse, harsh chemicals, or unauthorized modifications. Collateral or incidental damage from servicing built-in units is also not covered.