Do you have a question about the EP Equipment PB2000 and is the answer not in the manual?
Details about the machine's technical capabilities, dimensions, and performance.
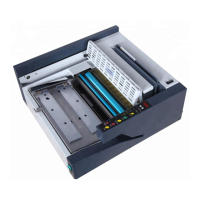
Lists and illustrates the included accessories for the binding machine.
Details and identifies the main structural components of the binding machine.
Explains the function and layout of the machine's control panel buttons and indicators.
Provides essential safety and environmental guidelines for installing the machine.
Outlines critical safety warnings and precautions to follow during machine operation.
Offers advice and best practices for achieving high-quality book binding results.
Details initial adjustments and warming-up procedures for preparing the machine.
Step-by-step guide for using the automatic binding mode of the machine.
Step-by-step guide for using the manual binding mode, suitable for beginners.
Instructions on how to refill the glue tank and important safety warnings.
Guidance on how to empty and clean the waste paper collection tank.
Procedure for safely draining and removing old glue from the melt tank.
Provides countermeasures for the issue of lamps not turning on when the machine is powered.
Explains methods to safely stop the ongoing binding process.
Offers solutions for troubleshooting the clamper mechanism not functioning correctly.
Suggests actions for blinking lights or other general control panel issues.
Advises contacting the dealer for any unlisted or complex operational problems.
The device described in this manual is a Perfect Binding Machine, model PB2000, designed for binding books. It operates by applying hot melt glue to the spine of a stack of sheets and then nipping them with a cover to form a bound book. The machine offers both automatic and manual operation modes, catering to different user needs and experience levels.
The primary function of the PB2000 is to bind multiple sheets of paper into a book format using hot melt glue. The process involves several key steps:
The machine is designed to handle various book thicknesses and cover weights, making it versatile for different binding projects.
The PB2000 offers several features to facilitate its use and ensure quality binding:
Before binding, several preadjustments are recommended to ensure good binding quality:
Regular maintenance is essential for the longevity and optimal performance of the PB2000.
The manual provides basic troubleshooting steps for common issues:
| Punching Capacity | 20 sheets |
|---|---|
| Binding Capacity | 450 sheets |
| Adjustable Margin | Yes |
| Number of Punching Pins | 21 |
| Binding Type | Comb binding |
| Weight | 6.5 kg |