Centrifuge 5804/5804 R and 5810/5810 R
5 Alignment / Adjustment
5-2 Alignment/Adjustment
MSTM/0408
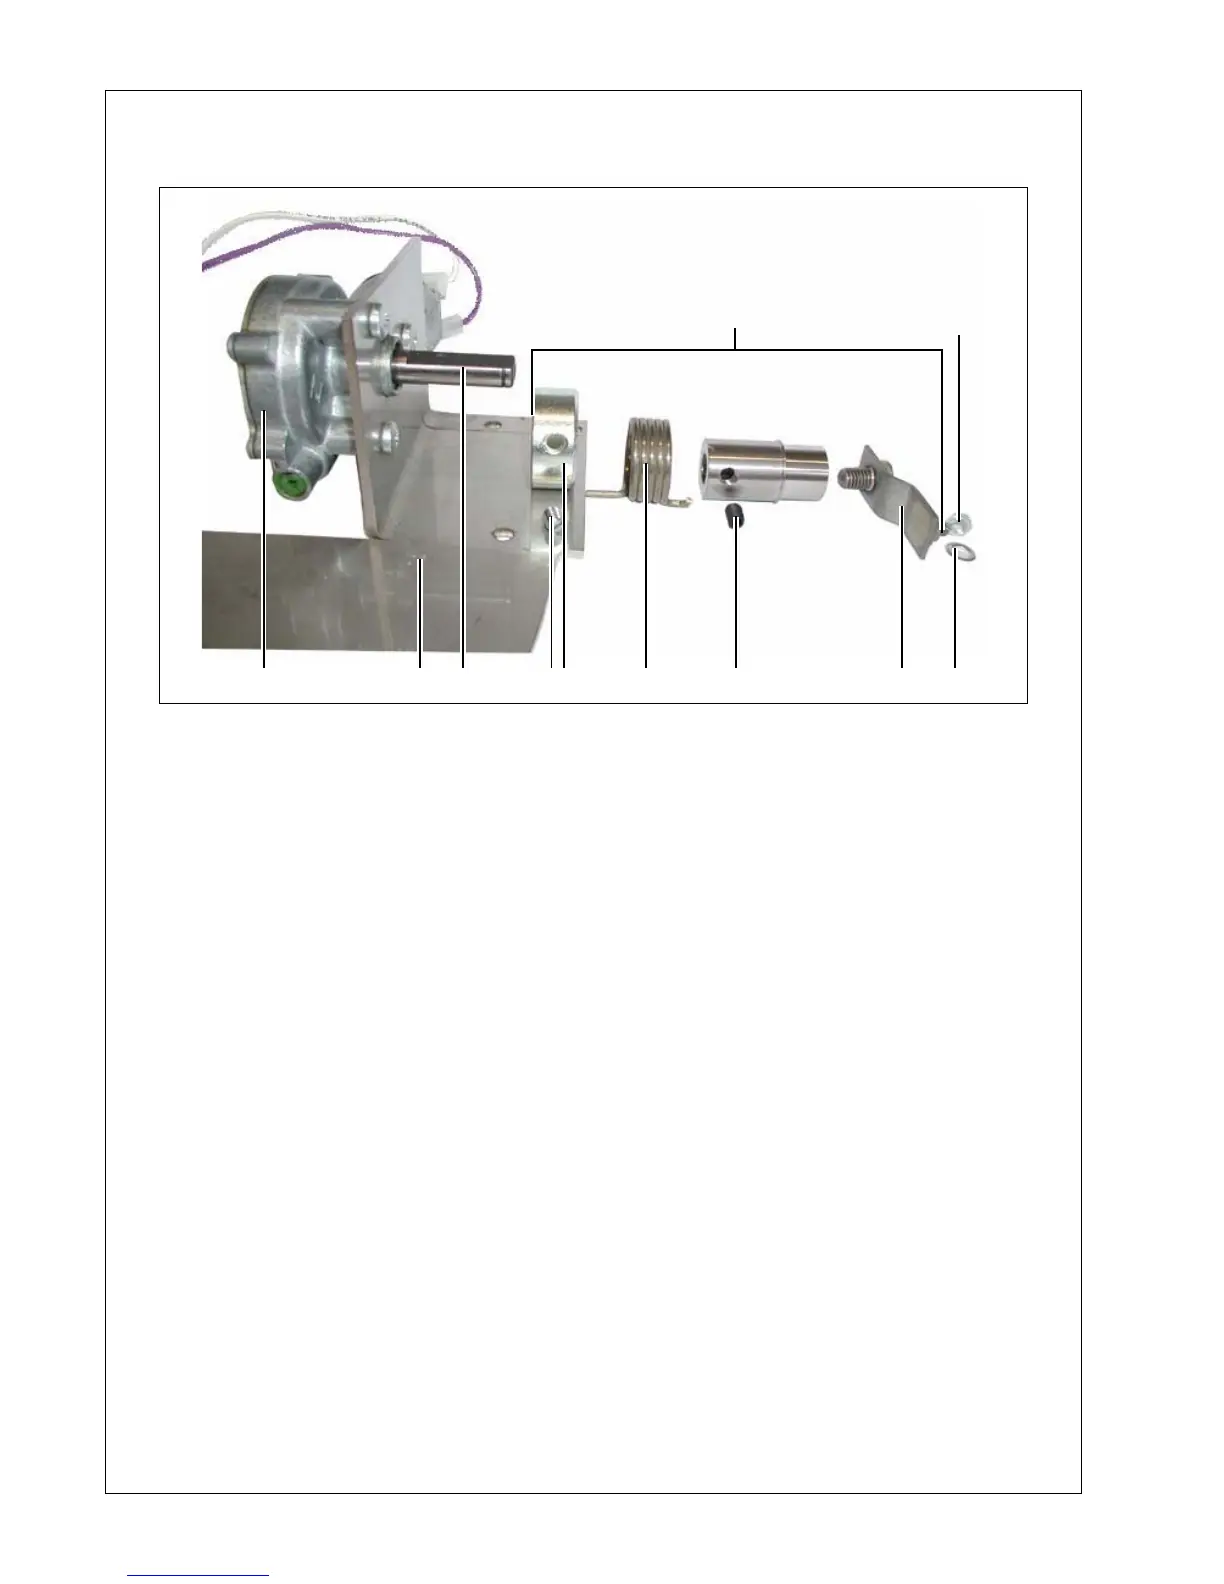
Adjusting motor for lid latch with crank and torsion spring
Secure the screws/nuts no. 6, 9 and 11 with Loctite 243 (medium strength).
Note: actuate motor externally at approx.10 - 24 VDC or using Service program SE 4 to put the drive
shaft in a different position.
A) Fit motor for lid latch (1) on motor mounting angle (2).
B) Push crank compl. (3) onto drive shaft (4). Crank for the lid latch (5) remains mobile.
C) Secure crank compl. (3) on drive shaft (4) using screw (6) (see Figure 2 following assembly).
D) Turn adjustment ring (7) 30°– 45° to the right (clockwise) which puts torsion spring (8) under
initial tension. Now secure adjustment ring (7) using screw (9).
E) Perform a function check: put the rotor key in crank for the lid latch (5) and check that it will
turn through approx. 170° anticlockwise (and against the tension of the torsion spring).
F) Put the motor in a favorable installation position of crank for the lid latch (5) to facilitate assembly
in the centrifuge. Fit motor unit (Figure 2) and connect the cable.
G) Once the motor unit has been installed or replaced, select a different installation position for crank
for the lid latch (5), put on the slide for the lid latch and and install the washer (10) and tighten with the
nut M5 (11). If there is still a crank with peg, tighten the circlip.
Set/check using Service program SE 4.
1 2 9 7 8 6 54
3
10
11
Fig. 1