Epson Artisan 810/835/837/710/725/730/Epson Stylus Photo PX810FW/TX810FW/PX820FWD/TX820FWD/PX830FWD/PX710W/TX710W/PX720WD/TX720WD/PX730WD/TX730WD
Revision G
DISASSEMBLY/ASSEMBLY Disassembly Procedures 110
Confidential
4.2.3 Removing the Housing
4.2.3.1 ADF Unit
Parts/Components need to be removed in advance:
None
Removal procedure
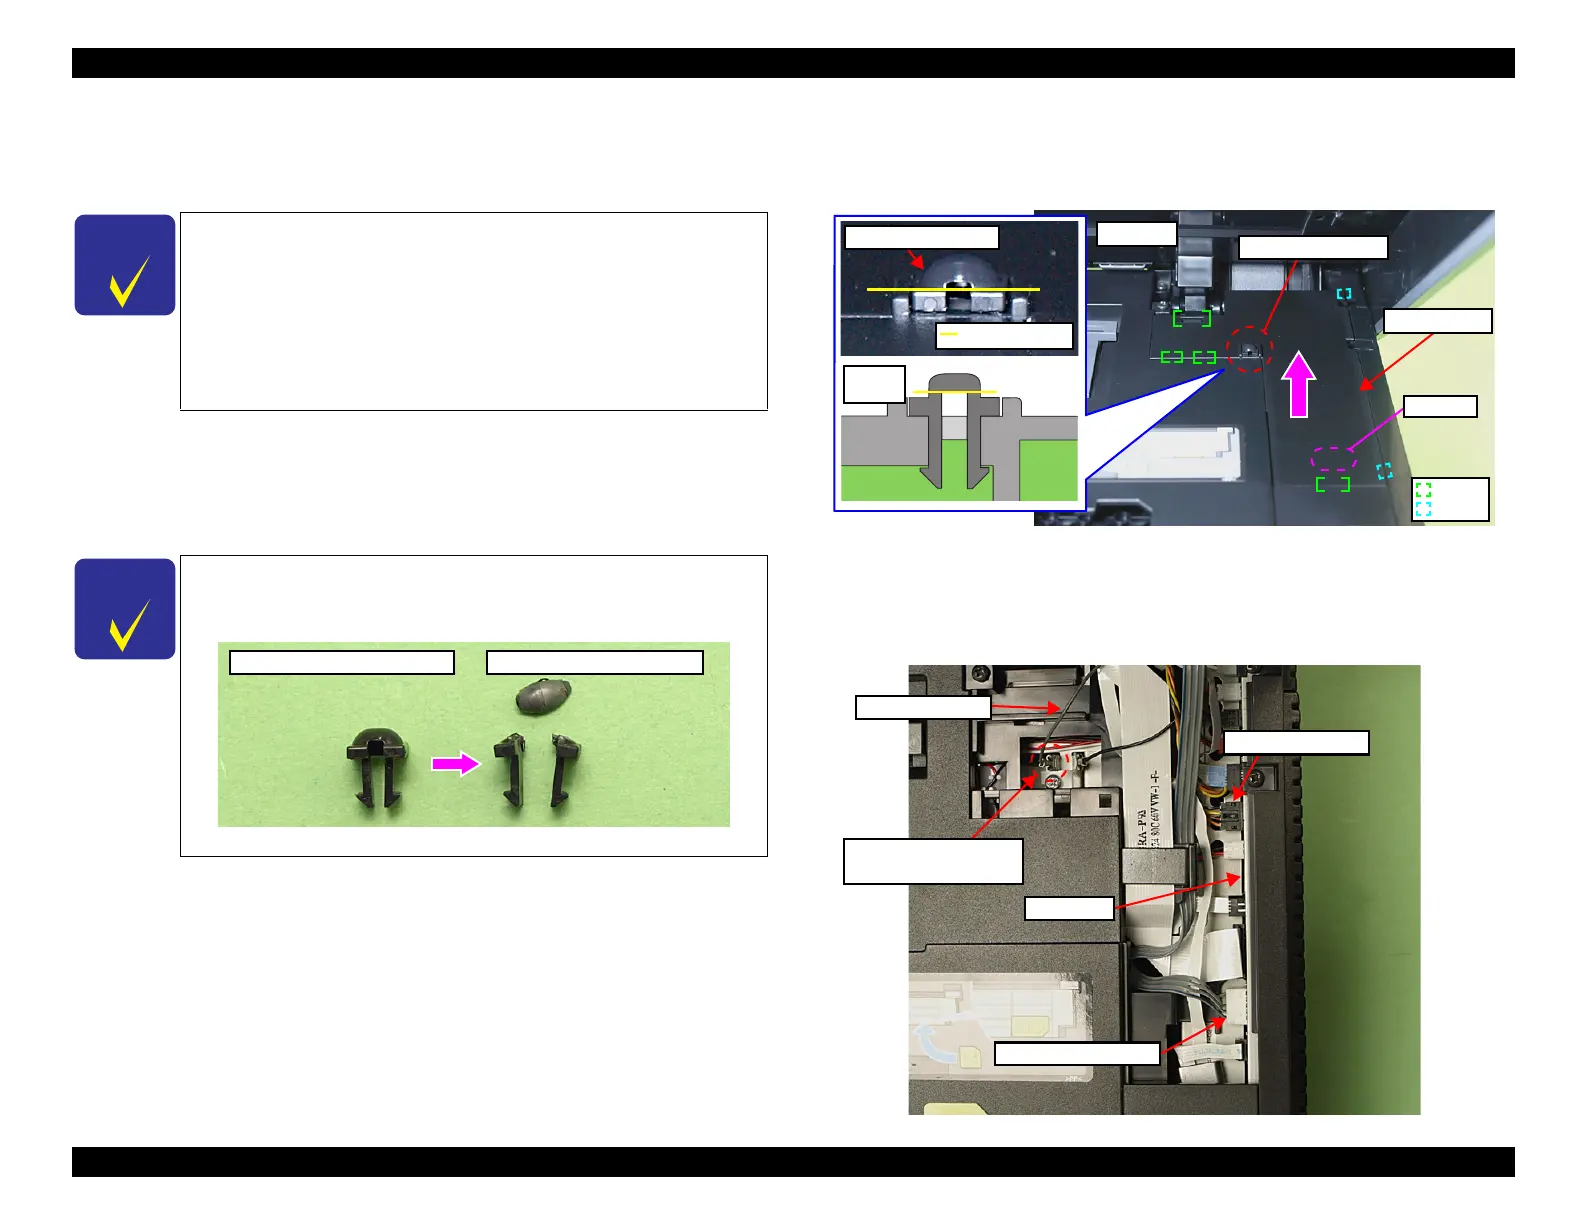
1. Open the Scanner Unit.
2. Cut the harness cover clamp with a nipper as shown in Fig. 4-4 and remove
the harness cover clamp.
3. Slide the Cable Cover to the rear of the printer by pushing the point A of the
Cable Cover to release the hooks (x4) and ribs (x2), and remove the Cable
Cover.
Figure 4-4. Removing the Cable Cover
4. Disconnect the ADF Motor Cable and ADF Sensor Cable from the connectors
on the Main Board. (See
Fig. 4-5.)
5. Pull out the terminal of the grounding wire from the fixing rib of the frame.
Figure 4-5. Removing the ADF Unit (1)
This section applies to Artisan 810/PX810FW/TX810FW only.
Because the hinges of the ADF unit for Artisan 835/837/
PX820FWD/TX820FWD/PX830FWD differ, see
"8.3.2.1 ADF
Unit" (p.264). In addition, some printers among Artisan 810/
PX810FW/TX810FW use the same hinges of the ADF Unit and
Scanner Upper Housing as for Artisan 835/837/PX820FWD/
TX820FWD/PX830FWD, so see
"8.3.2.1 ADF Unit" (p.264) in such
a case.
The harness cover clamp needs to be cut when removing, and
cannot be reused. When installing the Cable Cover, replace it with a
new one.
Figure 4-3. Damaged stopper
Harness cover clamp before cut
Harness cover clamp after cut
Harness cover clamp
Cable Cover
Right side
Point A
Harness cover clamp
Cutting position
Grounding wire
Terminal of grounding
wire and the fixing rib
Main Board
ADF Motor Cable
ADF Sensor Cable

 Loading...