Epson Artisan 810/835/837/710/725/730/Epson Stylus Photo PX810FW/TX810FW/PX820FWD/TX820FWD/PX830FWD/PX710W/TX710W/PX720WD/TX720WD/PX730WD/TX730WD
Revision G
Artisan 835/725/PX820FWD/TX820FWD/PX720WD/TX720WD
Disassembly/assembly 264
Confidential
8.3.2.1 ADF Unit
Parts/Components need to be removed in advance:
None
Removal procedure
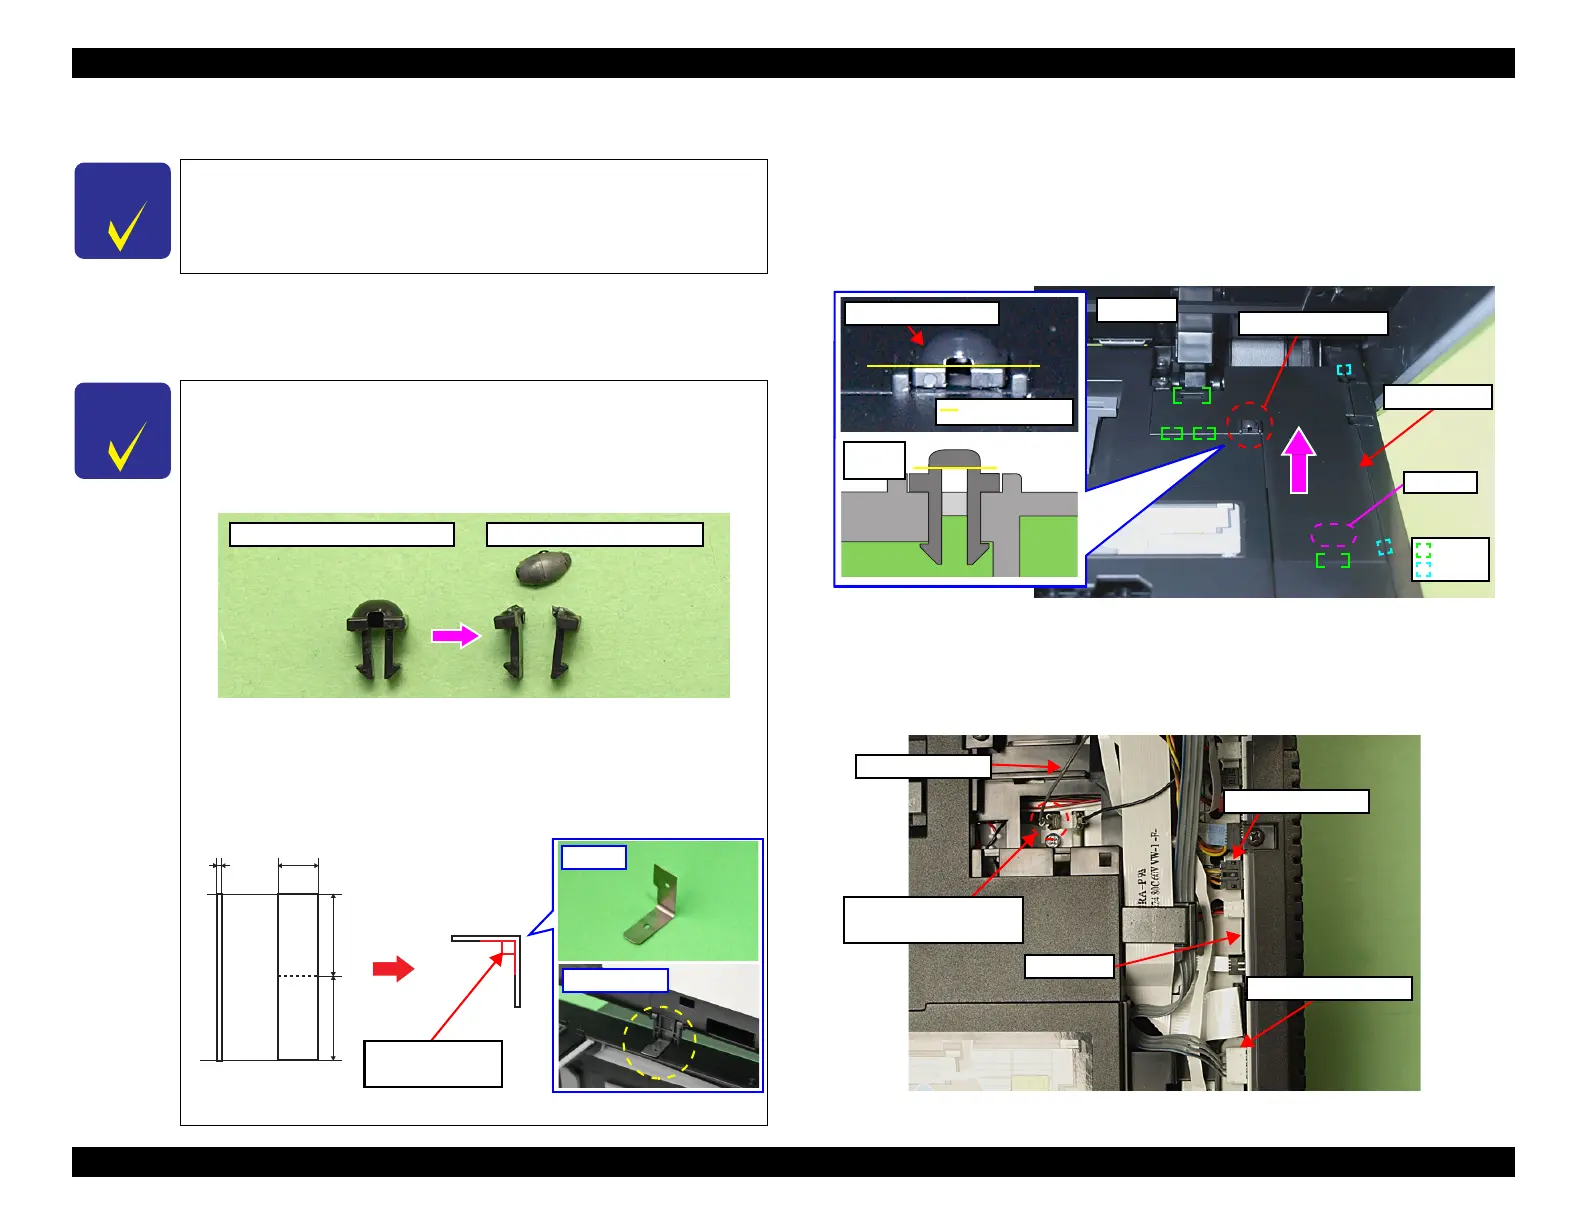
1. Open the Scanner Unit.
2. Cut the harness cover clamp with a nipper as shown in Fig. 8-3 and remove
the harness cover clamp.
3. Slide the Cable Cover to the rear of the printer by pushing the point A of the
Cable Cover to release the hooks (x4) and ribs (x2), and remove the Cable
Cover.
Figure 8-3. Removing the Cable Cover
4. Disconnect the ADF Motor Cable and ADF Sensor Cable from the connectors
on the Main Board. (See
Fig. 8-4.)
5. Pull out the terminal of the grounding wire from the fixing rib of the frame.
Figure 8-4. Removing the ADF Unit (1)
This section describes the disassembly/reassembly procedures of the
ADF Unit for Artisan 835/837/PX820FWD/TX820FWD/
PX830FWD.
Artisan 837/PX830FWD does not have the harness cover clamp,
therefore, skip
Step 2 in the following procedure.
The harness cover clamp needs to be cut when removing, and
cannot be reused. When installing the Cable Cover, replace it
with a new one.
Figure 8-1. Damaged stopper
A hook releaser is required to release the hook engaging with
the hinges of the ADF Unit. Prepare two pieces of metal plate in
the following size, and make the hook releasers (x2) before
taking the following procedure.
Figure 8-2. Hook Releaser for the Hinge of the ADF Unit
Harness cover clamp before cut
Harness cover clamp after cut
0.3 mm 20 mm
25 mm
25 mm
Fold it on dotted
line at right angle
Harness cover clamp
Cable Cover
Right side
Point A
Harness cover clamp
Cutting position
Grounding wire
Terminal of grounding
wire and the fixing rib
Main Board
ADF Motor Cable
ADF Sensor Cable

 Loading...