Using Multi-Screen Display
24
Adjusting the Virtual Display
After starting EasyMP Network Projection, the procedure for setting up
the virtual displays differs for Windows and Mac OS. The procedures are
explained separately below.
q
Check the following points before starting EasyMP Network Projection
when connecting via Wireless LAN. If the following points are not set
correctly, Multi-screen display cannot be used.
• The SSID for the computer and each projector must be the same.
• The wireless LAN system for the computer and each projector must be the
same.
You can modify the SSID and Wireless LAN system for the projector from
the Network menu in the projector's Configuration menu. See your
projector User’s Guide for details.
Procedure
For Windows
A Select "Start" - "Programs" (or "All Programs") - "EPSON
Projector" - "EasyMP Network Projection" - "EasyMP
Network Projection V2.XX" to start EasyMP Network
Projection.
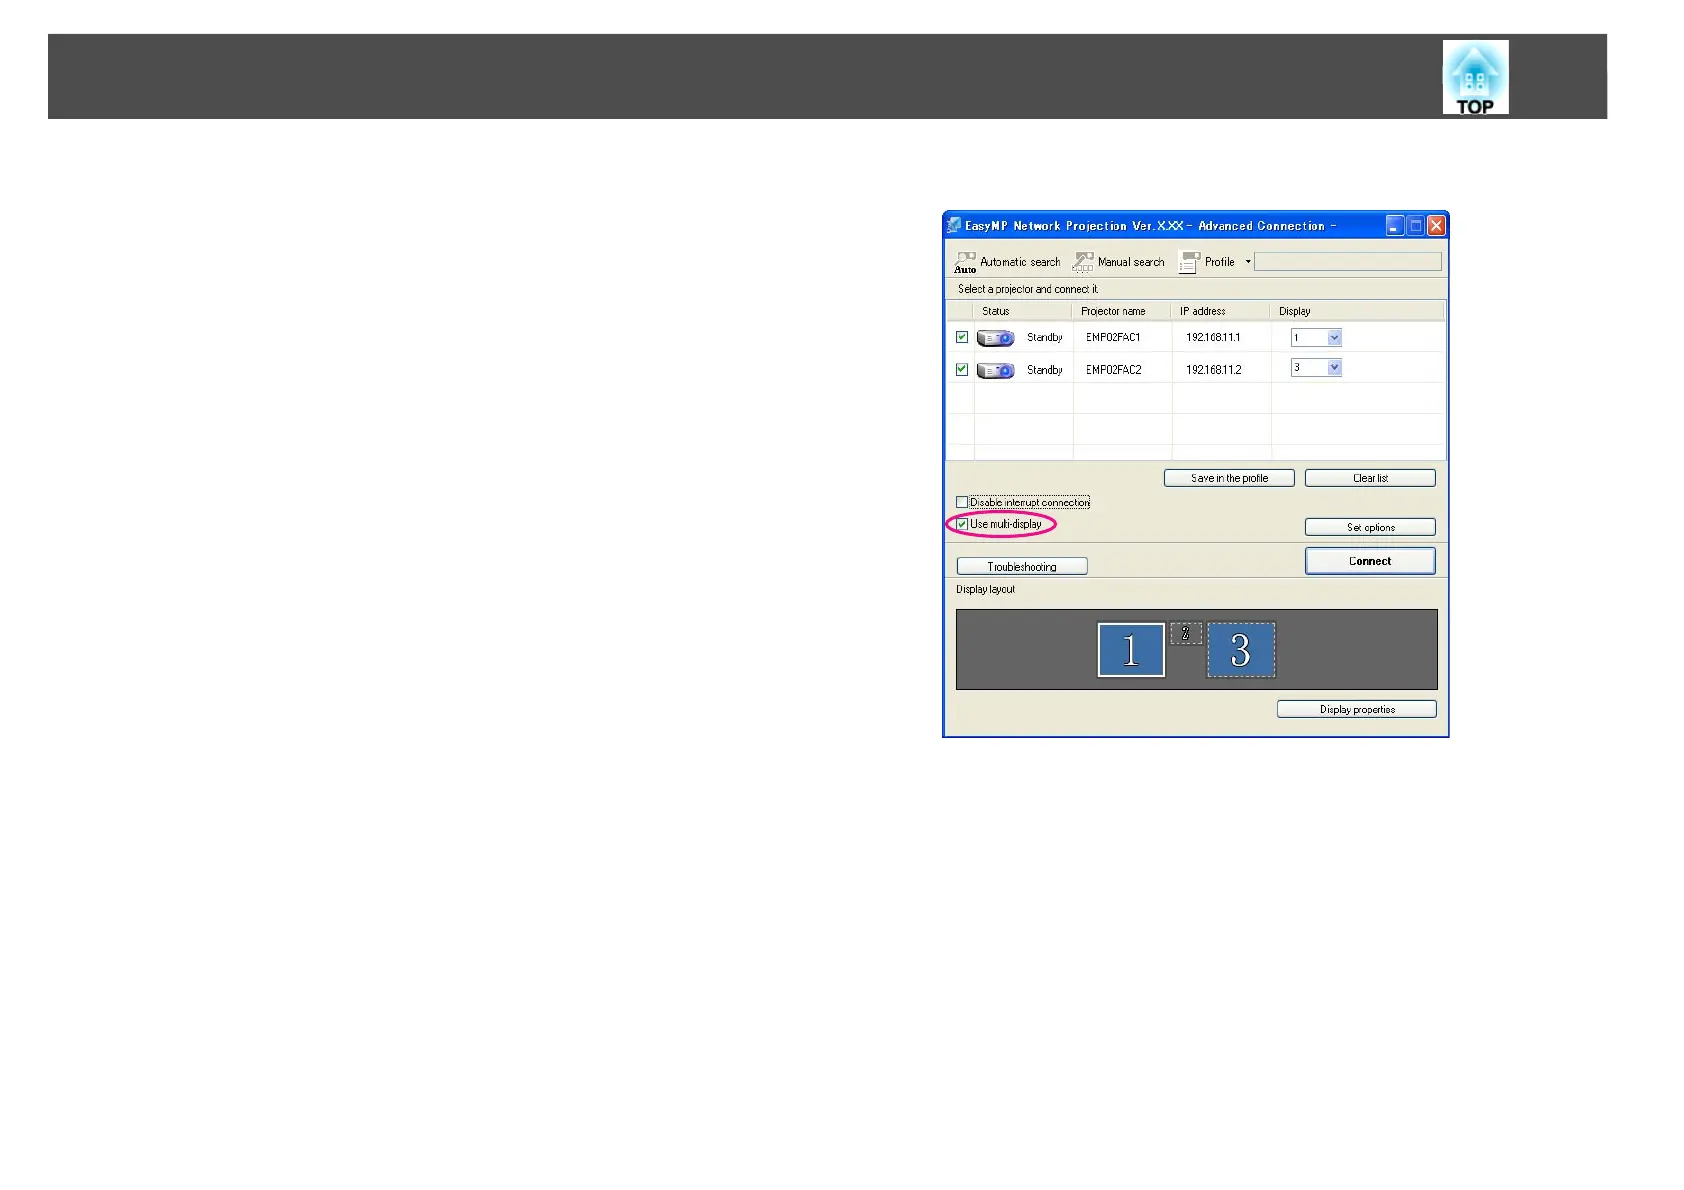
B Select the "Use multi-display" checkbox.
Display layout and Display properties are added at the bottom of
the screen.

 Loading...