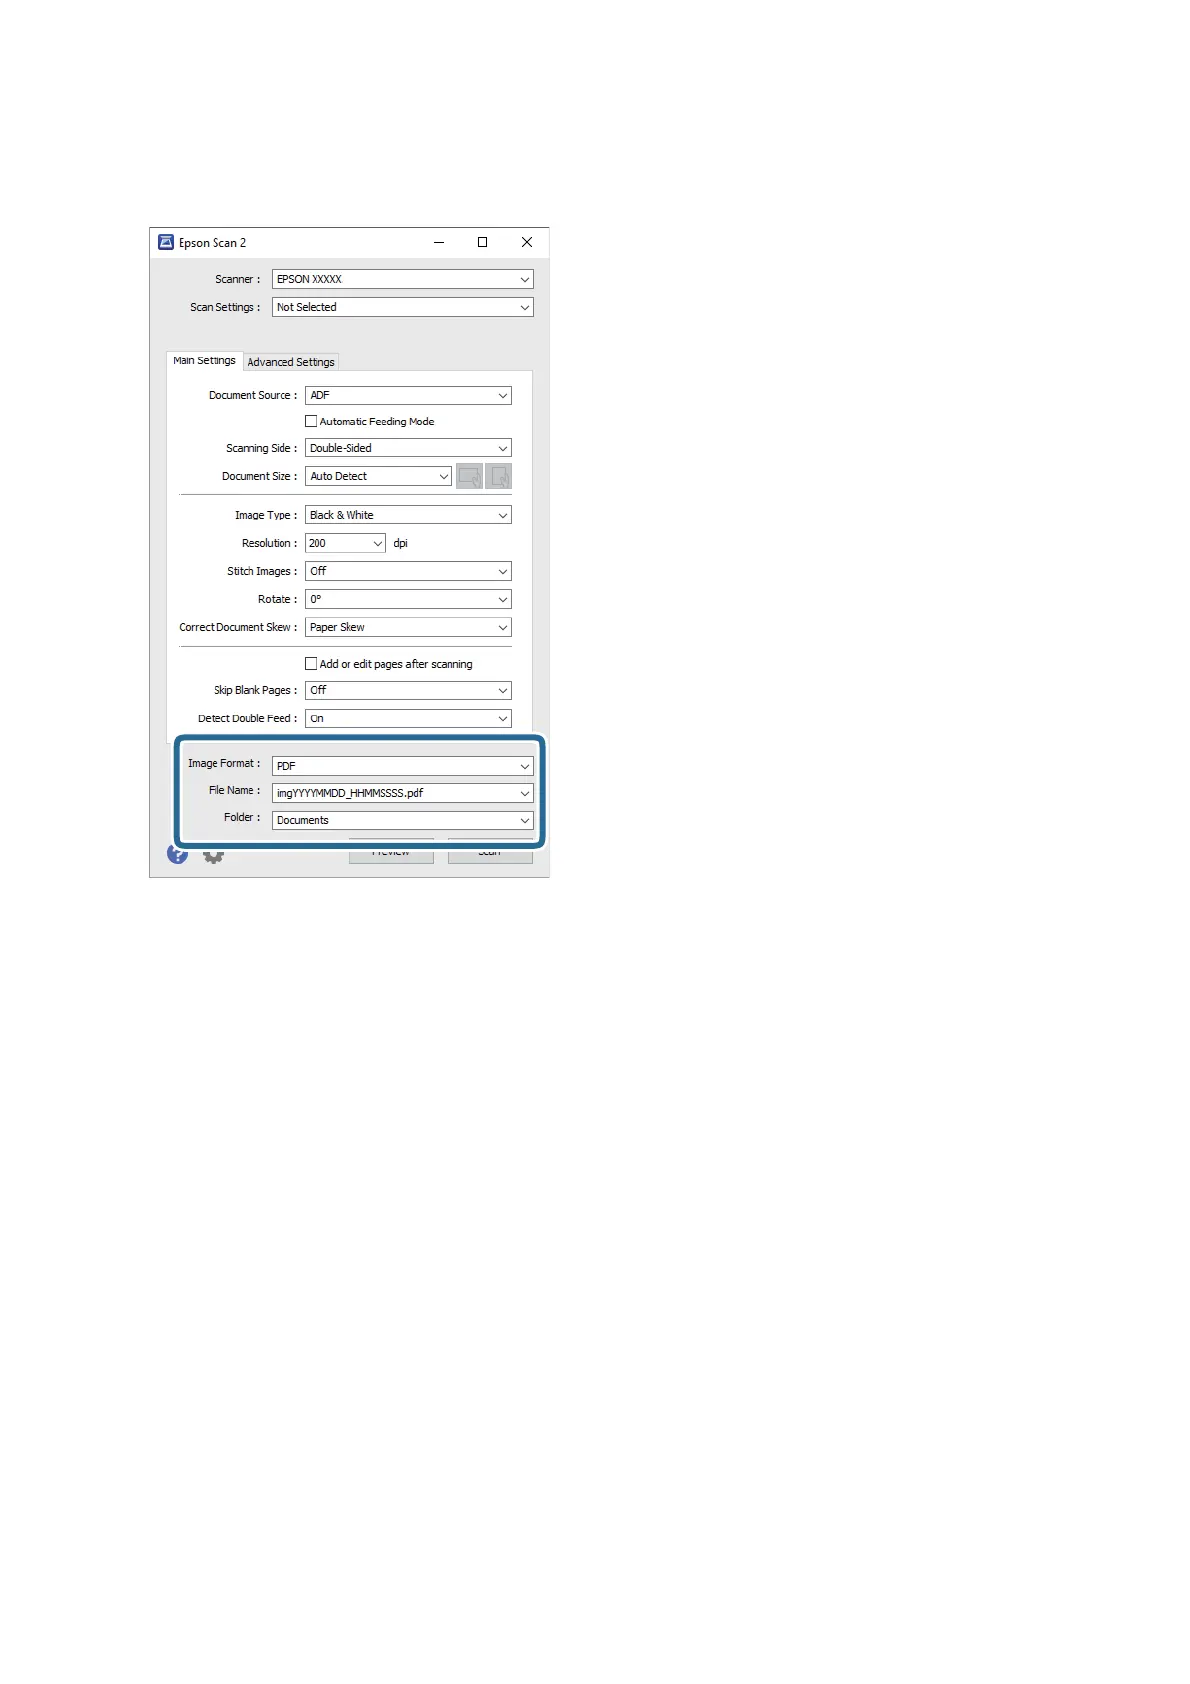
5. Set the le saving settings.
❏ Image Format: Select the save format from the list.
You can make detailed settings for each save format except BITMAP and PNG. Aer selecting the save
format, select Options from the list.
❏ File Name: Check the save le name displayed.
You c a n ch an g e s e tt i n g s f o r
le
name by selecting Settings from the list.
❏ Folder: Select the save folder for the scanned image from the list.
You can select other folder or create a new folder by selecting Select from the list.
6. Click Scan.
Note:
❏ You can also start scanning by pressing
]
button on the scanner.
❏ To scan originals that are likely to jam, for example thin paper, enable Slow on the control panel to slow down the
scanning speed.
Press the
d
button, and then select Scanner Settings > Slow.
e
scanned image is saved to the folder you
specied.
Related Information
& “Placing Originals” on page 26
& “Epson Scan 2” on page 17
User's Guide
Basic Scanning
70
 Loading...