EasyManua.ls Logo

Epson PictureMate Snap PM 240 User Manual

Epson PictureMate Snap PM 240
6 pages
To Next Page IconTo Next Page
Page #1 background imageLoading...
Page #1 background image
2 Plug
1 Connect the power
PictureMate.
2 Connect the power
cable to the power
adapter.
3 Plug the other end
of the power cable
into a power outlet.
4 Flip the handle to
5 Open the paper
6 Press the On
After a moment, you
this on the photo
viewer screen:
Now you can install your
3 Install
Photo
1 Open the cartridge
*410693400*
*410693400*
Start Here
Follow these steps to set up your PictureMate
®
Snap
or Flash and printno computer required!
Note: PictureMate Snap is shown throughout, but the steps are the
same for PictureMate Flash. To print from your computer, see the
Basics book and your CD after completing these steps.
1 Unpack
PictureMate comes with all these items in the box.
1 Remove all the tape and packing material from the
outside of PictureMate.
2 Open the cartridge door
on the back of
PictureMate.
3 Remove the packing
material from inside the
cartridge slot.
4 Close the cartridge door.
PictureMate
Initial PictureMate
photo cartridge
PictureMate
photo paper
Basics book Printer Software CD
Power adapter Power cable
®
PictureMate Snap
(PM 240)
PictureMate Flash
(PM 280)
Question and Answer IconNeed help?

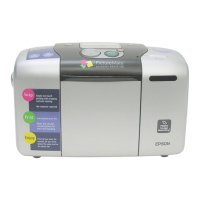
Do you have a question about the Epson PictureMate Snap PM 240 and is the answer not in the manual?

Epson PictureMate Snap PM 240 Specifications

General IconGeneral
Printer TypePhoto Printer
Print TechnologyInkjet
Max Print Resolution5760 x 1440 dpi
Print Size4 x 6 inches
Ink ColorsCyan, Magenta, Yellow, Black
Paper Sizes Supported4 x 6 inches
Ink TypeDye-based
ConnectivityUSB, PictBridge
Memory Card SupportSD, SDHC, Memory Stick

Summary

Unpack PictureMate

Remove External Packing

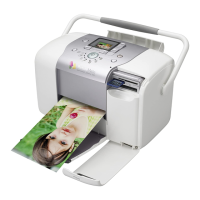
Remove all tape and packing material from the outside of the PictureMate.

Open Cartridge Door

Open the cartridge door located on the back of the PictureMate.

Plug In and Turn On PictureMate

Connect to Power Outlet

Plug the power cable into a wall power outlet.

Power On PictureMate

Press the power button to turn on the PictureMate.

Install Initial Photo Cartridge

Insert Cartridge

Slide the cartridge into the slot, label side up, until it clicks.

Initial Charge Process

PictureMate charges the print head for 3-4 minutes.

Confirm Charging Complete

Press OK when the 'Charging complete' message appears.

Load Paper into PictureMate

Fan and Load Paper

Fan up to 20 sheets and load with glossy side up.

Insert Memory Card

Insert Memory Card into Slot

Insert your memory card into the correct slot on the PictureMate.

Print Your Photos

View and Select Photos

Use navigation buttons to view and select photos for printing.

Select All Photos and Print

Start Printing Photos

Press the 'Print' button to begin printing your photos.
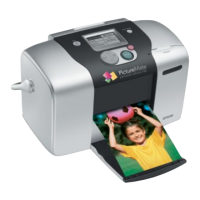
Related product manuals