Overview
This section explains the basic workflow from preparing a T-shirt before printing to post-treatment after printing.
The following shows the procedure for sending a job from the Garment Creator supplied to the printer and then
printing on a T-shirt. The printer also allows you to print by connecting a USB memory containing a saved job.
U User's Guide (Online Manual)
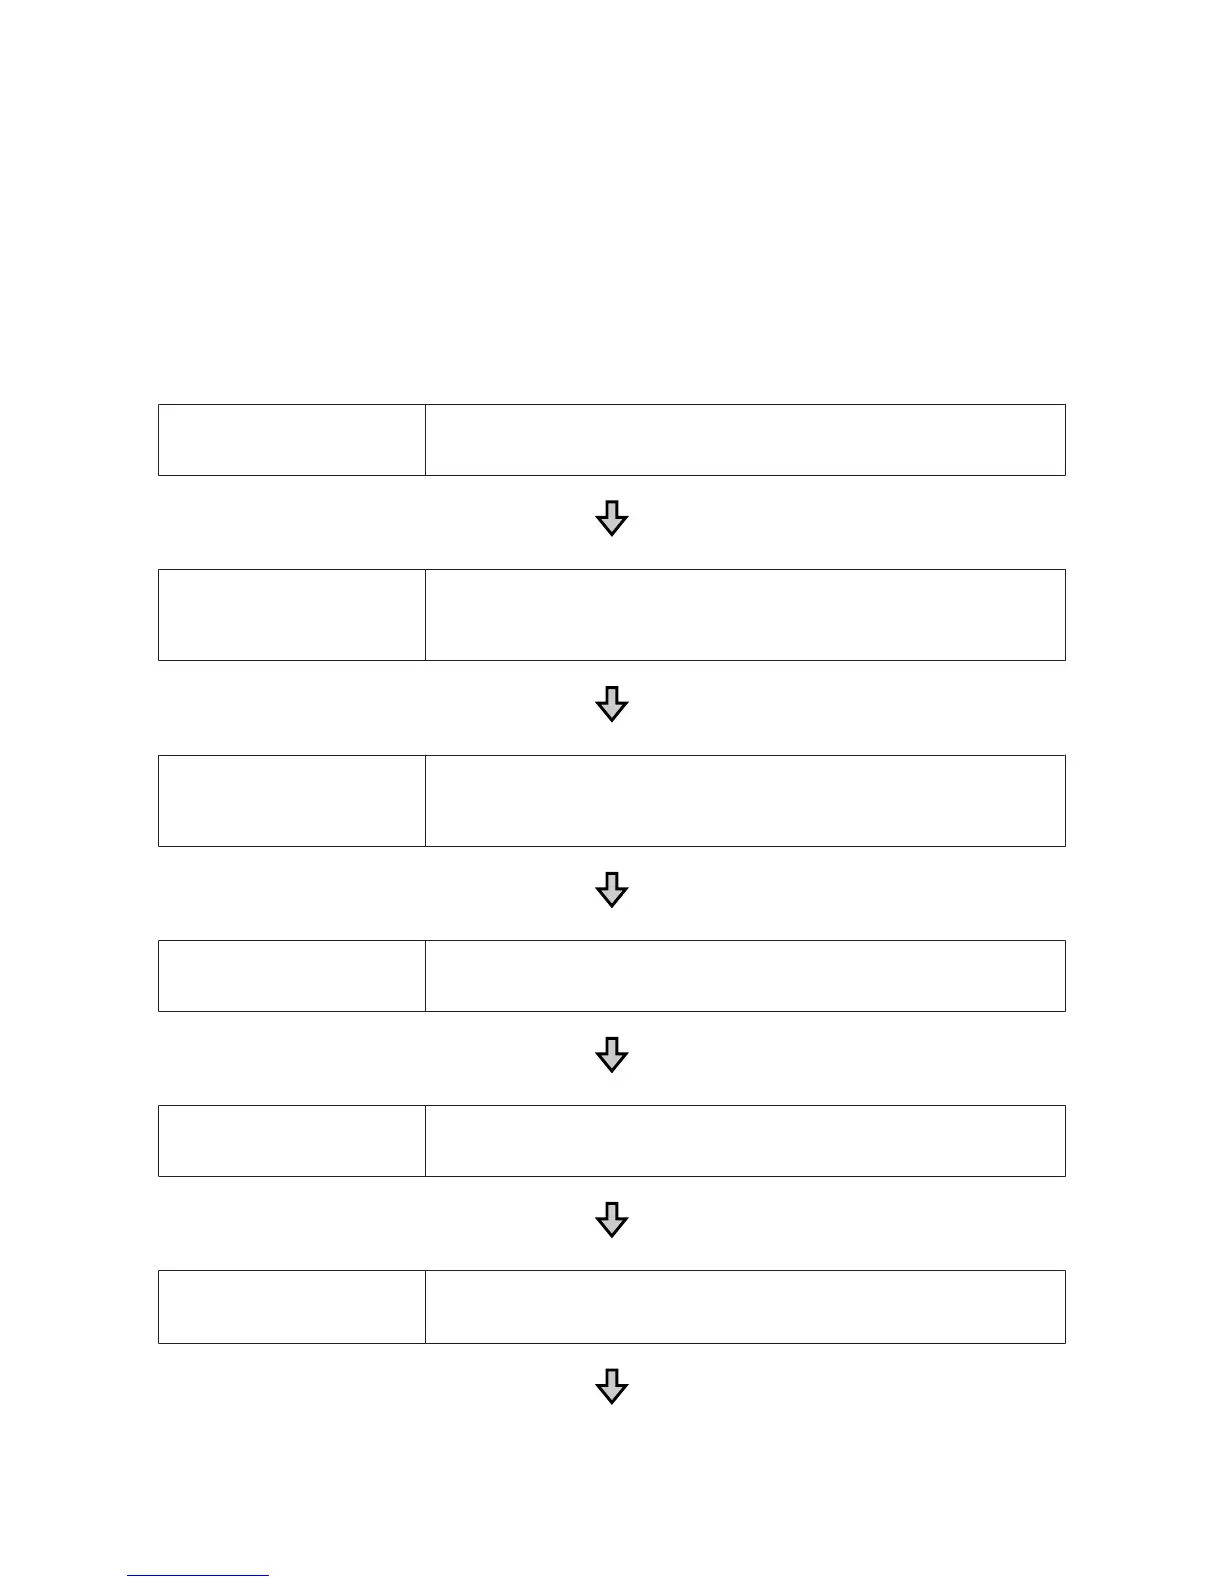
Before Printing Perform these steps before you start printing operations to maintain print quality.
U “Before Printing” on page 13
Pre-treatment (only for White ink) When printing with White ink, you need to apply pre-treatment liquid to the T-shirt.
Applying pre-treatment liquid allows the White ink to develop creating a more vivid color.
U User's Guide (Online Manual)
Creating and Sending Jobs Create jobs by laying out images in the supplied Garment Creator, and then send them to
the printer.
U “Creating and Sending Jobs” on page 13
Preparing the Platen Attach the platen for printing to the printer.
U “Preparing the Platen” on page 14
Loading the T-shirt (media) Load the T-shirt on the printer.
U “Load the T-shirt (media)” on page 20
Printing
Check that the x light is on before you start printing.
U “Starting and Canceling Printing” on page 25
SC-F2100 Series Operator's Guide
Basic Printing
11

 Loading...


