B
Check that the platen is installed, and install the
spacers in the following status.
L, M, S, and XS size platens
Attach spacers a and b.
U “Replacing Platens and Removing/
Attaching Spacers” on page 17
C
Remove the frame if you are using a platen frame.
D
Load the media on the platen.
When L, M, S, and XS size platens are installed
Place in the center of the platen.
Make sure you place the media in the position
shown above. If it is placed in a different position,
the platen may be soiled with ink.
E
Secure the media with cellophane tape and so on
to keep it in place.
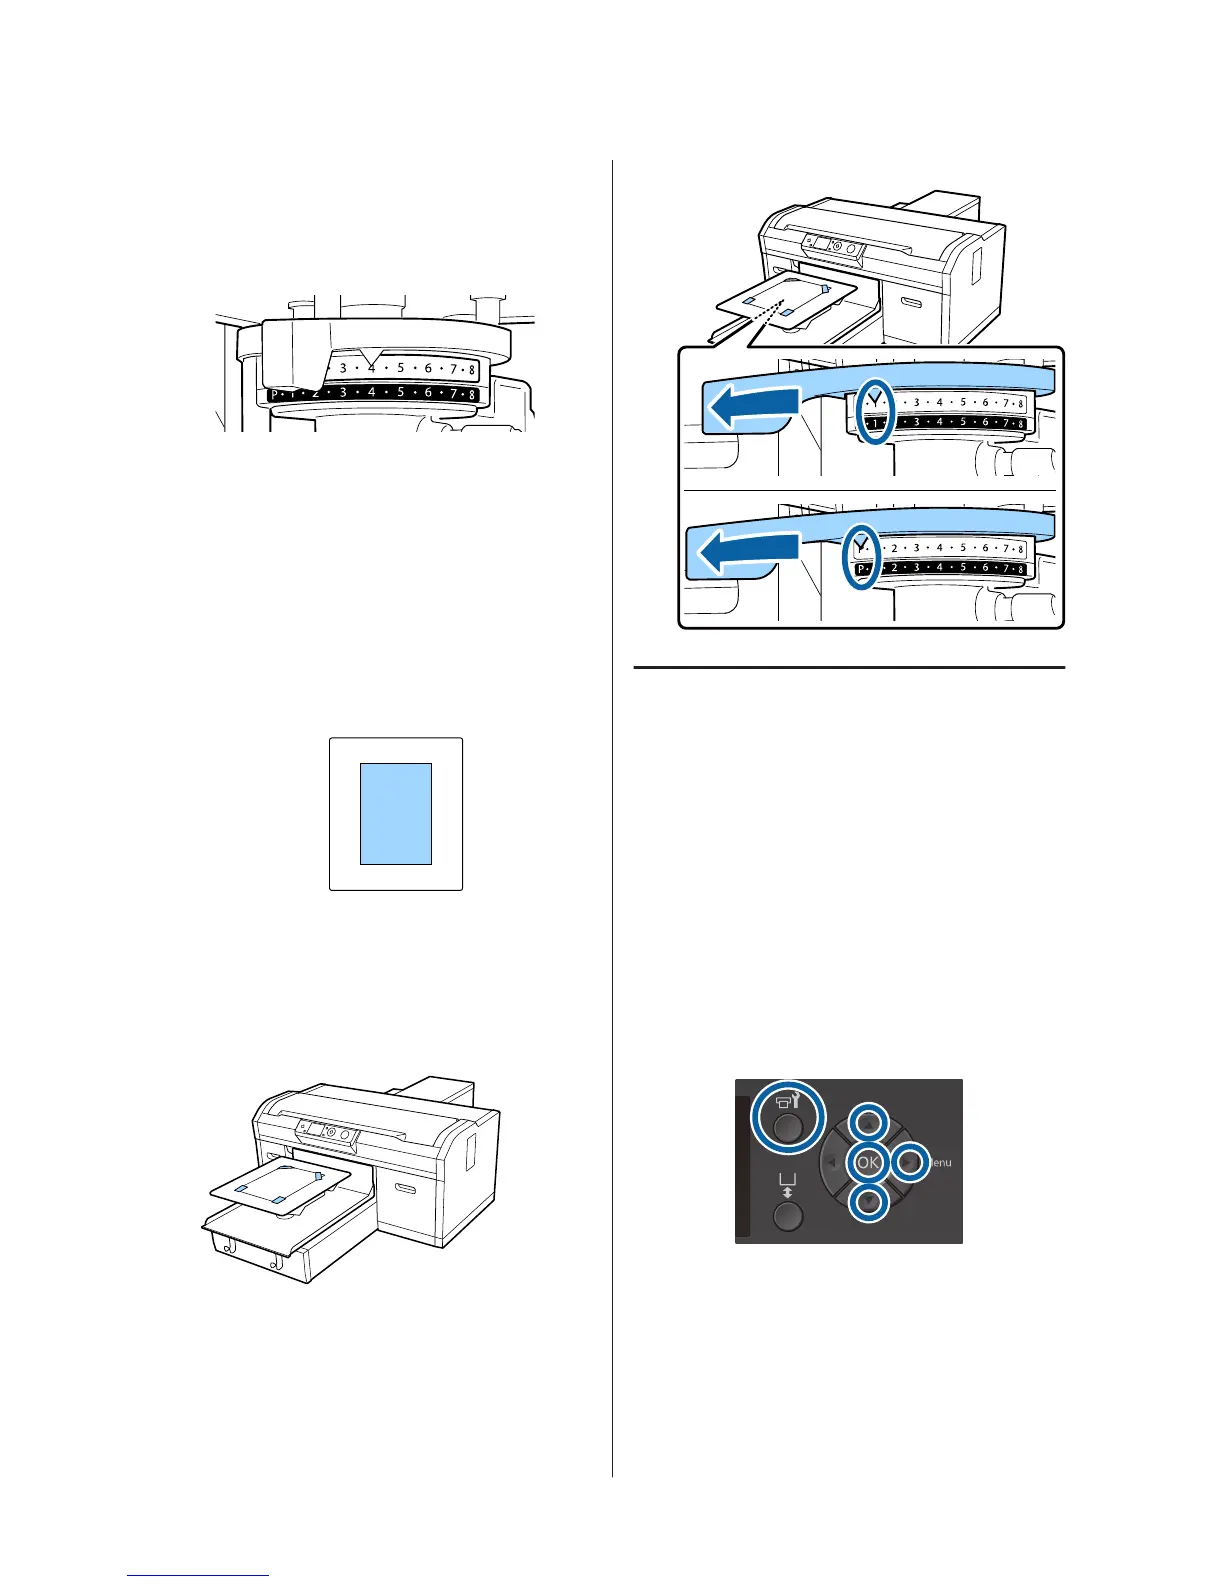
F
Set the platen gap adjustment lever to the
following position on the scale.
❏ When a grip pad covered platen is installed: 1
❏ When a platen without fabric is installed: P
Printing a Nozzle Check Pattern
This section explains how to print a nozzle check
pattern from the printer.
When the L, M, S, or XS size platens are installed, or the
medium grooved platen is installed, you can print a
nozzle check pattern from the printer or from the
Garment Creator software supplied.
For the procedure for printing the nozzle check pattern
from Garment Creator, see the Garment Creator's
online help.
Buttons that are used in the following operations
A
Press the - button.
The Maintenance menu is displayed.
B
Press the u/d buttons to highlight Nozzle
Check, and then press the r button.
SC-F2100 Series Operator's Guide
Maintenance
39

 Loading...


