❏ Flushing pad (x1)
Always choose a replacement head cleaning set that is
specified for this printer.
U “Options and Consumable Products” on
page 50
Before starting this procedure, be sure to read the
following:
U “Cautions when operating” on page 31
How to Replace the Head
Cleaning Set
A
Press the Z button in the Head Cleaning Set
Life screen.
The platen and print head move to the
maintenance position.
Note:
After 10 minutes from the start of replacing the
head cleaning set, a screen will be displayed and a
buzzer sounds informing you that 10 minutes have
elapsed. Press the Z button to continue the
replacement process. After 10 more minutes have
passed, the buzzer sounds again.
If the print head is moved out of its home position
for more than 10 minutes, the nozzles could easily
be clogged. Finish replacement as quickly as
possible.
B
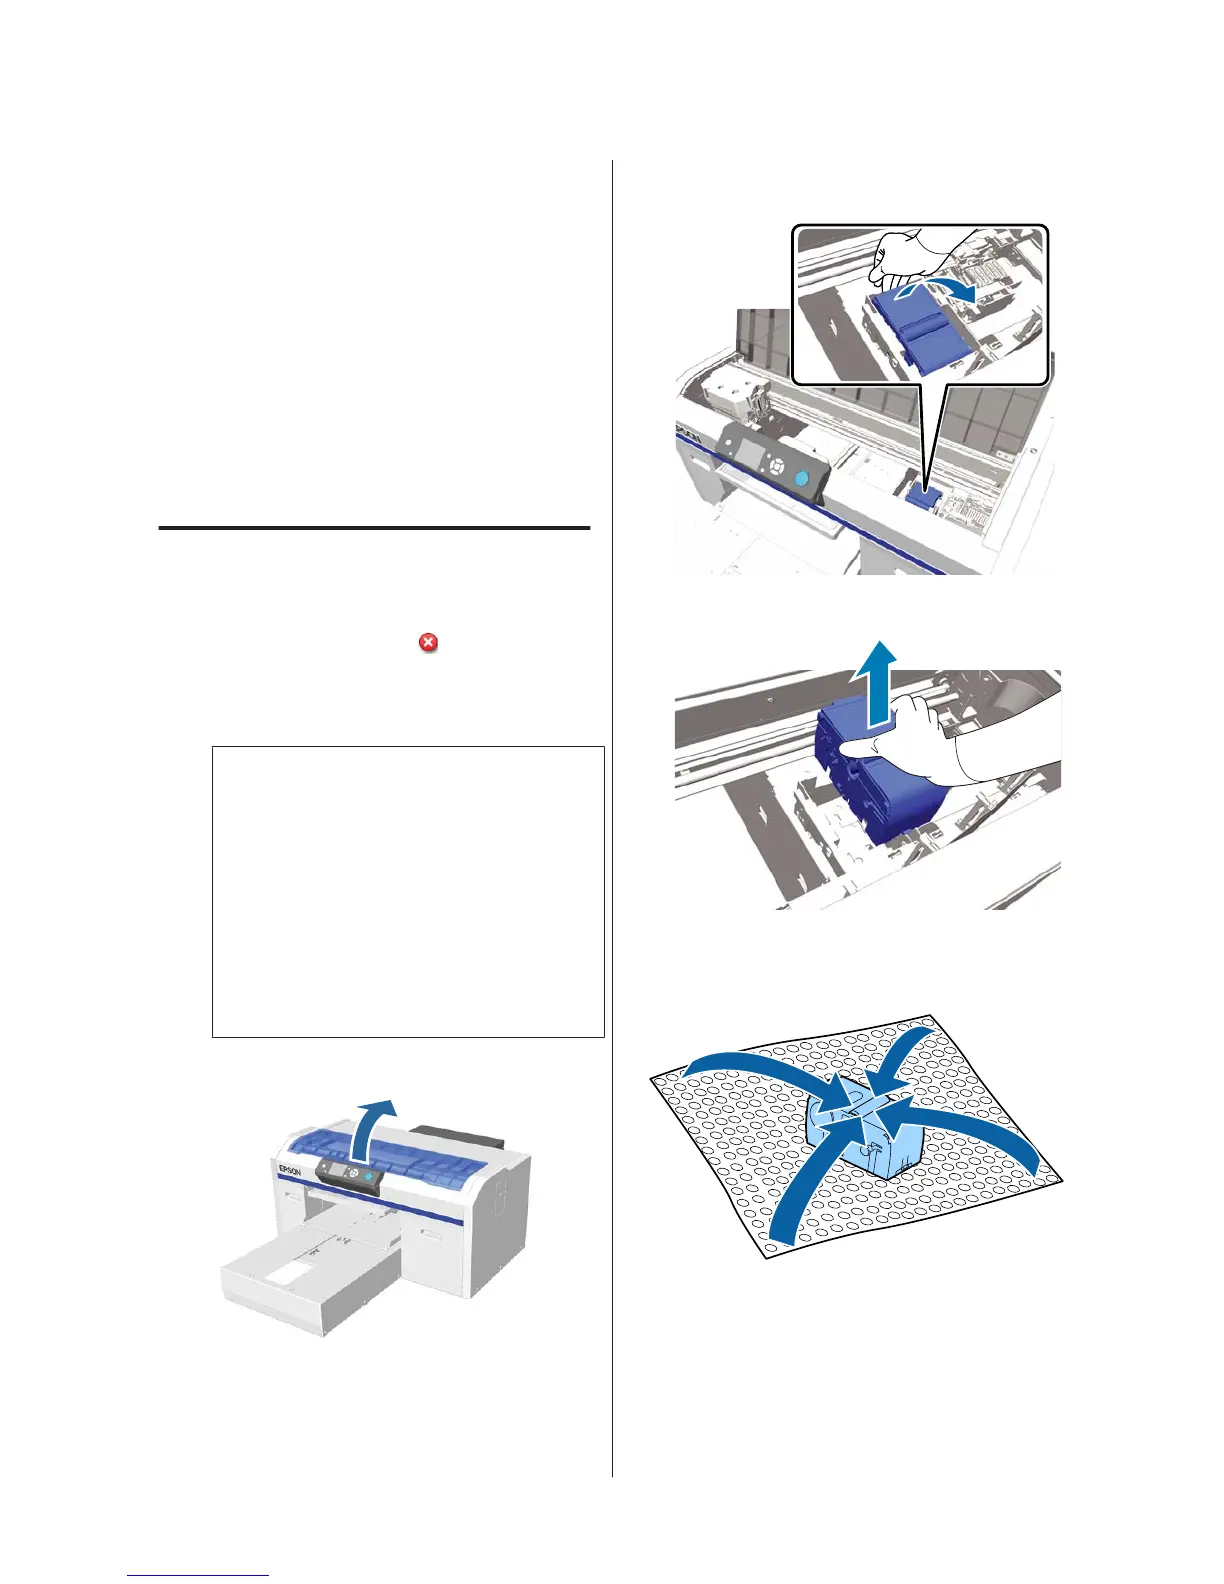
Open the printer cover.
C
Place your fingers in the groove on the back of the
wiper unit, and tilt it forward a little.
D
Grip the sides, and pull it straight up to lift it out.
E
To avoid soiling your surroundings with ink,
wrap the used wiper unit in the packaging
supplied with the new wiper unit.
SC-F2100 Series Operator's Guide
Maintenance
47

 Loading...


