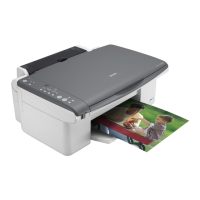
Epson Stylus CX7400 Series
6 7/07
5. Press the
Copies button to select from 1 to 9 copies.
The number is displayed in the
Copies window.
To make 10 to 100 copies, press the
Copies button until
appears in the
Copies window. Then load only enough
paper for the copies you want to make. For example, for
12 copies, load 12 sheets of paper. (Be sure to change this
setting back to
1 when you’re finished.)
6. Press the x
Start B&W button (for black-and-white
photos) or the x
Start Color button (for color photos) to
start copying. The CX7400 Series automatically sizes your
photo to fit on the 4 × 6-inch photo paper you loaded.
If you need to cancel copying, press the y
Stop button.
Printing from a Memory Card
You can print photos right from your digital camera’s memory
card by inserting it into the CX7400 Series memory card slots.
See the sections below to print photos from an index sheet.
See the on-screen User’s Guide to perform the following
memory card functions:
❏ Printing photos using DPOF (Digital Print Order Format)
❏ Transferring files between the CX7400 Series and
acomputer
Compatible Memory Cards and Files
Make sure your memory card is one of the following types:
* Requires adapter
Make sure the files on the card are compatible with your
CX7400 Series.
Note:
Also consult your memory card and adapter documentation for any
special use instructions for your card or adapter.
If you will only be printing from your memory card, it is best if the
CX7400 Series is not connected to your computer (or your computer
should be turned off).
Insert Memory Card
Insert one card at a time in one of the CX7400 Series memory
card slots. Insert the type of card you have into the correct
slot, as shown below.
1. Turn on the CX7400 Series.
2. Insert your card into the correct slot as shown below:
The memory card access light flashes and stays lit.
Caution:
Do not remove a card or turn off the CX7400 Series when the
memory card access light is flashing or you may lose photos on
the card.
Print Photos From an Index Sheet
You can print an index sheet containing small versions of all
the photos on your memory card. Then you can select the
photos you want to print by marking them on the sheet and
scanning the sheet. The CX7400 Series automatically prints
them.
Printing an Index Sheet
1. Load several sheets of plain letter-size paper (see page 4).
2. Insert a memory card in a memory card slot (see above).
Slot Type of card
Right slot CompactFlash
Type I and II
Microdrive
Left slot SD
SDHC
miniSD*
miniSDHC*
microSD*
microSDHC*
MultiMediaCard
Memory Stick
Memory Stick Duo*
Memory Stick PRO
Memory Stick PRO Duo*
Memory Stick Micro*
MagicGate Memory Stick
MagicGate Memory Stick Duo*
xD-Picture Card
xD-Picture Card Type H
xD-Picture Card Type M
File format JPEG with the Exif version 2.21 standard
Image size 80 × 80 pixels to 9200 × 9200 pixels
Number of files Up to 999
Left slot
Right slot
Memory card
access light

 Loading...