Epson Stylus CX8400 Series
8 7/07
Inserting the Memory Card
Insert one card at a time in one of the CX8400 Series memory
card slots as shown below.
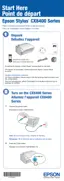
1. Turn on the CX8400 Series.
2. Insert your card into the correct slot (see page 7 for a list).
The memory card access light flashes and stays lit.
Caution:
Do not remove a card or turn off the CX8400 Series when the
memory card access light is flashing or you may lose photos on
the card.
Printing Photos
After inserting your memory card, press the Memory Card
button to view your photos on the LCD display screen. The
following sections contain instructions on how to print
individual photos or photos by the date they were taken.
See the on-screen User’s Guide to perform other memory card
functions including:
❏ Printing all photos on a memory card
❏ Viewing photos as a slide show and printing them
❏ Printing photos using DPOF (Digital Print Order Format)
❏ Using an index sheet to select photos for printing
❏ Transferring files between the CX8400 Series and a
computer
Select Individual Photos for Printing
You can select individual photos for printing as you view them
on the LCD display screen.
1. Press the
Memory Card button.
You see this screen:
2. Press
OK to select View and
Print Photos.
3. Press l or r to move through
your photos and display the one
that you want to print.
4. Press the
+ or – button to select
the number of copies you want
of that photo.
5. If you want to crop your photo
and enlarge the resulting image
area to fit onto your paper, press
the
Display/Crop button.
❏ To resize the image area,
press + or –.
❏ To move the image area, use
the arrow buttons.
❏ To check the zoomed image, press
OK.
❏ To rotate the image area, press the
Menu button.
After you finish cropping your photo, press
OK.
6. Repeat steps 3 through 5 to select and crop more photos, if
you want.
7. To change any of the memory card mode print settings
displayed on the screen, press
Menu.
Left slot
Right slot
Memory card
access light

 Loading...