12
Copying a Document or Photo
■ Select
Paper Type
and choose the type of paper you loaded.
■ Select
Paper Size
and choose the size of paper you loaded.
Note:
Availability of options depends on the Paper Type setting you choose.
■ To print without borders, select
Layout
and then select
Borderless
. Or
select
With Border
to print with white margins at the edges of your
photos.
■ To change the copy quality, select
Quality
and choose
Standard
,
Best
,
or
Draft
.
■ To adjust the darkness or lightness of the copy, select
Density
and choose
a higher (darker) or lower (lighter) setting.
■ To adjust the amount of image expansion when printing borderless
photos, select
Expansion
and choose
Standard
,
Min
, or
Mid
.
Note:
You may see white borders on your printed photo if you use the Min setting.
12. When you’re ready to copy, press x
Start
. To cancel copying, press y
Stop/
Clear Settings
.
Note:
Do not pull out paper as it is printing; it ejects automatically.
When you scan with your computer, you can use additional options to transform faded,
dusty, or badly exposed photos into ones with true-to-life color and sharpness. See the
on-screen User’s Guide for details.
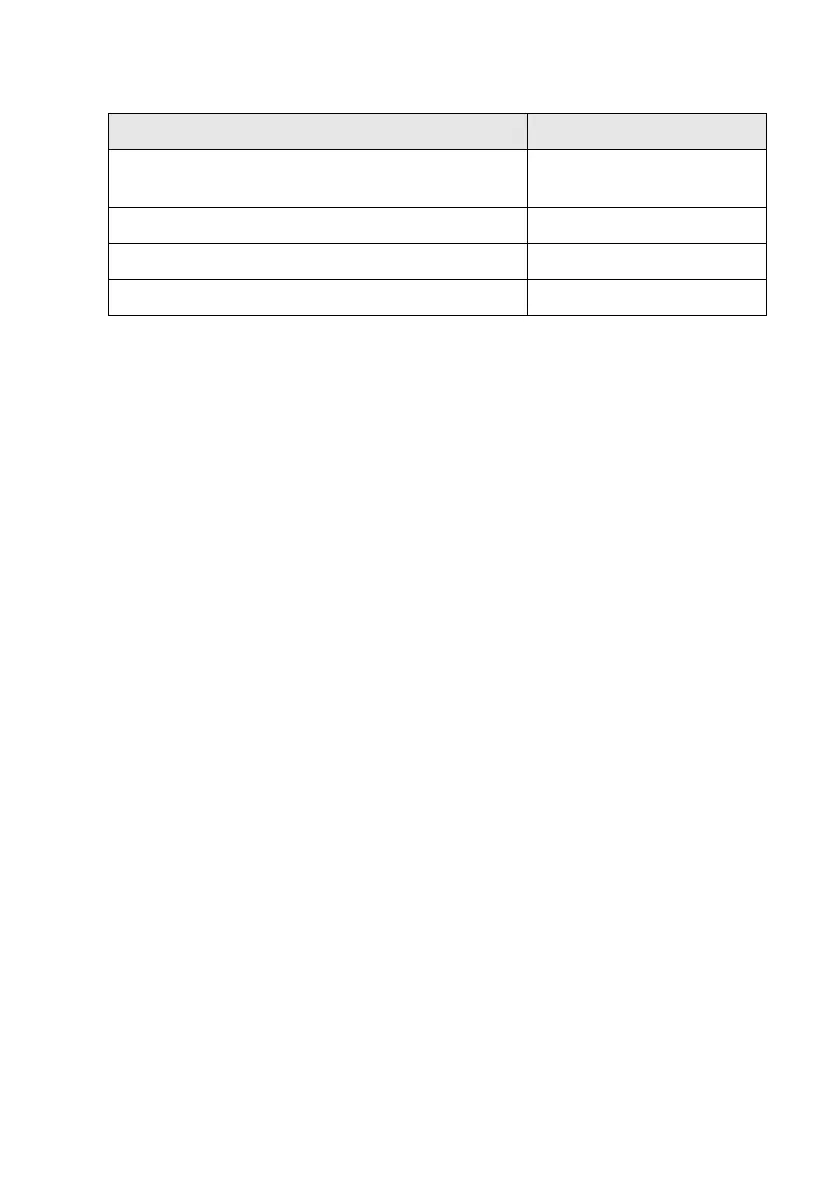
Paper Type Paper Type setting
Epson Premium Photo Paper Glossy
Epson Premium Photo Paper Semi-gloss
Prem. Glossy
Epson Ultra Premium Photo Paper Glossy Ultra Glossy
Epson Photo Paper Glossy Photo Paper
Epson Premium Presentation Paper Matte Matte
 Loading...