EasyManuals Logo

Epson Stylus Photo R2000 Series Basic Guide

Epson Stylus Photo R2000 Series
60 pages
To Next Page IconTo Next Page
To Previous Page IconTo Previous Page
Page #7 background imageLoading...
Page #7 background image
Loading Paper 7
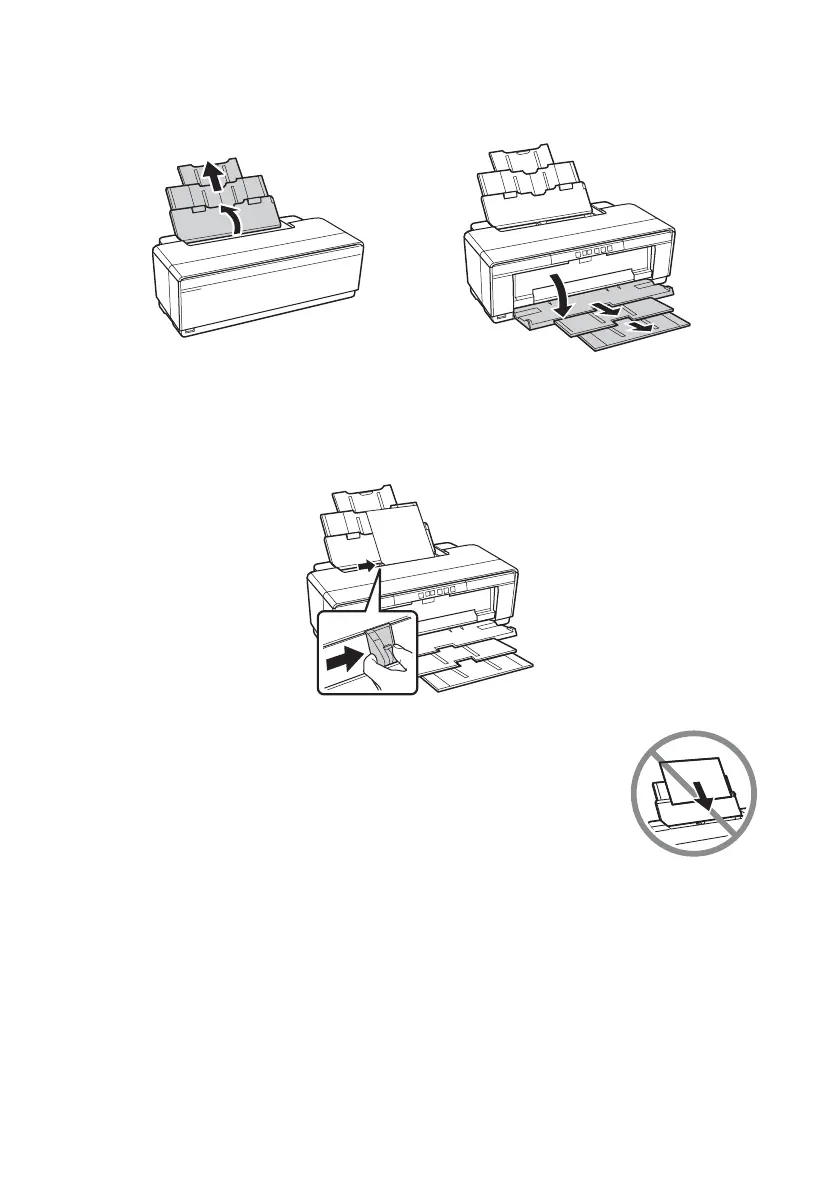
1. Open the paper support and pull up the extensions, then open the output tray
and pull out the extensions.
2. Insert paper, glossy or printable side up, short edge first, against the right side
and beneath the tab. Then press the button on the edge guide and slide it
against the paper (but not too tightly).
Always load paper short edge first, even for landscape printing.
Load letterhead or pre-printed paper top edge first.
Note:
The edge guide moves slightly during paper feeding and printing.
Do not adjust it while printing is in progress.

Other manuals for Epson Stylus Photo R2000 Series

Questions and Answers:

Question and Answer IconNeed help?

Do you have a question about the Epson Stylus Photo R2000 Series and is the answer not in the manual?

Epson Stylus Photo R2000 Series Specifications

General IconGeneral
Print TechnologyInkjet
Max Print Resolution5760 x 1440 optimized dpi
Number of Ink Colors8
Borderless PrintingYes
Operating SystemsWindows, Mac OS
Ink TypeUltraChrome Hi-Gloss 2
Ink ColorsCyan, Magenta, Yellow, Red, Orange, Matte Black, Photo Black, Gloss Optimizer
Ink Droplet Size1.5 picoliters
ConnectivityUSB, Ethernet, Wi-Fi
Media Sizes Supported4" x 6", 5" x 7", 8" x 10", 11" x 14", 13" x 19"
Media Types SupportedPlain paper, photo paper, fine art paper, canvas
InterfaceUSB, Ethernet

Related product manuals