EasyManuals Logo

Epson Stylus Photo R2000 Series Basic Guide

Epson Stylus Photo R2000 Series
60 pages
To Next Page IconTo Next Page
To Previous Page IconTo Previous Page
Page #8 background imageLoading...
Page #8 background image
8 Loading Paper
Loading Paper Using the Single Sheet
Guide
You can print professional quality photos on these paper types using the single
sheet guide and the rear manual feed slot:
Premium Photo Paper Glossy
Ultra Premium Photo Paper Luster
Epson Velvet Fine Art Paper
Epson Matte Scrapbook Photo Paper
(See page 15 for available sizes.)
1. Remove any paper from the sheet feeder and close
the paper support.
2. Open the output tray and pull out the extensions.
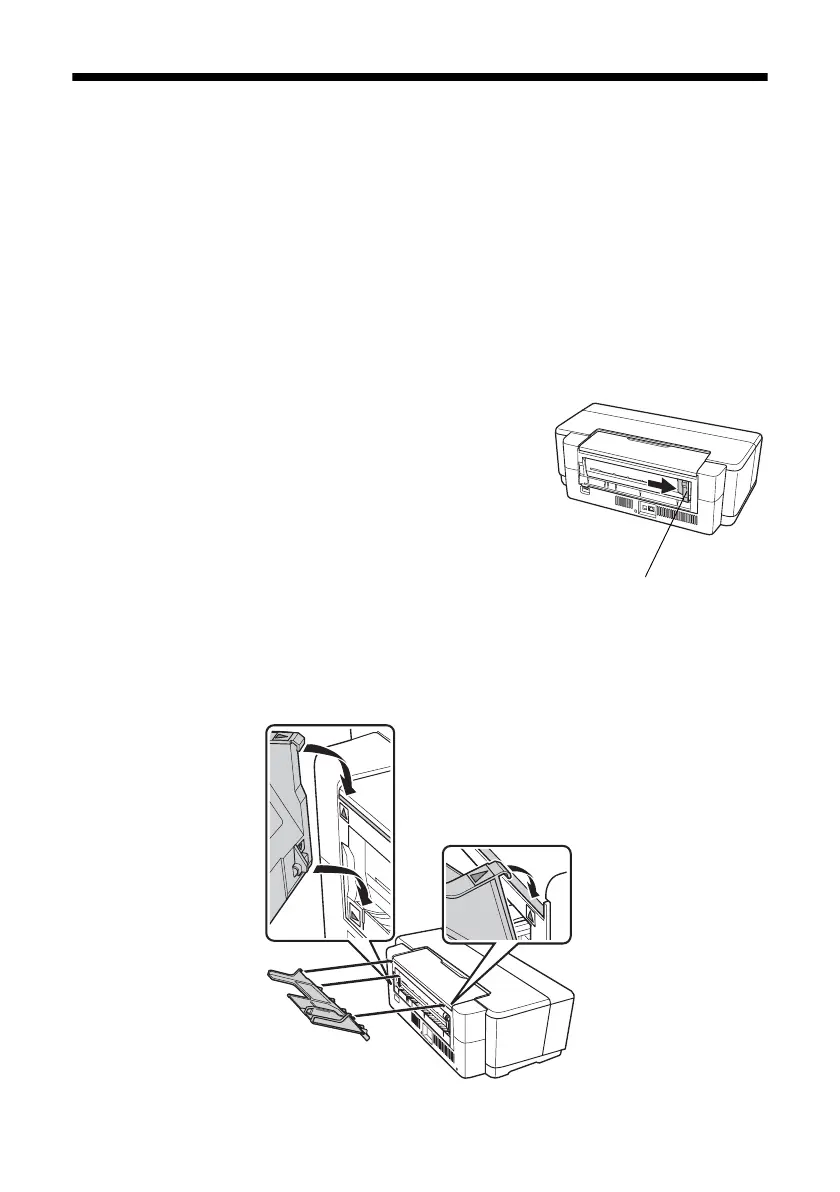
3. Slide the roll paper edge guide on the back of the
printer all the way to the right.
4. Attach the single sheet guide by aligning the
notches on its base with the slots on the back of
the printer. Then hook the tabs over the top of the slot (marked with orange
triangles).
Roll paper
edge guide

Other manuals for Epson Stylus Photo R2000 Series

Questions and Answers:

Question and Answer IconNeed help?

Do you have a question about the Epson Stylus Photo R2000 Series and is the answer not in the manual?

Epson Stylus Photo R2000 Series Specifications

General IconGeneral
Print TechnologyInkjet
Max Print Resolution5760 x 1440 optimized dpi
Number of Ink Colors8
Borderless PrintingYes
Operating SystemsWindows, Mac OS
Ink TypeUltraChrome Hi-Gloss 2
Ink ColorsCyan, Magenta, Yellow, Red, Orange, Matte Black, Photo Black, Gloss Optimizer
Ink Droplet Size1.5 picoliters
ConnectivityUSB, Ethernet, Wi-Fi
Media Sizes Supported4" x 6", 5" x 7", 8" x 10", 11" x 14", 13" x 19"
Media Types SupportedPlain paper, photo paper, fine art paper, canvas
InterfaceUSB, Ethernet

Related product manuals