10
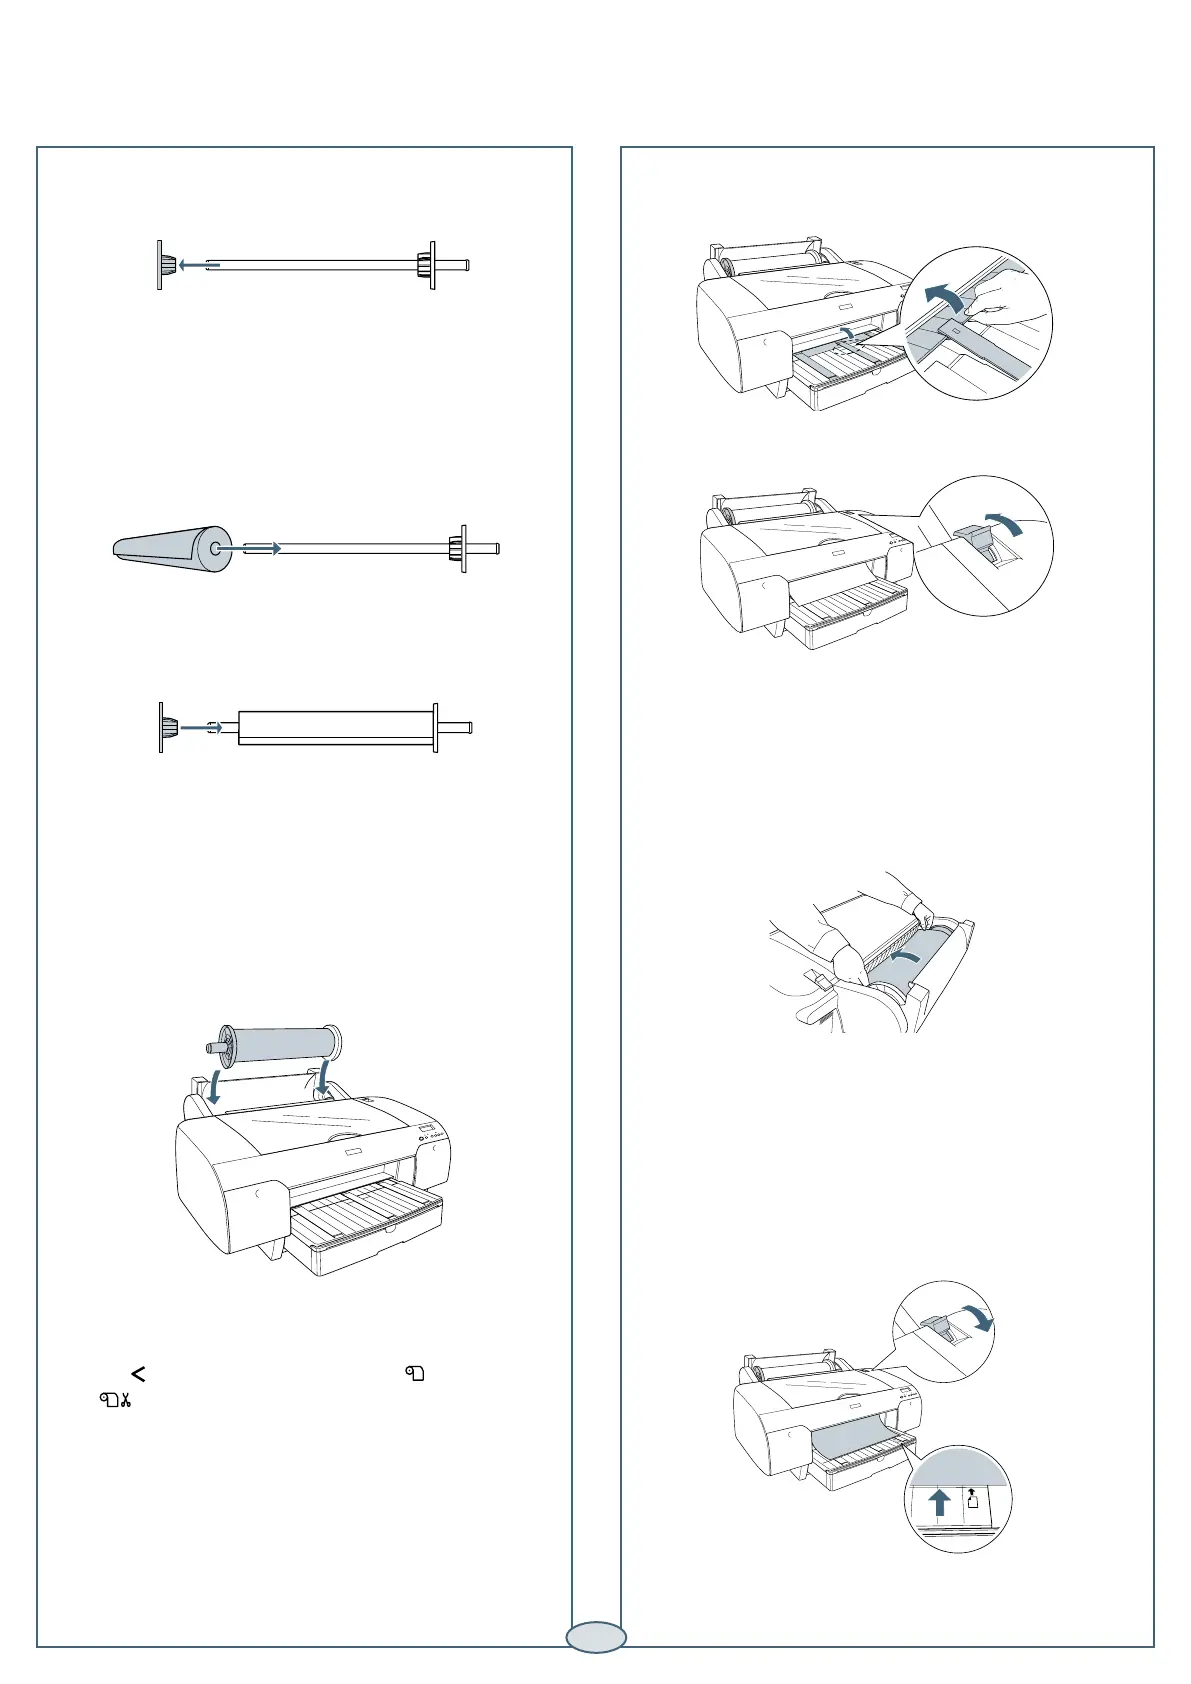
Feed the paper all the way through the printer until
it is aligned with the OTHERS mark on the paper
tray cover. Align the right edge of the paper with
the vertical mark on the right side of the tray cover.
Then return the paper lever to the secured position
and close the roll paper cover.
The printer automatically feeds the paper to the
printing position.
Caution: To prevent creasing the paper, remove it
from the paper path and roll it up when you’re not
printing.
Loading Roll Paper
Loading Roll Paper
1
Slide the black paper stop off the end of
the spindle.
Note: To use paper with a 2-inch core, remove the
gray adapters from the paper stops at each end.
See your Printer Guide for details.
2
Position the roll as shown, then slide it onto
the spindle.
3
Slide the black paper stop back onto the spindle and
insert it firmly into the end of the roll.
4
Open the roll paper cover.
5
Place the roll paper in the printer as shown. (The
black end of the spindle goes on the left.)
6
Make sure the printer is turned on, then press
the paper source button until the or
icon appears.
1
7
Raise the roll paper support on top of the paper
tray cover.
8
Release the paper lever.
9
Hold both sides of the paper and feed it into
the slot.

 Loading...


