EPSON TM-U325
2/02 EPSON TM-U325 - 3
1RWH %HVXUHWRLQVHUWSDSHULQFRUUHFWGLUHFWLRQ
3. Hold both edges of the paper, and insert it straight into
paper slot. The printer feeds the paper automatically.
4. Take up any slack in the paper, tear off the excess, and close
the cover.
Validation Paper
1RWH 8VHRQO\YDOLGDWLRQSDSHUWKDWPHHWVVSHFLILFDWLRQV
%HVXUHUROOSDSHULVORDGHGZKHQ\RXXVHYDOLGDWLRQSDSHU
9DOLGDWLRQSDSHUPXVWEHIODWZLWKRXWFXUOVIROGVRUZULQNOHV
1. Select validation paper using the control command.
2. When the
9$/,'$7,21
LED flashes, insert validation
paper into the inlet using the right edge of the paper as a
guide. See the illustration below.
3. Insert the validation paper into the inlet as far as it will go.
4. When the sensor detects the paper, the
9$/,'$7,21
light
changes from flashing to On. Paper is drawn into the
printer automatically, and printing begins.
5. After printing, the
9$/,'$7,21
light begins flashing
again. Remove the validation from the printer.
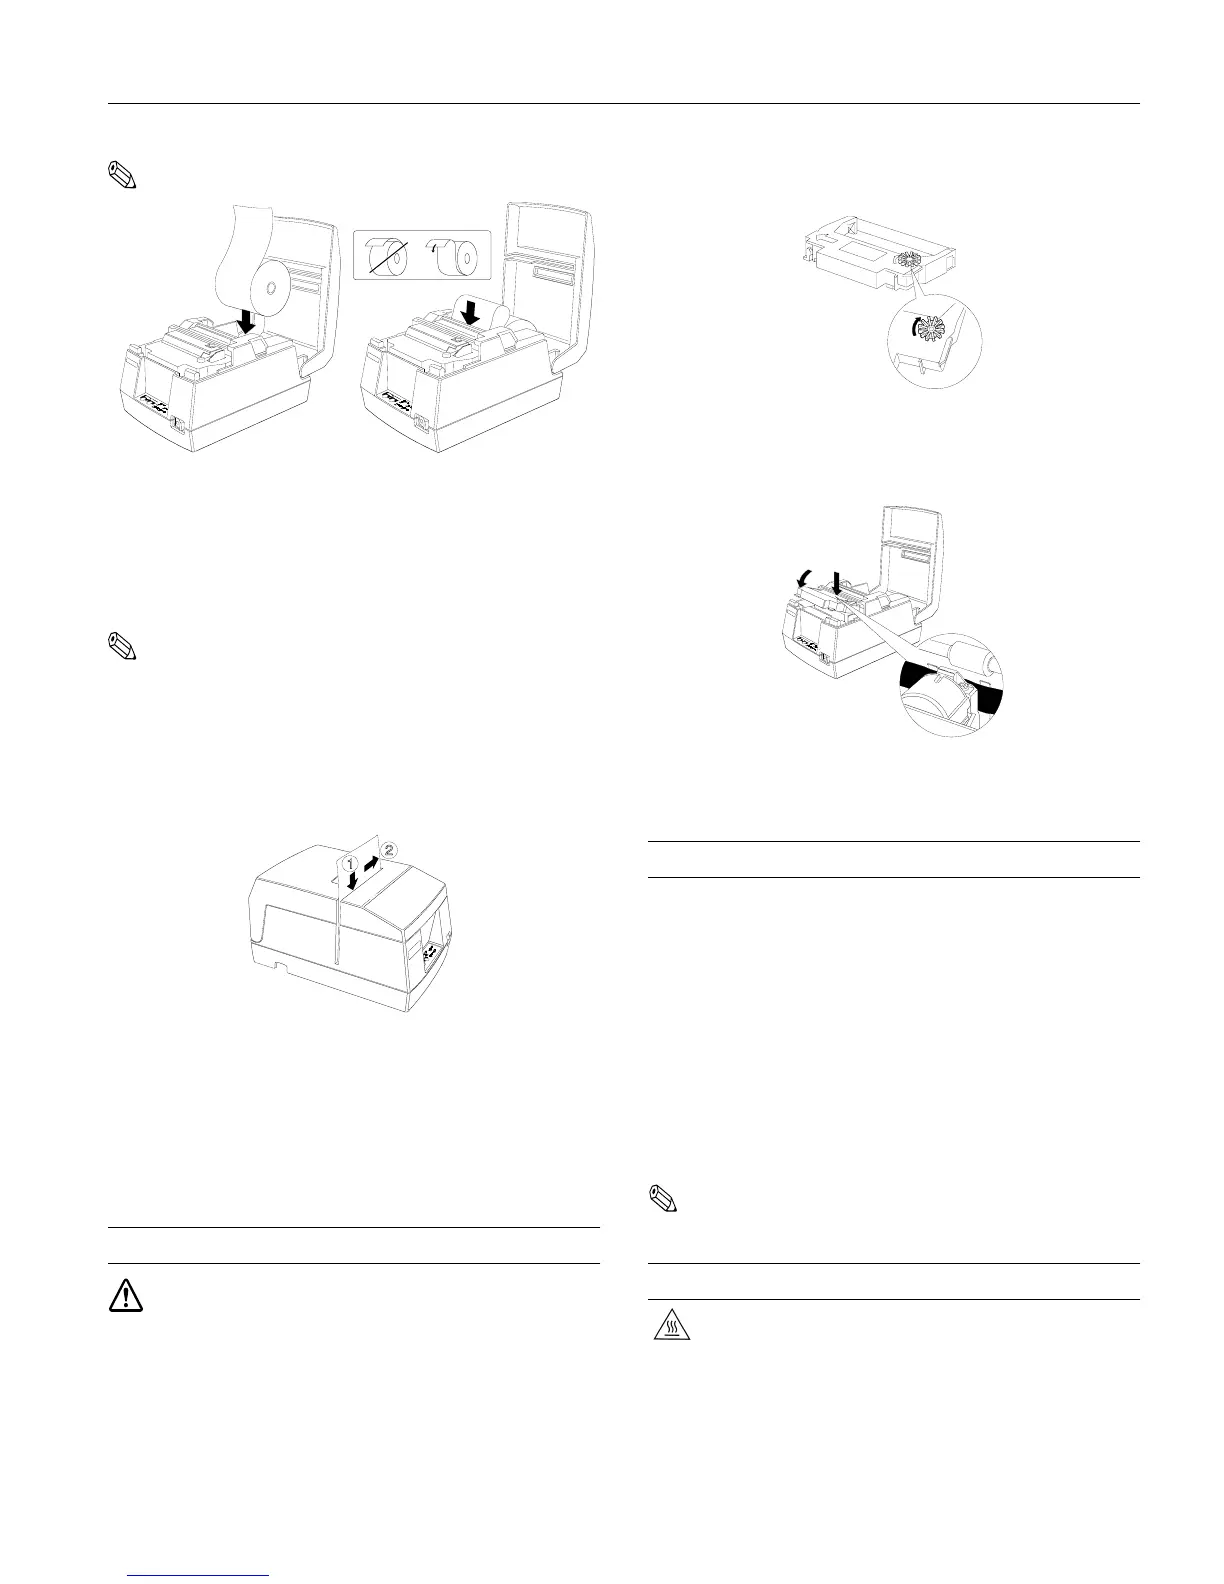
Installing the Ribbon Cassette
&$87,21 8VHRQO\WKH(3621(5&3RU(5&%ULEERQ
8VHRIDQ\ULEERQFDVVHWWHQRWDSSURYHGE\(3621PD\
GDPDJHWKHSULQWHUDQGZLOOYRLGWKHZDUUDQW\
1HYHUWXUQWKHULEERQFDVVHWWHIHHGNQRELQWKHRSSRVLWH
GLUHFWLRQRIWKHDUURZRQWKHFDVVHWWH2WKHUZLVHWKH
FDVVHWWHPD\EHGDPDJHG
1. Be sure the printer is not receiving data. Open the printer
cover.
2. Turn the ribbon cassette knob in the direction of the arrow
to take up any slack in the ribbon.
3. Insert the ribbon as shown below, and push the cassette
until it clicks. Be sure the ribbon is installed between the
print head and platen with no wrinkles or creases.
4. Turn the ribbon cassette knob 5 or 6 more times in the
direction of the arrow to take up any slack.
Running the Self-test
1. Be sure the ribbon cassette and roll paper are installed.
2. Hold down the
)(('
button while turning on the power.
3. The self-test prints the printer settings and then the
5(&(,37287
light flashes to indicate that the printer is in
the stand by state.
4. Press the
)(('
button to start the second part of the test.
The printer prints a pattern with the built-in character set.
5. The self-test automatically ends and prints
“
*** completed ***
.” The printer is ready to receive
data as soon as it completes the self-test.
1RWH 7RSDXVHWKHVHOIWHVWPDQXDOO\SUHVVWKH)(('EXWWRQ3UHVV
)(('DJDLQWRFRQWLQXHWKHVHOIWHVW
Removing a Paper Jam
&$87,217KHSULQWKHDGEHFRPHVYHU\KRWGXULQJSULQWLQJ/HWLW
FRROEHIRUHUHDFKLQJLQWRWKHSULQWHU
1. Turn the printer off and open the printer cover.