4. Do the following as necessary:
• Use the numeric keypad to manually enter fax numbers. Press the down arrow button to add
additional fax numbers.
• To select a speed or group dial entry, press the Menu button. Use the up and down arrows to
highlight an entry, the right arrow button to select an entry, and the left arrow button to deselect an
entry.
5. When you have finished selecting your recipients, press the OK button.
6. Press one of the Start buttons in the Fax section of the control panel. If prompted, select where
you placed your document (Automatic Document Feeder or scanner glass).
Note: If your recipient's fax machine does not print in color, your fax is automatically sent in black-
and-white. To cancel faxing, press the Stop button.
Your product scans your original and prompts you to place additional pages, if necessary.
After scanning your originals, your product dials the number and sends the fax.
Note: If the number is busy or there is a communication problem, your product displays a redialing
message and will redial the number in a few minutes.
Parent topic: Sending Faxes from the Product Control Panel
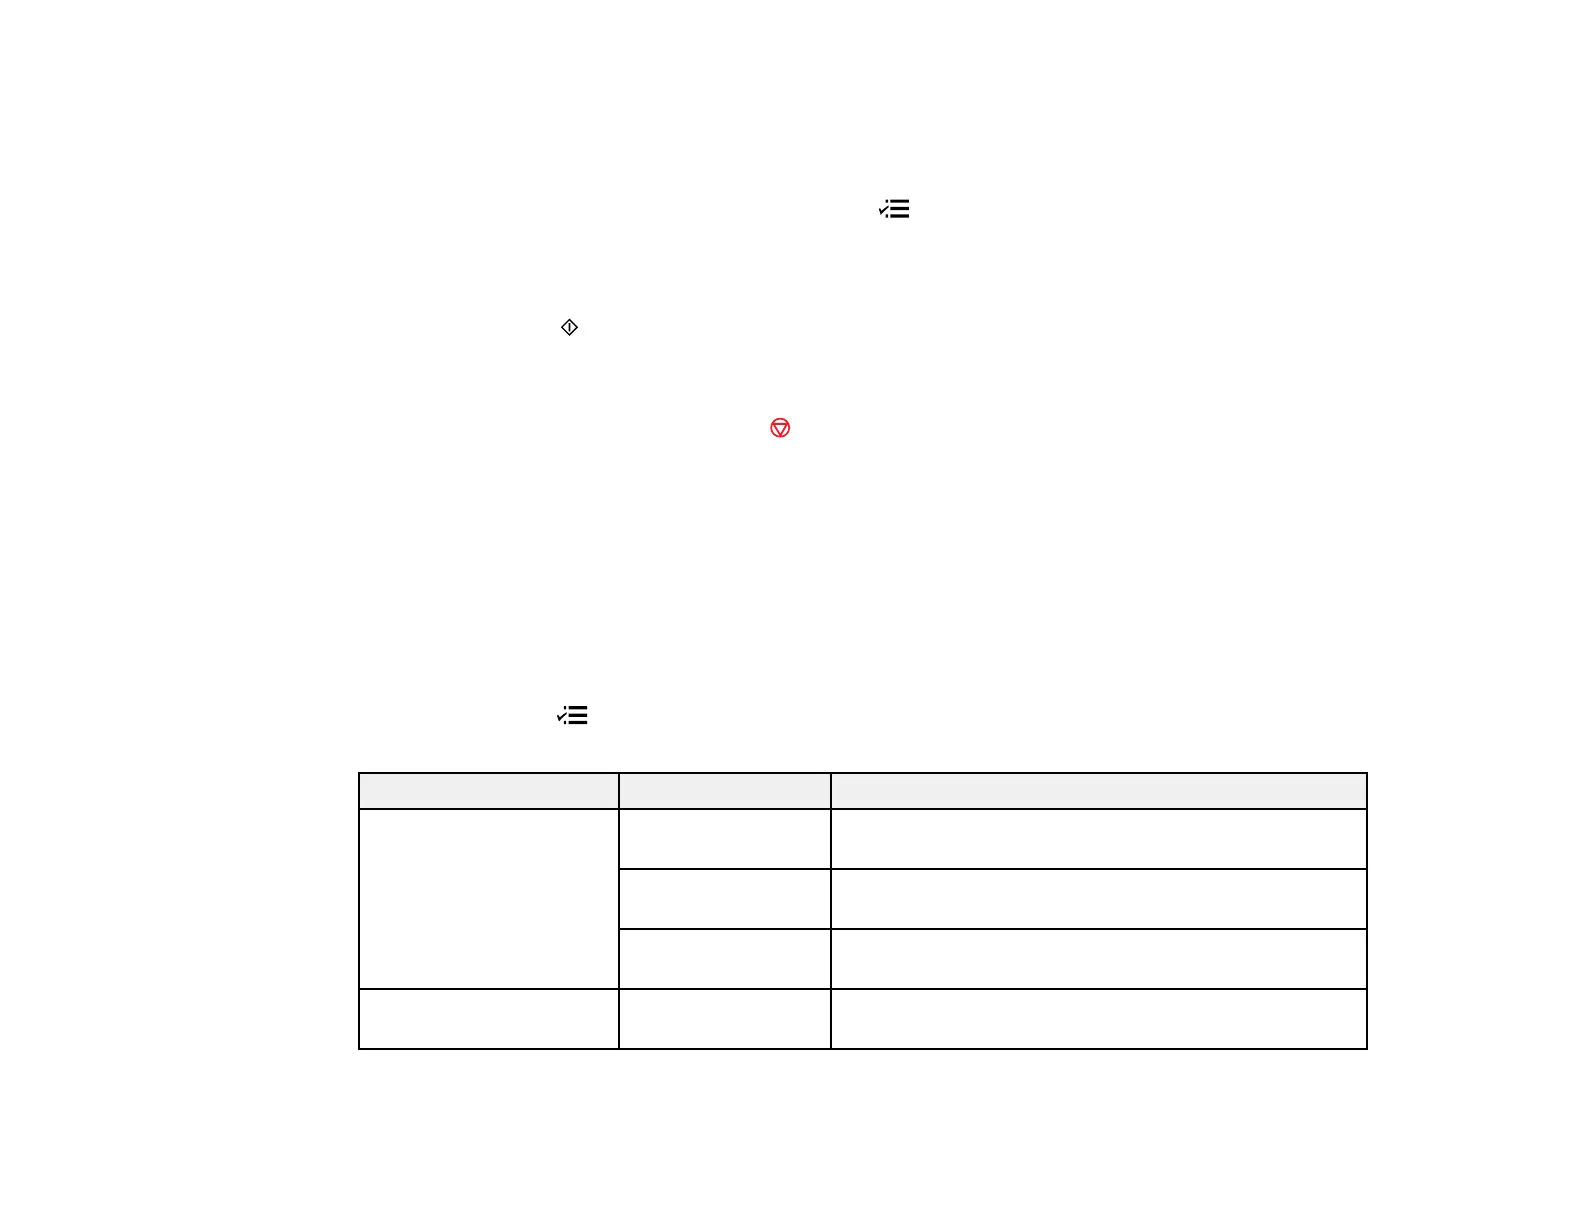
Fax Send Options
When you press the Menu button and select Send Settings while sending a fax, you can select
these options.
Setting Options Description
Quality Standard Provides good scan resolution and print quality for
most faxes.
Fine Provides best scan resolution and print quality for
faxes of small print and line art.
Photo Provides best scan resolution and print quality for
faxed photos.
Contrast –4 to +4 Adjusts the contrast for faxes; negative settings make
faxes lighter and positive settings make faxes darker.
191