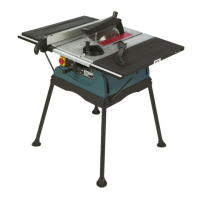
ERBAUER 250MM TABLE SAW
ERBAUER 250MM TABLE SAW
ERBAUER 250MM TABLE SAW
ERBAUER 250MM TABLE SAW
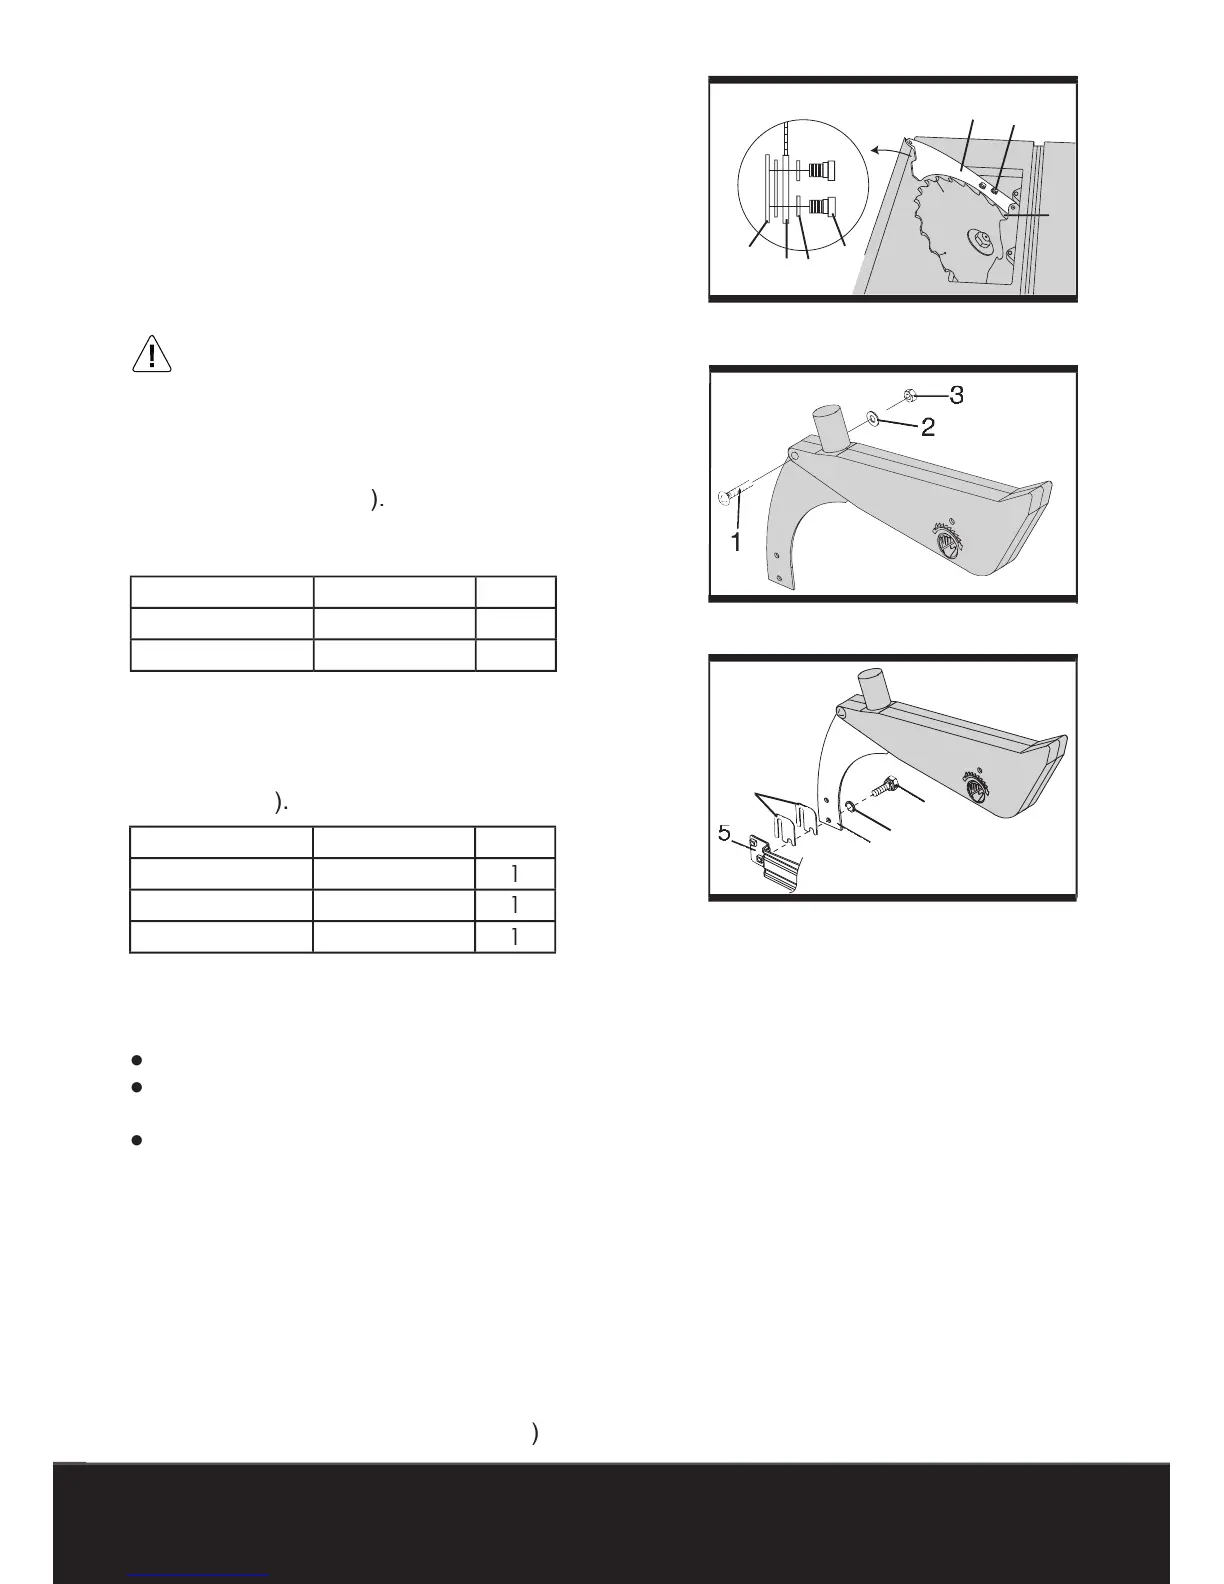
1) Rise the blade to its highest position by turning
the handwheel and tilt the blade to 45° bevel
2) Loosen the screws on the table insert and
3) Place the bolts (3), and fl at washers (4) on
the riving blade bracket (5).
4) Tighten the bolts (3).
5) Replace the table insert and tighten the screw.
The riving blade thickness of 2.5 mm. Make
sure the blade and riving blade are aligned on
the same line. If not, adjust the riving blade by
loosening the bolts. It should be less than 5 mm at
the gloves during removing a
1) Place the blade guard on the riving blade and
secure it with the bolt (1), fl at washer (2), and nut
Remove the table insert by removing the screws.
Remove the blade guard by removing the bolt,
fl at washer and nut that lock the guard in place.
Loosen the two bolts (3) from the
2) Insert the supplied spacers (7) between the
3) Retighten the two mounting bolts (3) securely.
the blade guard assembly using the
bolt, fl at washer and nut.
again at both 90° and 45°.
Add or remove the spacers until the alignment
7) Replace the table insert.