8 | P a g e
CONNECTIONS
a) Input
The specifications of recommended input cable, grounding line and fuse or circuit breaker are
listed below:
Maximum
effective
input
current
b) Output
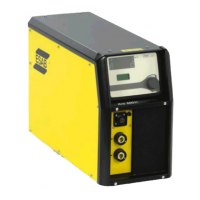
The positive and negative terminals of output circuit are at the bottom of the front panel, marked
with “+” and “-”.
Connect and rotate to tightened output cable from the “+” terminal to the positive OKC quick
connector at one end and the electrode holder at the other.
Connect and rotate to tightened output cable from the “-” terminal to the negative OKC quick
connector at one end and the work piece at the other.
Remote control can be connected at the bottom of the front panel depending on the user
selection.
WELDING OPERATIONS
Switch on the power switch at the rear panel of the machine. After switching on the machine, the
power indicator on the front panel will be lighted (red), the current digital meter displays will be ON,
the fan starts running and voltage is available at the output terminal.
The welding current can be set continuously from minimum to maximum value by turning the
welding current knob on the front panel when machine is local mode. When the machine is in
remote mode current can be set by remote potentiometer.
When the power switch at the rear panel is turned off, machine is shut off and power indicator light
is off, digital display will be off, Fan stops rotating.
The droplet transfer property of the welding could be improved through adjusting the ARC FORCE
knob and the arc property of cold electrodes could be regulated through adjusting the HOT
START knob. When the above two knobs are set properly and the welding current is regulated at
right value, the welding will be much easier and more stable.