S0740 800 196/E101019/P76
- 56 -
ca41f2heat
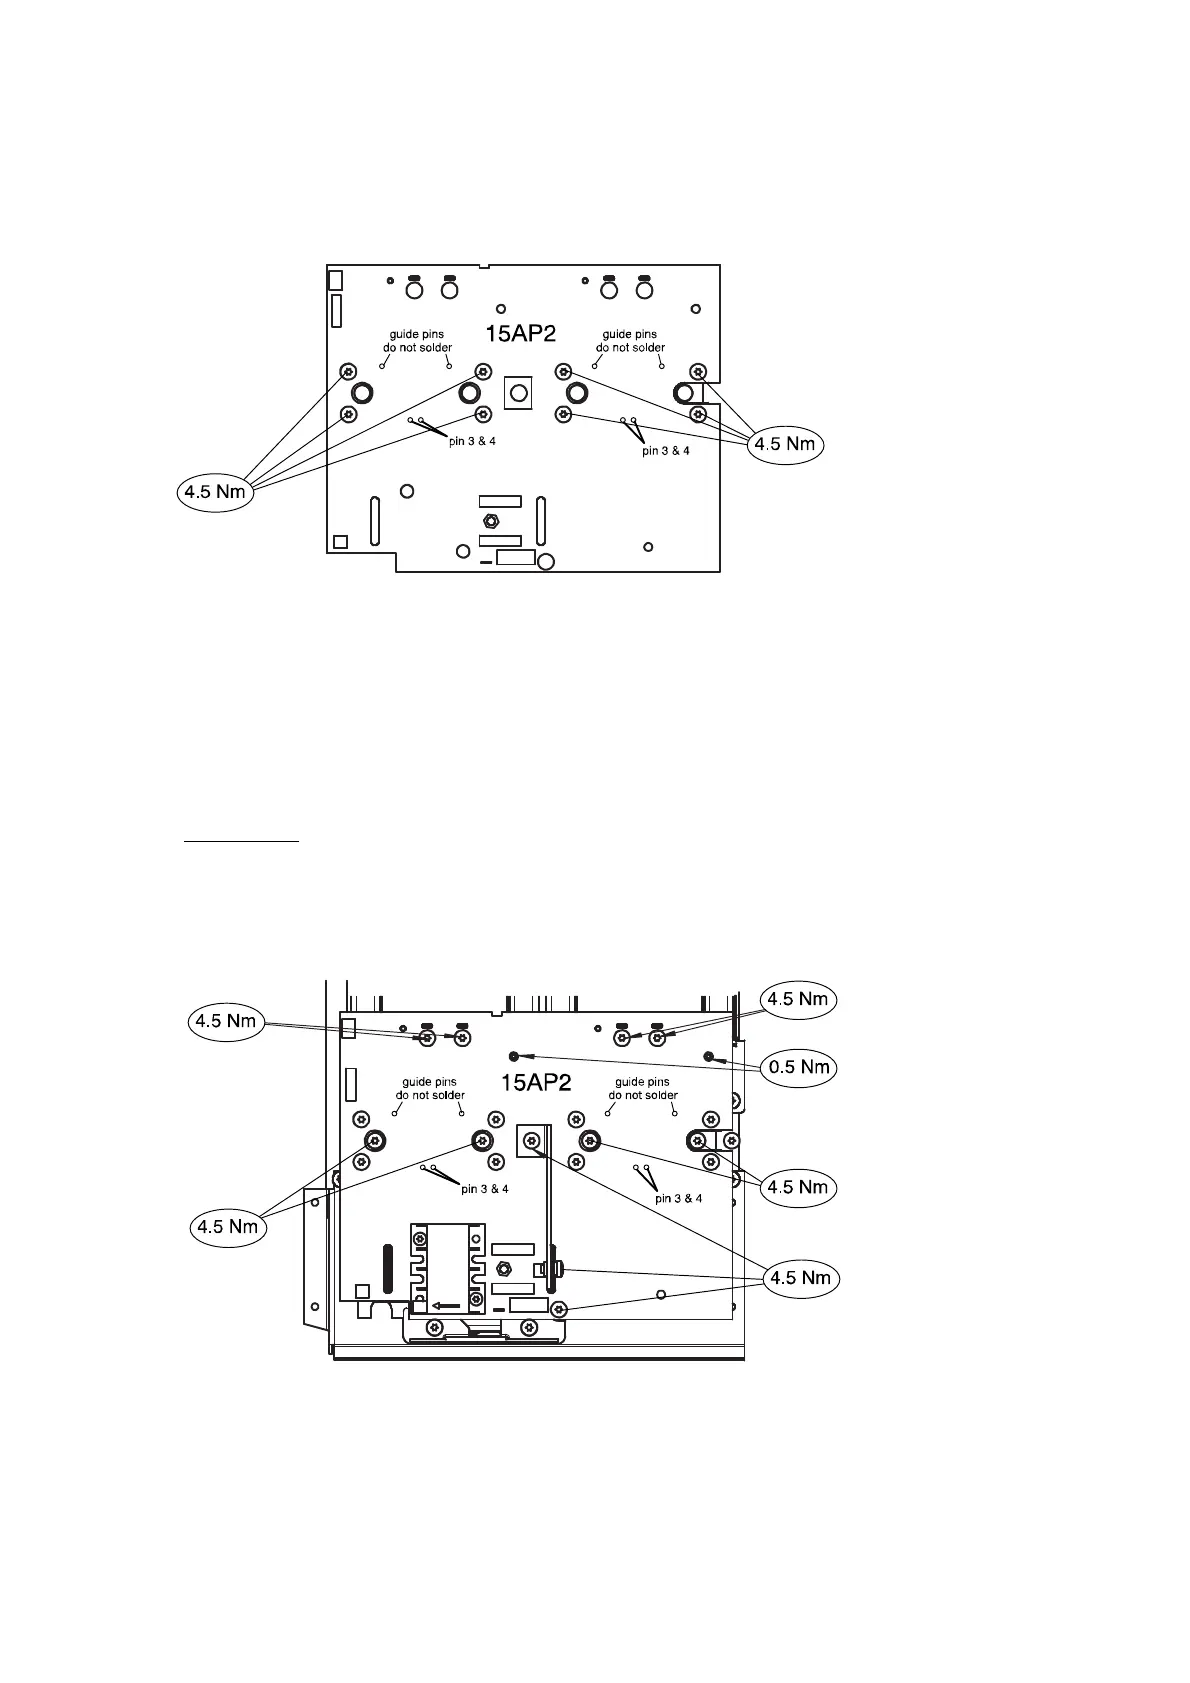
Diode modules 15D1, 15D2 and secondary board 15AP2
1. Fit the diode modules to secondary board 15AP2.
2. Tighten the connection screws to a torque of 4.5 Nm, see the picture below.
3. Solder pins 3 and 4 of the diode modules to circuit board 15AP2.
Fitting of diode modules 15D1 and 15D2 to circuit board 15AP2
4. Clean the heat sink and apply thermal conducting paste to the diode modules as
described on page 54.
5. Fit the the circuit board with the diode modules to the heat sink.
6. Tighten the screws that holds the modules on the heat sink to a torque of 2.5 Nm, and
then further tighten them to 4.5 Nm.
7. Tighten the remaining screws as shown in the picture below.
WARNING!
Incorrectly fitted components can cause failure. Do not tighten the screws to
more than 4.5 Nm.
Note! If transformers 15TM1 and 15TM2 have to be replaced, the secondary board and
the diode modules must be removed and then refitted.
Fitting of circuit board 15AP2 with diode modules
 Loading...