Do you have a question about the ESAB PowerCut 1300 and is the answer not in the manual?
General safety warnings and advice for users.
Safety guidelines and precautions presented in English.
Safety guidelines and precautions presented in Spanish.
Safety guidelines and precautions presented in French.
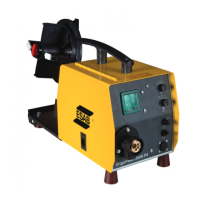
Overview of the PowerCut 1300/1600 manual plasma cutting package.
Purpose and coverage of the instruction manual.
Specifications for the manual plasma cutting units.
Part numbers and details for ordering manual packages.
Technical information and data for the PT-38 torch.
List of available accessories for manual units.
General guidelines for installing the cutting package.
Importance of following installation procedures for proper operation.
List of necessary equipment for installation.
Requirements for optimal placement and ventilation.
Procedures for checking the unit for damage upon receipt.
Details on connecting the primary electrical power input.
Instructions for switching between 230V and 460V settings.
Connecting the air supply and replacing fuses.
Setting up the unit for communication with automated systems.
Wiring output connections for manual cutting operations.
Step-by-step guide for installing the PT-38 torch.
General overview of operating the PowerCut unit.
Description and function of the unit's controls.
Functionality of the torch trigger and gas test switch.
Explanation of fault codes displayed by the unit.
Procedures for performing plasma cutting operations.
Instructions for using the stand-off guide during cutting.
Specific technique for drag cutting at 40 amps.
Procedures for performing gouging operations.
Guidelines for checking and replacing worn electrodes.
General guidelines for maintaining the equipment.
Routine checks and cleaning procedures for safety and operation.
Identifying and resolving common cutting issues.
Precautions for handling IGBT components to prevent damage.
Steps for replacing internal modules and heatsink mounting.
General guidance for diagnosing and resolving unit problems.
Detailed list of error codes, their causes, and solutions.
General information regarding replacement parts.
Importance of providing the serial number for parts.
Procedures for ordering genuine ESAB replacement parts.
Specifications for screw tightening torques (in/lbs).
Instructions for setting air pressure display units (PSI/BAR).
Identification and part number for the control board.
Identification and part number for the power board.
Overview of the PowerCut 1300/1600 mechanized plasma cutting package.
Purpose and coverage of the mechanized instruction manual.
Specifications for the mechanized plasma cutting units.
Part numbers and details for ordering mechanized packages.
Technical information and data for the PT-37 torch.
List of available accessories for mechanized units.
General guidelines for installing the mechanized cutting package.
Importance of following installation procedures for proper operation.
List of necessary equipment for installation.
Requirements for optimal placement and ventilation.
Procedures for checking the unit for damage upon receipt.
Details on connecting the primary electrical power input.
Instructions for switching between 230V and 460V settings.
Connecting the compressed air supply to the unit.
Connecting the unit to CNC systems.
Adjusting the voltage divider for height control systems.
How to sample the plasma system's output voltage.
Wiring output connections for mechanized cutting operations.
Step-by-step guide for installing the PT-37 torch.
General overview of operating the mechanized unit.
Description and function of the unit's controls.
Functionality of the torch trigger and gas test switch.
Explanation of fault codes displayed by the unit.
Procedures for performing plasma cutting operations.
Guidelines for checking and replacing worn electrodes.
| Input Voltage | 230 V |
|---|---|
| Input Frequency | 50/60 Hz |
| Efficiency | 85% |
| Power Factor | 0.93 |
| Protection Class | IP23 |