15
Operator’s Manual
44100
|
Eskape™ 2000 Flip-Style Sled Shelter
Check for parts online at www.GetEskimo.com or call 800-345-6007
ENGLISHENGLISH
SKIN
SLED
EDGE TRIM
#6 1/2"
SCREW
EDGE TRIM
SKIRT
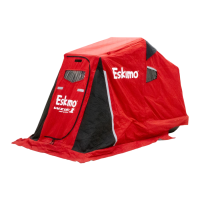
1
4
3
3
4
2
2
5
5
6
6
7
7
8
8
5.3
Locate the 93.5" rubber edge trim
(#69654) included in the parts box.
Find the center of the length of edge
trim. This will be the starting point to
attach the edge trim to the skin.
Move to the rear of the shelter and
locate the center of the #43504 sled.
This will be the point where the edge
trim will be attached rst.
Pull down on the skin at the center-
back of the skin, being sure to apply
tension below the point of edge trim
attachment.
While maintaining tension, push the
edge trim onto the sled lip and begin
doing this around the sled. Maintain
skin tension ahead of the edge trim
as you push it on, as this will keep the
skin tight and free of wrinkles.
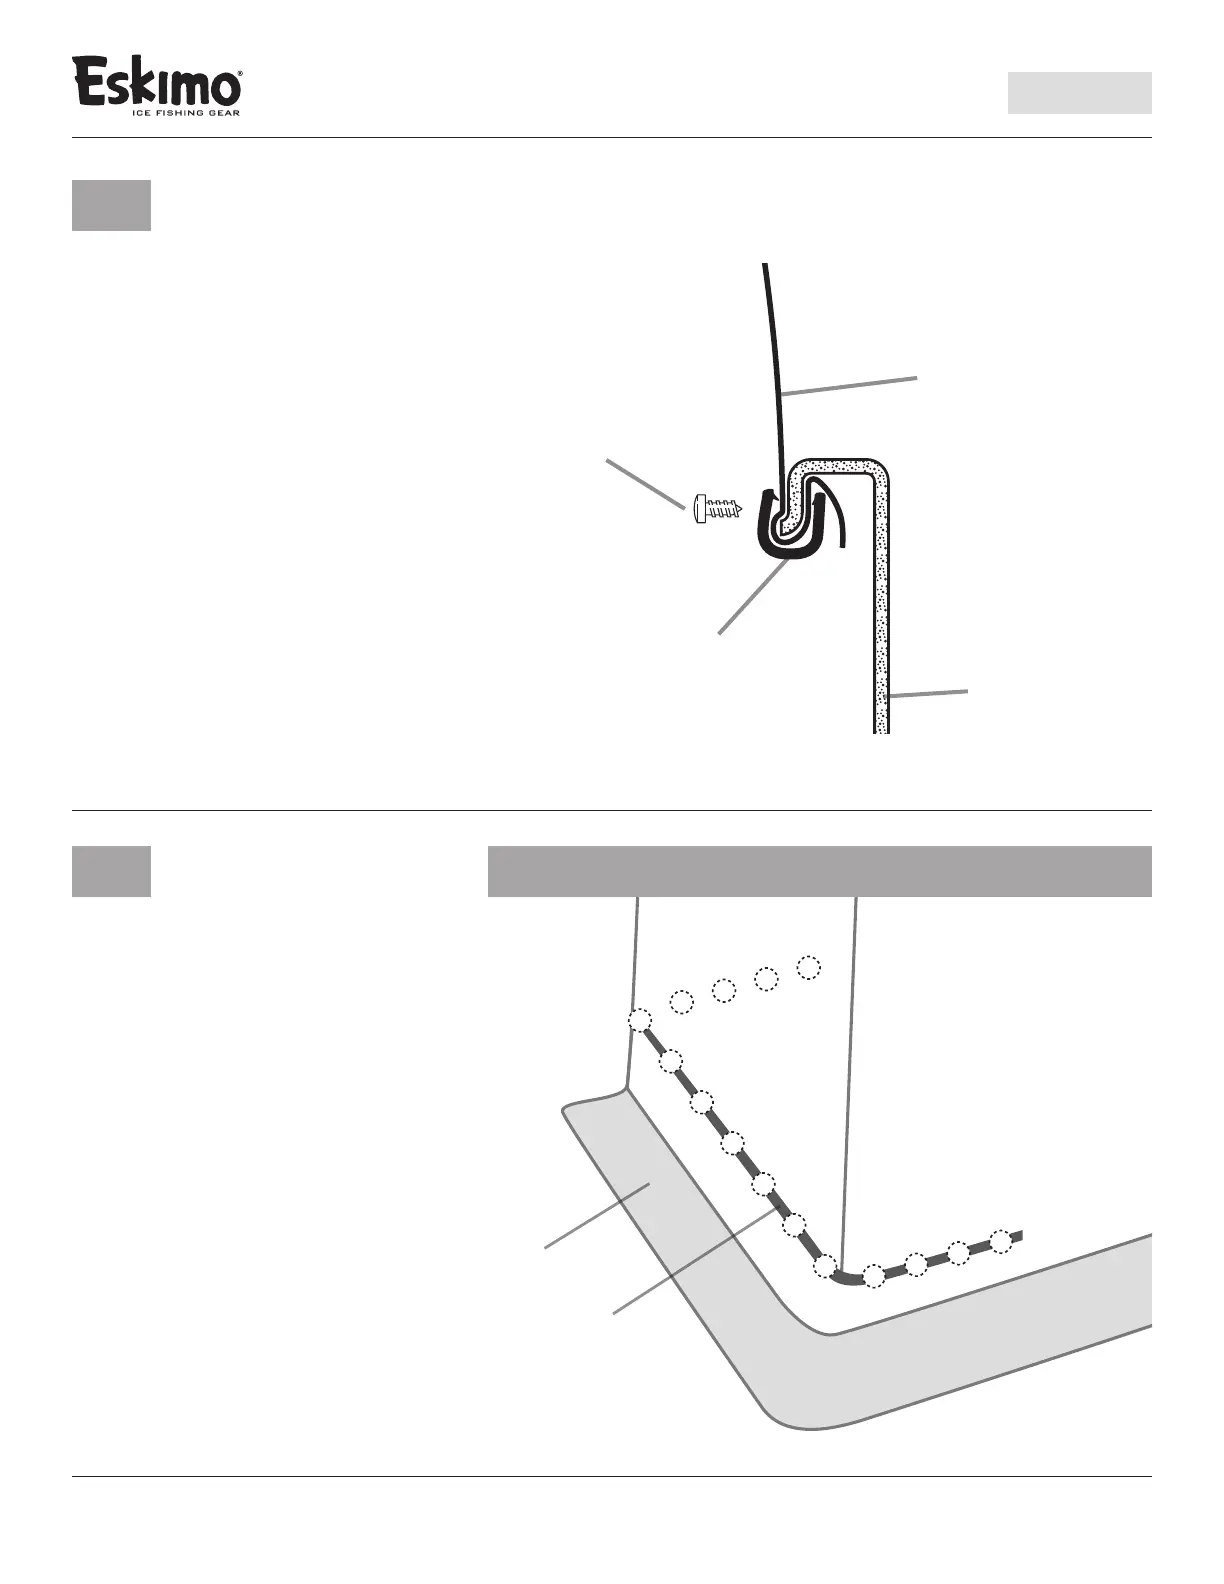
5.4
Once the edge trim is completely
attached, secure it to the back of
the #43504 sled using the included
#6 X ½ IN Philips drive screws.
For the most eective application,
follow the numbered order of screw
attachment locations shown in the
Figure for this step.
NOTE:
Make sure the skin is tight and even before
installing the edge trim screws. It will be easier
to make skin adjustments before all the screws
have been installed.
Follow numbered screw attachment locations below for this step.