16 Check for parts online at www.GetEskimo.com or call 800-345-6007
Operator’s Manual
44100
|
Eskape™ 2000 Flip-Style Sled Shelter
ENGLISHENGLISH
OPTIONAL INSKIRT ANCHOR GROMMETS:
This shelter model also includes in-skirt grommets to aid
in conditions where little snow is present on the ice.
An ice anchor can be installed in each corner of the shelter
to keep the skirt at to the ice, sealing out the elements.
Ice Anchor 2-Packs (#69138) are sold separately and are
available online at GetEskimo.com.
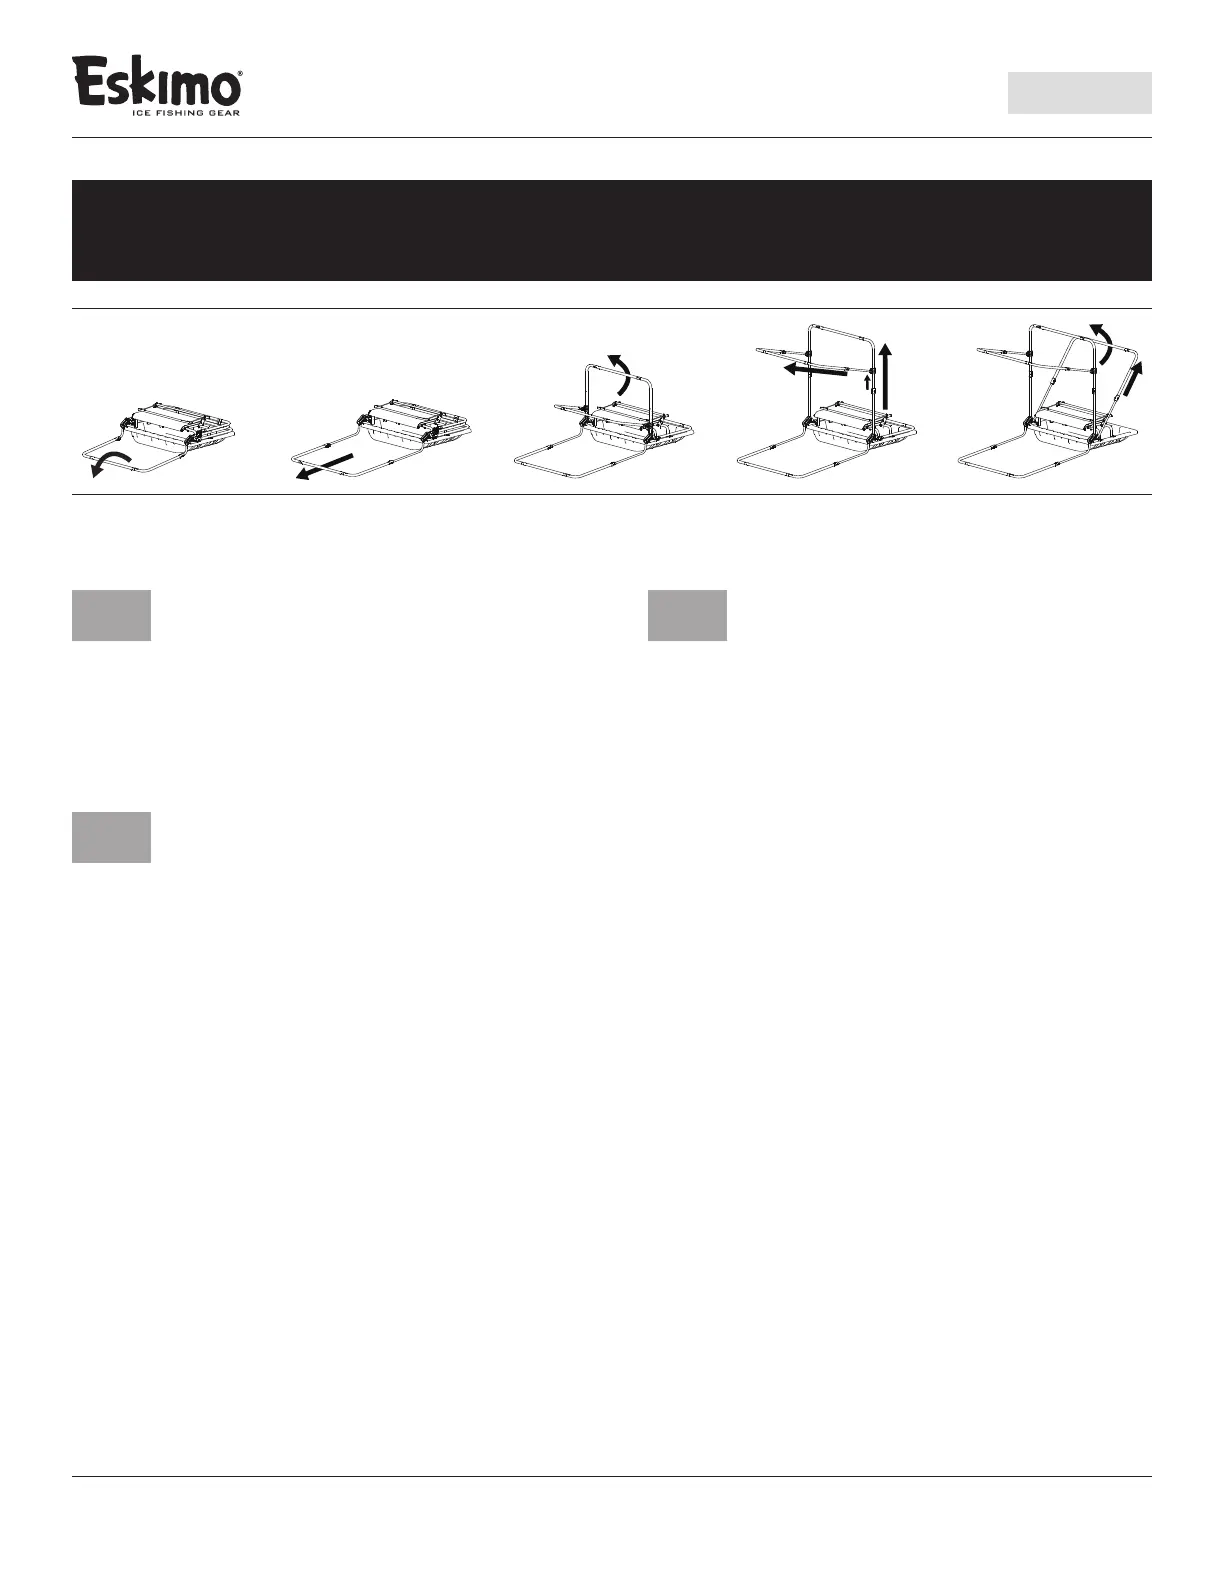
SETUP/TAKEDOWN INSTRUCTIONS
1
Starting at the front side of the shelter, locate the bottom
framework, and slowly extend this assembly out until
an audible “click” is heard. This click noties you that the
framework is locked in the extended position.
3
Takedown requires the same process used to deploy the
shelter except in reverse.
TAKEDOWN TIP:
Be sure to close all window covers to prevent tearing or tangling of this excess
fabric with the framework.
TAKEDOWN TIP:
Be sure to carefully fold all loose shelter skin inward to prevent any tearing of
the fabric. Damage to the skin should be expected if the skin is not properly
stowed prior to travel.
TAKEDOWN TIP:
Using the framework you should be able to “tuck” each skin section in
between the pole assemblies, locking it in place, and safely containing the
skin within the sled.
TAKEDOWN TIP:
When hauling large amounts of gear, it will be easier to collapse the sled
and correctly pack the skin rst before all gear is repacked into the sled. With
increased use, each user will develop their own way of packing that is easiest
for them.
2
While pulling the extended bottom pole over your head,
reach for the next set of poles and extend them.
Repeat this step until the remaining framework assemblies
are fully extended and the shelter is deployed.
TIP:
At this point the shelter is usable, as the spreader poles are not necessary
when the skin has been properly attached as described earlier in this manual.
Spreader poles are to be used in inclement weather conditions.
TIP:
Make sure the shelter skin is not tangled or pinched in any way before beginning setup or takedown. This can prevent the framework from being able to fully extend.