9
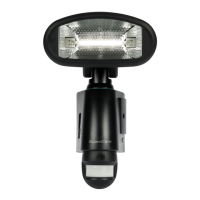
2. Video mode setting: automatically at the end of the time date setting two icons
and “V” appear on the screen; push the button to choose ”V” (Video) or
”P” (Photo).
On the ”P” (photo) setting, GuardCam will take a series of digital photographs at a
rate of 1–3 photos every second when the motion sensor is triggered.
On the "V" (video) setting, GuardCam will take a 20 second video clip when the
motion sensor is triggered.
Please note that in the event of a mains power failure GuardCam will revert to
the factory setting of "V".
If you have not pushed any buttons for 3 second, “OK” will appear on the screen,
indicating it has automatically saved the current settings. The LCD screen will
shut off automatically 10 seconds later.
Please note that in the event of a mains power failure in excess of 72
hours the time and date settings must be reset.
1. START
3. MONTH
Setting
2. YEAR
Setting
4. DATE
Setting
MINUTE
Setting
FINISH
HOUR
Setting
VIDEO/PHOTO
Setting
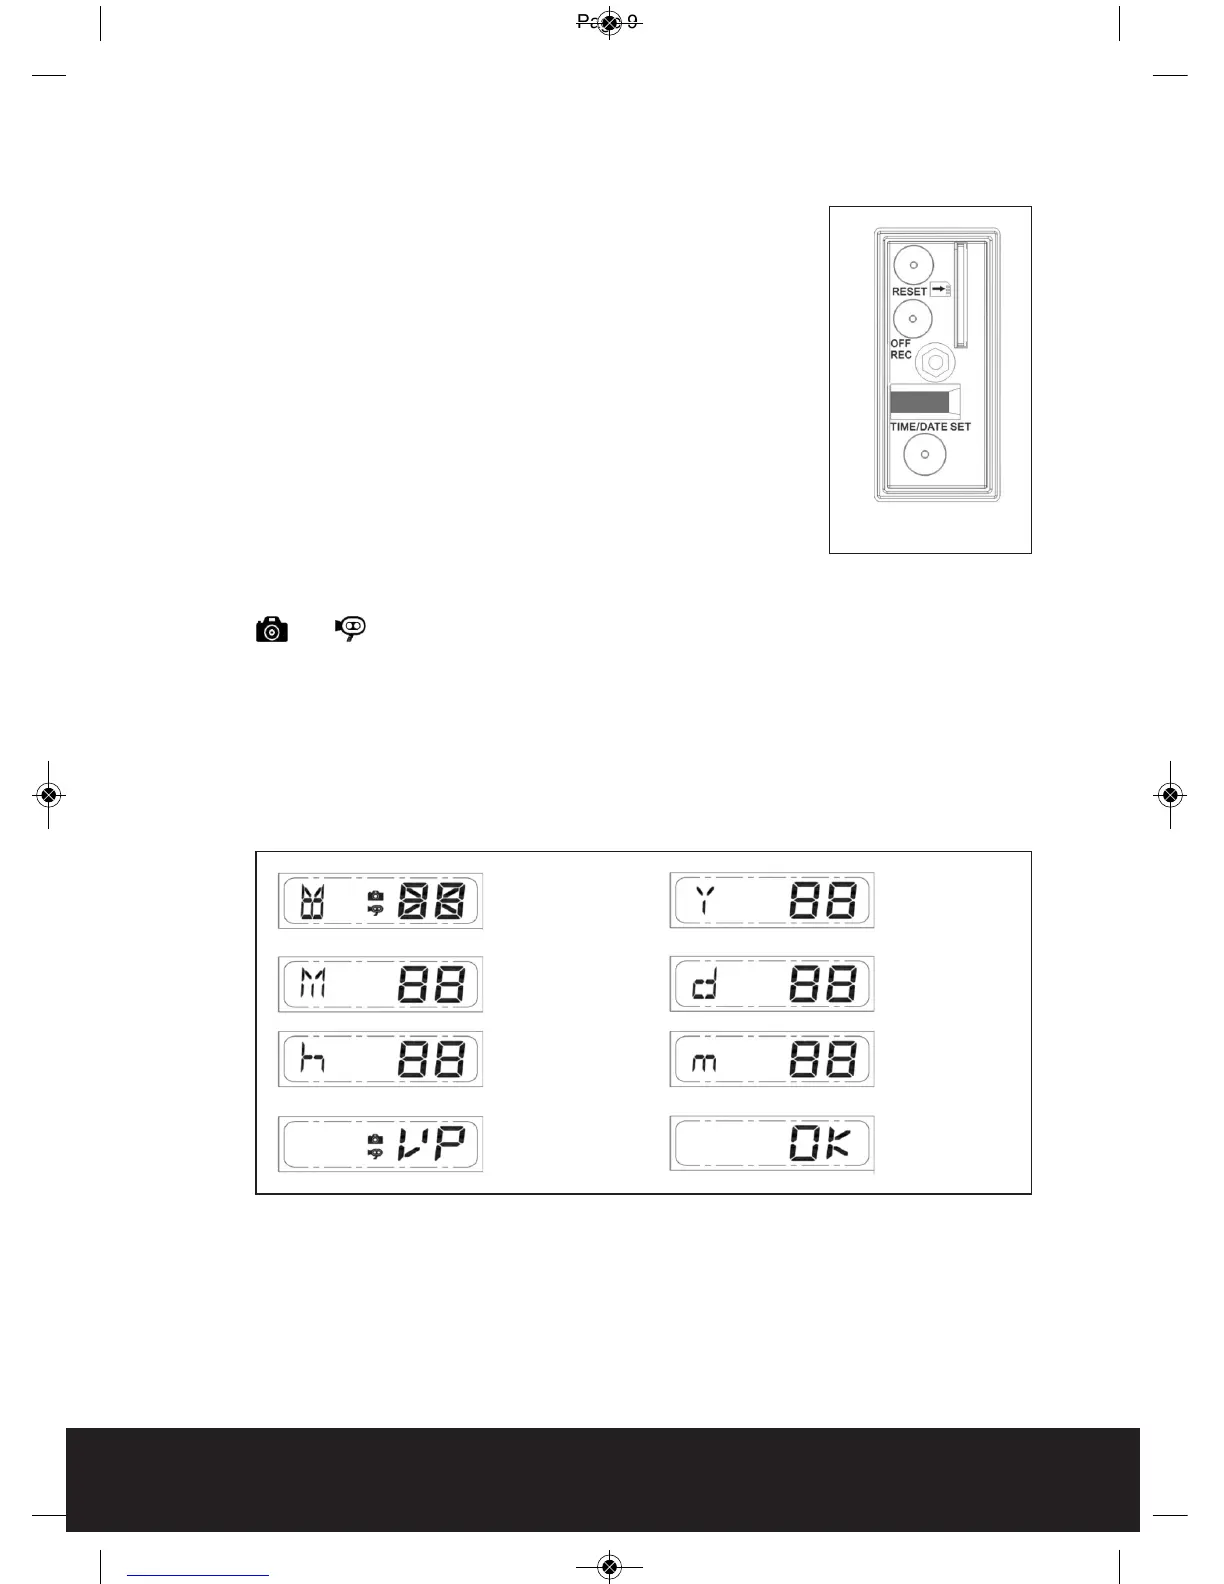
Step 5 - Set the Date and Time and Video Mode
This will allow the images taken by GuardCam to display
the correct date and time it was taken.
Push TIME/DATE SET button (see Fig. 10) for 3 seconds,
The LCD screen will then flash 3 times, indicating you
have entered Time/Date setting mode.
1. “YEAR”setting: ”Y” and “08” are displayed on the screen;
push the button to set year from “08-99”, push the
button again and hold for 3 seconds to scroll through
numbers quickly. If you have not pressed the button for
3 seconds, it will automatically save the year and go on
to allow you to set the month.
Repeat the same setting procedure for
MONTH / DATE / HOUR / MINUTE / VIDEO MODE.
Fig. 10