18
ESS GPS-5 OWNER’S MANUAL
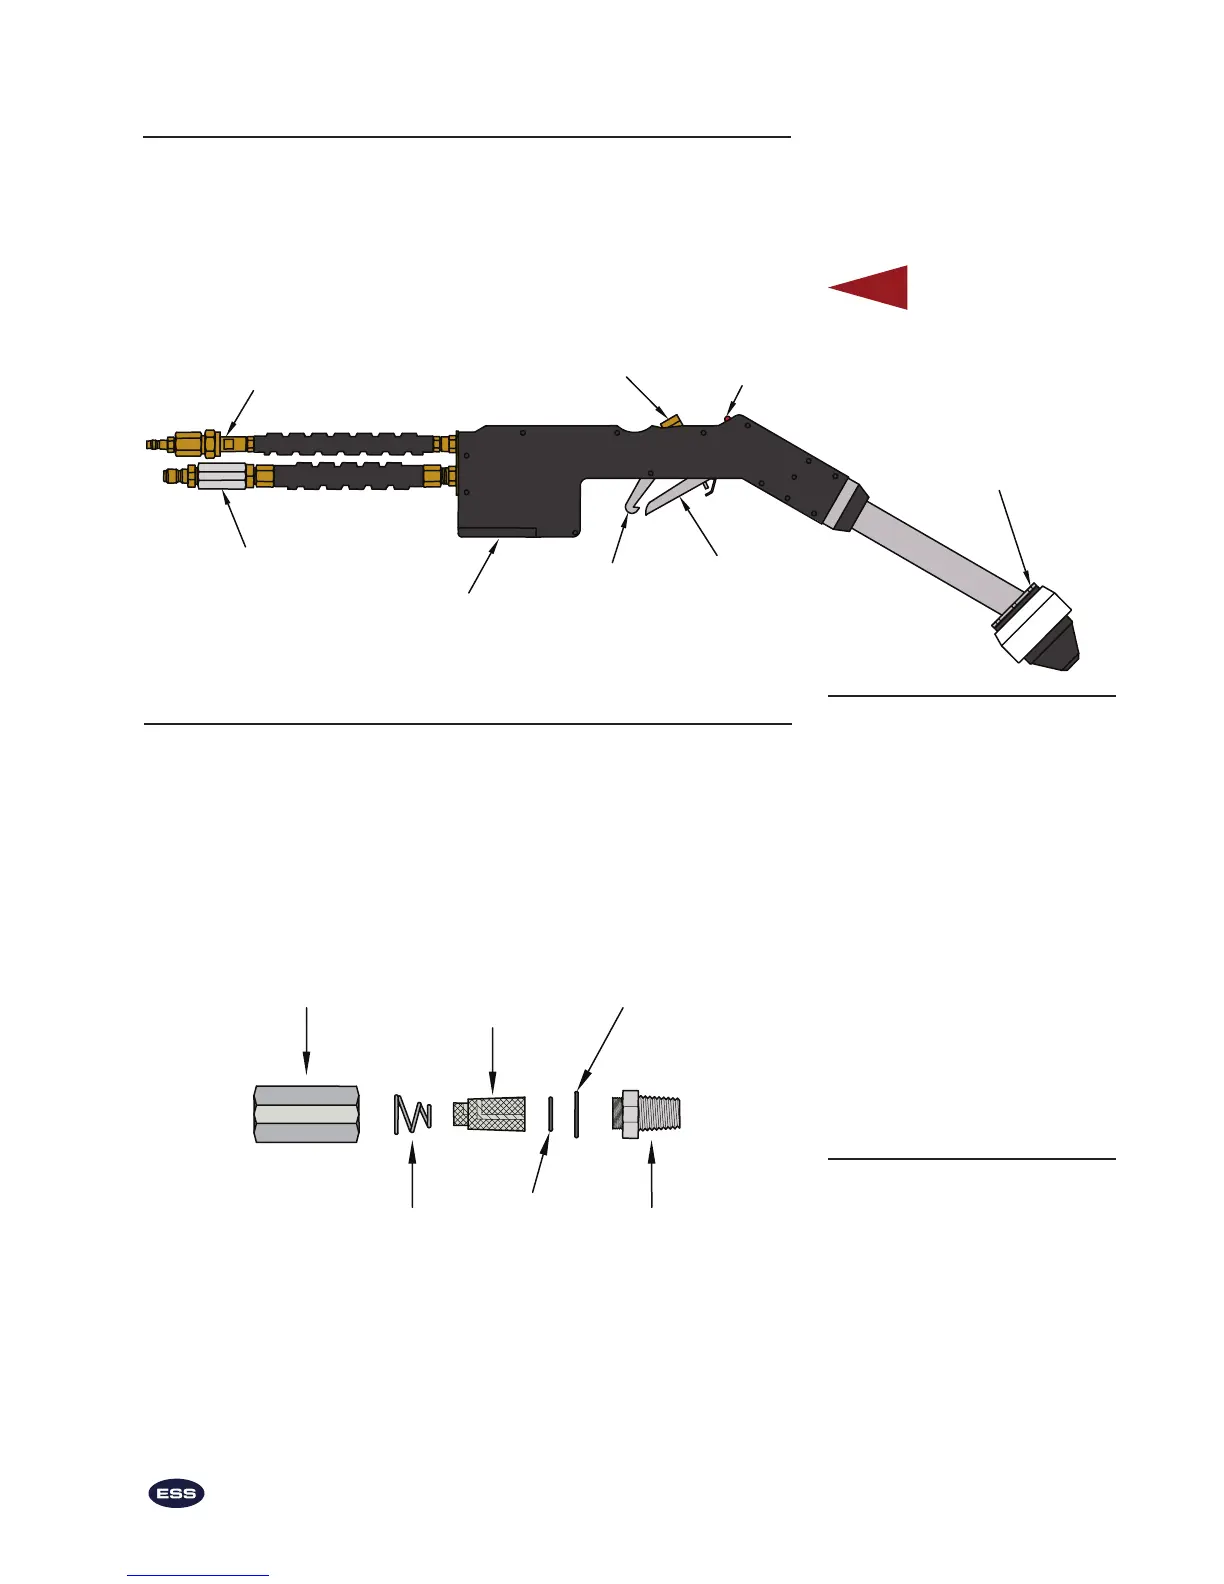
Spray gun
The spray gun is held by the operator during spraying. Activation
of the trigger causes liquid to spray. The Spray gun has the follow-
ing user-serviceable parts: the air lter, the liquid lter assembly, the
nozzle assembly, and the batteries. Except for the batteries, which are
accessed by removing the battery cover, nothing inside the Spray gun
shell is user-serviceable. Do not open the spray gun shell; doing so
will void the warranty on the spray gun.
Air filter
Note: GPS-5 units manufactured after March 2009 do not require
an air lter on the spray gun air leader.
For GPS-5 units manufactured before March 2009, there is an in-line air
lter located outside the base of the spray gun in the air hose. It lters
dirt out of the air lines. It’s easy to tell the Air Filter from the Liquid
Filter Assembly because the Air Filter is in a silver-colored casing.
Replacement parts for the air lter assembly are available as a kit.
The kit includes a lter, and large and small o-rings.
Order using ESS part number 231.
The Spray Gun
To clean the air lter:
1. Unthread the casing from the cap using a ¾” wrench on
both parts. Be careful not to lose the spring or the air lter
inside of the casing.
2. Check inside each part for debris. Clean any dirt out with
compressed air or warm, soapy water.
3. Reassemble the air lter, making sure to put it together as
shown above.
Casing
Filter Element
Cap O-Ring
Cap
Filter O-Ring
Spring
The Air Filter Assembly
Liquid Filter
Air Filter
Battery
Housing
Trigger
Lock
Brass Bolt
Trigger
Charging Indicator
Nozzle