24
Set the Wheel Synchronicity of Exhaust Chuffs
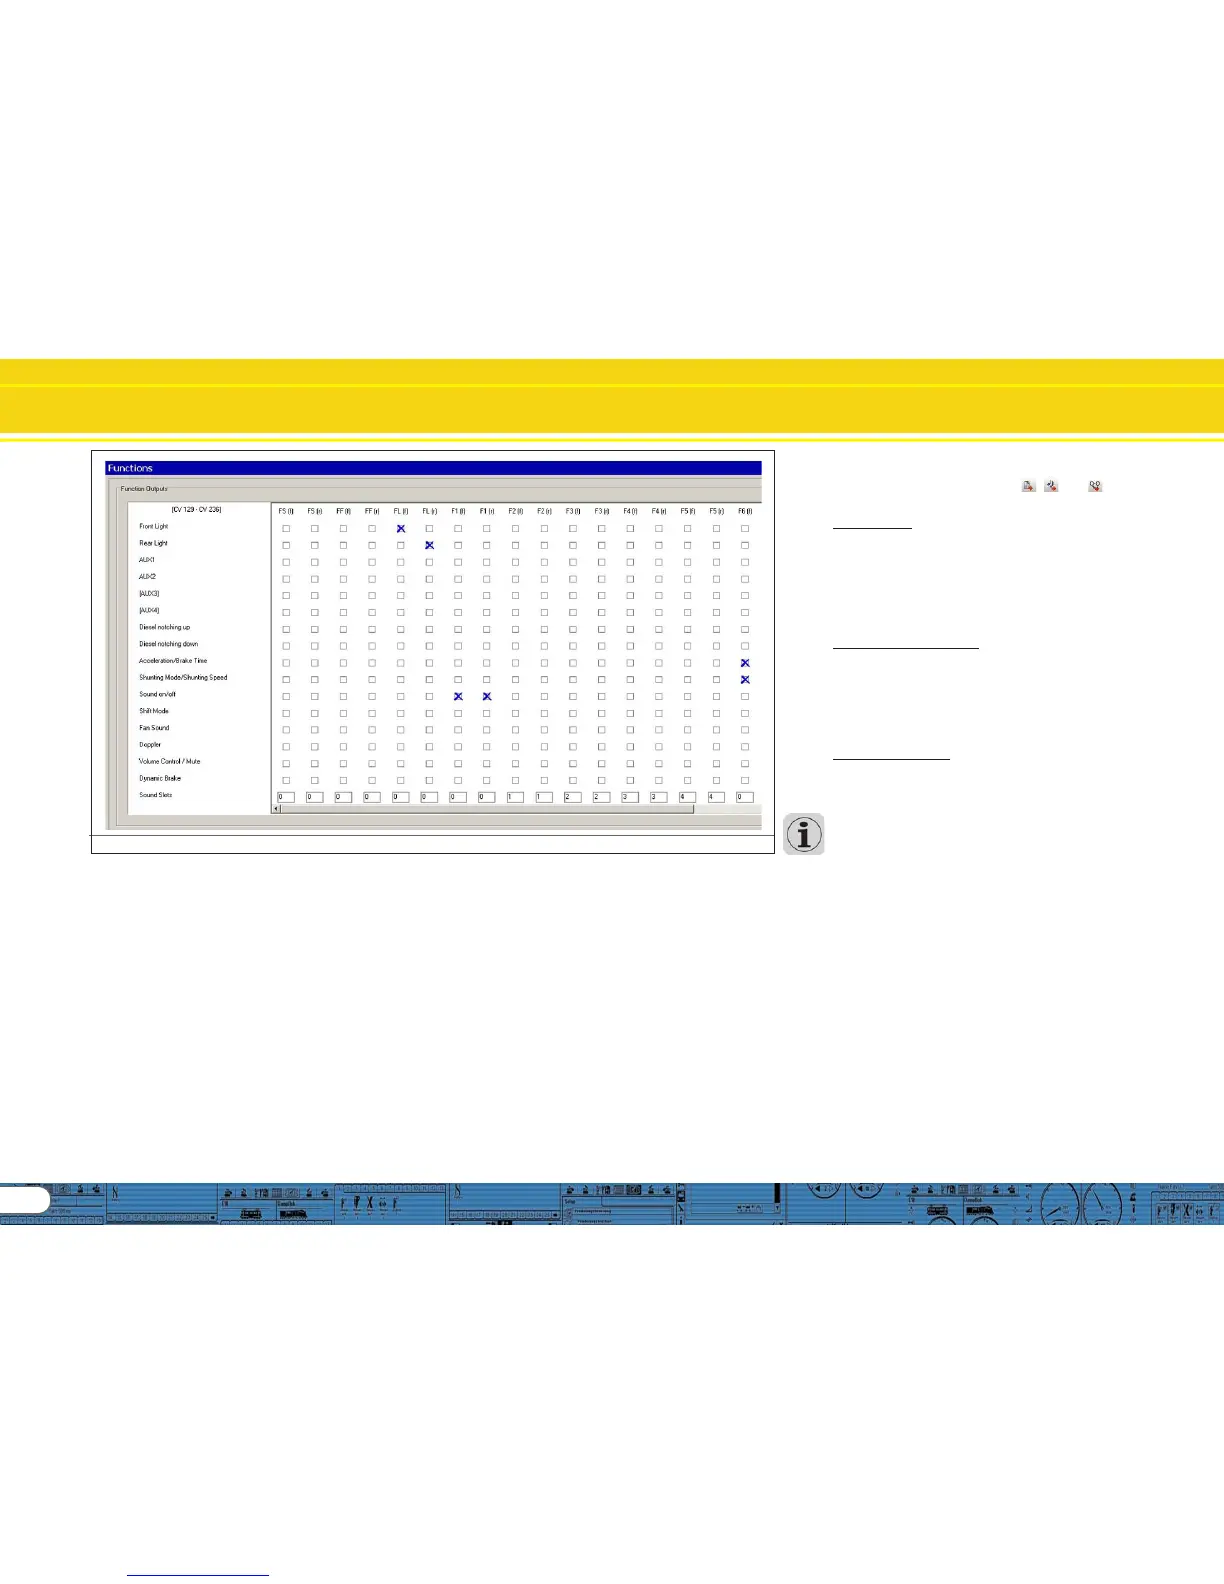
Fig.37.: Default Allocation of Function Buttons
12.2.5. Set the wheel synchronicity of exhaust chuffs12.2.5. Set the wheel synchronicity of exhaust chuffs
12.2.5. Set the wheel synchronicity of exhaust chuffs12.2.5. Set the wheel synchronicity of exhaust chuffs
12.2.5. Set the wheel synchronicity of exhaust chuffs
After you have imported all sounds into the correct sound slots
and have entered the first driving parameters it is time to look
at a special feature for steam locomotives without external
wheel sensor, namely setting the exhaust chuffs according to
the revs of the drivers. You can set the necessary parameters
with the option „Type of Sound“ 12.2.5. Radsynchronität der
Dampfstöße einstellen(CV57 and 58). First make sure that the
correct number of cylinders has been entered in the menu
„Extended Settings“ and that you have imported the
appropriate chuff sounds (also refer to 9.2.4.). Furthermore
the mid speed and the maximum speed (CV5 and 6) must have
been set since this would influence the synchronicity if it was
changed later on.
• Place the locomotive onto the programming track or a test
bed.
• Run the locomotive on speed step 1 with the virtual cab or your
digital system.
• Observe one wheel and its movement and count the number
of exhaust chuffs that are played during one turn of the wheel.
• If there are too many chuffs during one turn the time span is
too small. Increase the value in CV 57 until the desired
synchronicity is achieved.
• If there are not enough chuffs during one turn the time span is
too big. Reduce the value in CV 57 until the desired synchronicity
is achieved.
• Now switch to speed step 2.
• Observe one wheel and its movement and count the number
exhaust chuffs that are played during one turn of the wheel.
• If there are too many chuffs during one turn the time span is
too small. Increase the value in CV 58 until the desired
synchronicity is achieved.
• If there are not enough chuffs during one turn the time span is
too big. Reduce the value in CV 57 until the desired synchronicity
is achieved.
Since CV 57 and 58 influence each other you must check the
synchronicity of speed steps 1 and 2 repeatedly. Thus you get
closer and closer to the desired synchronicity in several steps.
12.2.6. Fine tuning12.2.6. Fine tuning
12.2.6. Fine tuning12.2.6. Fine tuning
12.2.6. Fine tuning
Save the project and write it onto your decoder with the aid of
your LokProgrammer. Use the buttons , and . Listen
to the sounds during normal operation and fine tune them
further if necessary.
Sound volumes: You can adjust the volume of the individual
sound settings in the sound slots separately or with the group
volume controllers 1 to 312.2.6. Feinabstimmung.
In our example you can adjust all driving sounds with controller
3 (=CV123), the whistle with controller 1 (=CV121) and the bell
with controller 2 (=CV122); all other sounds are adjusted
individually.
You can adjust the overall volume in the menu „Sound Set-
tings“ or with CV 63.
Minimal time between chuffs: should the exhaust chuffs sound
too hard a high speeds you can set a time limit with the option
„Minimal time between exhaust chuffs“. Then the chuffs will
not be played any closer together than that time limit. Once
the locomotive reaches the speed at which the current time
between chuffs corresponds with the minimal time between
chuffs the time remains constant – even at higher speeds. This
method is recommended for high speeds of the locomotive
since the synchronicity cannot be observed anyway.
Brake sound threshold: If the brake sound starts too late or
(due to the large file size) it is not played at all simply increase
the value for the brake sound threshold. The higher the value,
the sooner the brake sound starts playing and therefore has
more time to be played completely (also refer to 8.5.5.).
In the following chapters many processes that you already
know are repeated from the creation of the steam sound
project. Therefore we only describe the settings that are diffe-
rent in the following chapter.
12.3. Diesel-electric locomotive12.3. Diesel-electric locomotive
12.3. Diesel-electric locomotive12.3. Diesel-electric locomotive
12.3. Diesel-electric locomotive
12.3.1. 12.3.1.
12.3.1. 12.3.1.
12.3.1.
Generate new fileGenerate new file
Generate new fileGenerate new file
Generate new file
Proceed as in 12.2.1..
12.3.2. Settings12.3.2. Settings
12.3.2. Settings12.3.2. Settings
12.3.2. Settings
Proceed as in 12.3.2.., but select „Diesel-electric“ as type of
locomotive. Enter the value „1“ for „Time between Throttle
Notches“. Then the decoder does not divide the sound
automatically in to throttle notches; this is done later with the
different sound files for different throttle notches.
Also set the following under „Address“: Click onto the squares
„FL (f)“ and „FL(r)“ in „Function outputs in consists“. If
locomotives are run in consist, then the lights can be controlled
in both locomotives simultaneously.
Should there be only one driving sound file (d1.wav) it is
recommended to set a higher value for „Time between throttle
notches“. This results in the modulation of sound with different
pitch levels.