27
Dieselhydraulic/Dieselmechanical
• Enter the value 1 in „Repeat sounds“ for all transition sounds
and for s.wav in the first part of notch S so as to play each
transition sound only once until the following throttle notch is
reached.
• Allocate all sounds to volume controller 3 („AUX“). Thus the
driving sounds will be controlled simultaneously by controller 3.
• Click onto „Adapt sound to Driving Sound“ for each sound.
This causes the driving sound to increase in pitch with increasing
speed.
Since there are no acceleration files in this example (A1 to Da1)
and no coasting files (in CD1, DC1 and CX) you must enter in
the thresholds for each path between the D1- and DA1-squares
the highest possible value of 127. Furthermore you must set
the threshold between D1 and DC1 to -128.
Change to the window „User Sounds“:
• Open the „Slot1“ by double clicking the square
• Import „airhorn1_init.wav“ in the upper square of the open
sound slot
• Import „airhorn1_loop.wav“ in the middle square of the open
sound slot
• Click onto the button „Sound settings“ next to the middle
square and select the option „Loop mode“. This causes the
horn to sound until the user deactivates this function.
• Import „airhorn_exit.wav“ in the lower square of the open
sound slot
• Allocate the horn to the volume controller 1 (=CV121) in the
window „Sound settings“. Thus you can adjust the volume of
this important sound with your digital system later on.
• Proceed in the same manner with Slot 16 and the brake sound-
wav-files and with Slot 15 with the „fan“ files.
• Select for all brake sound files the option „Sound requires
Driving Sound“ in the window „Sound settings“.
• Click onto the button „display extended settings“ and enter
the highest value 15 in „Priority“ in order to assure that the
brake sound is not suppressed by any other sound. Do the
same with slot 15 to assure that the fan sound is not suppressed
by any other sound.
• Confirm with OK and go to the button „more settings“ at the
top left corner of the screen.
Select the option „brake sounds“ (user sound slot 16). Thus the
user sound slot 16 is marked as an automatic sound. The brake
sound will be played automatically during operation.
• Also select „Stop Sound“ (user sound slot 15); thus the fan will
be heard every time after braking.
12.5.4. Function mapping12.5.4. Function mapping
12.5.4. Function mapping12.5.4. Function mapping
12.5.4. Function mapping
Allocate your functions to any buttons as desired (also refer to
8.6.) by clicking the appropriate squares in the corresponding
lines respectively columns.
Here we also use the same default allocations:
• Headlights on FL(f), back-up lights on FL(r). Please make sure
that the output configuration of the lights is set to „Dimmer“
and the dimmer setting is „15“.
• Driving sounds („Sound on / off“) on F1(f) and F1 (r)
• Horn on F2 (f) and F2 (r) (e.g.: on user sound slot 1). Set the
Doppler effect for a whistle in loop mode; then you can activate
it as described in 13.1..
• Shunting speed on F6 (f) and F6 (r). It is recommended to switch
off acceleration and deceleration with the same function
button in order to assure a faster response in shunting mode.
12.5.5. Fine tuning12.5.5. Fine tuning
12.5.5. Fine tuning12.5.5. Fine tuning
12.5.5. Fine tuning
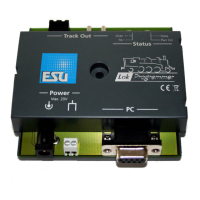
Save the project and write it onto your decoder with the aid of
your LokProgrammer.
Use the buttons ,
and .
Listen to the sounds during normal operation and fine tune
them further if necessary.
Adjust the sound volumes as described in 12.2.6.

 Loading...