13
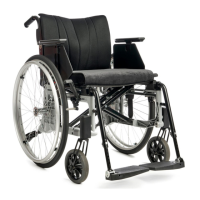
The height of the front fork can be
adjusted 4 cm up or down by loos-
ening the two attachment screws
(A and B) 1-2 turns. See position
marking (C) to obtain equal height
on both sides.
Check and adjust the angle of the
attachment and tighten the screws.
Tools: 6 mm Allen key
(a spirit level might be useful).
Risk of tipping: Always
check the setting of the
anti-tips.
(!) See also point 14:
“Alternative seat
heights/angles”.
Tools: 5 mm Allen key
and 10 mm U-spanner.
(!) Also adjust the angle of the
front fork attachments see
point6:5.
nut until it cannot be turned any
more. Loosen it 1/2-1 turn. The
spring washer then has the cor-
rect tension. It reduces the risk of
the castor starting to “wobble”.
Tools: 19 mm socket
spanner.
(!) Also adjust the angle of the
front fork attachments, see
point 6:5.
Risk of tipping: Always
check the setting of the
the anti-tips.
(!) Also adjust the angle of
the front fork attach-
ment, see point6:5.
6 Settings seat
A
B
C
A
B
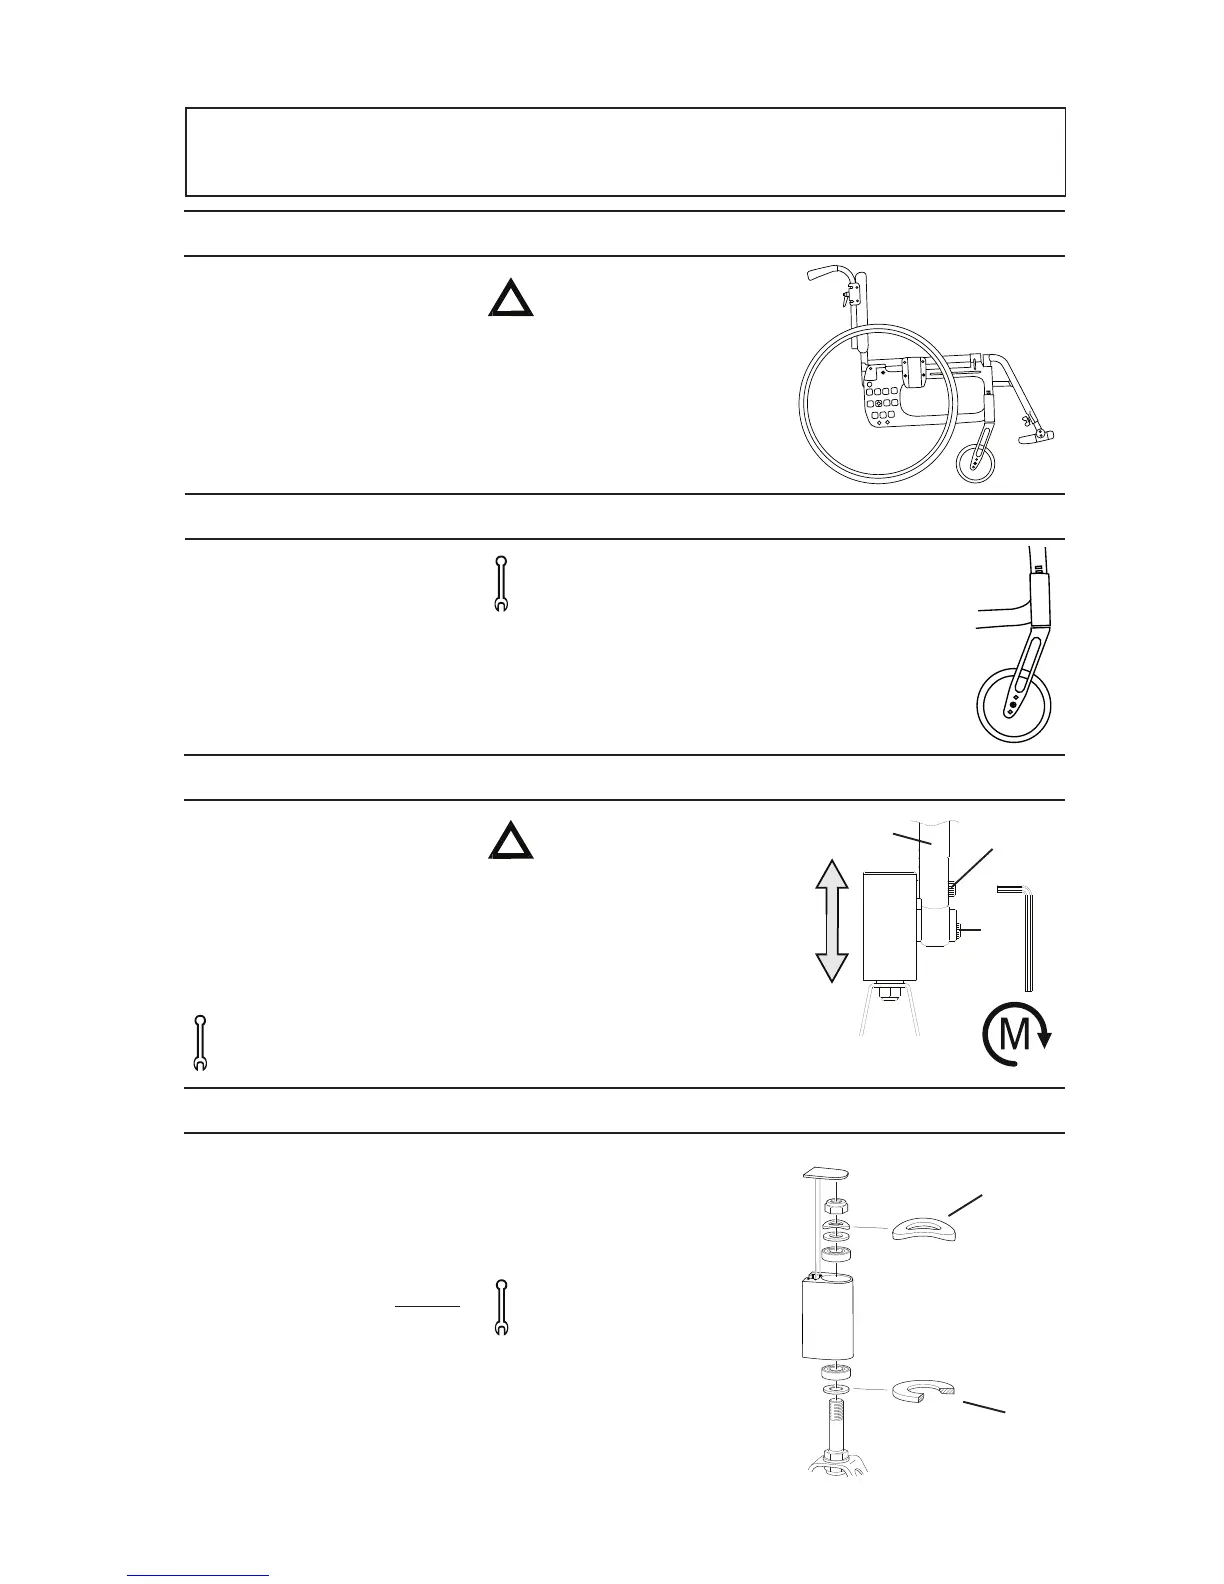
6:1 Front seat height
The front seat height (see Part
“The chairs possibilities”) is
dependent on:
Castor wheel: 5", 6", 6.5".
Front fork attachment: Settable in
height and angle.
Front fork: Short and medium
length with three alternative
height positions for the castor.
6:2 Castor wheel
The height may be adjusted by
changing the castor wheel itself
or by changing its position in the
fork. Unscrew the castor wheel
and place it at the desired height
in the front fork.
6:3 Adjusting the height of the front fork attachment
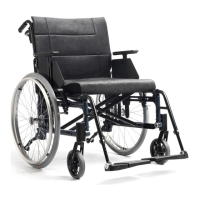
6:4 Changing front fork
Pull out the plug attachment
on the front fork attachment to
reach the retaining nut. Unscrew
the nut and pull out the front
fork. Take the washer and ball
bearings and put it on the new
fork (the bevelled side (A) towards
the fork). Insert the new fork into
the attachment. It is also impor-
tant to ensure that the washers in
the attachment (under the retain-
ing nut) are placed in the right
order, with the spring washer
(B) on top. Tighten the retaining
20Nm