ENGLISH
17
Cl prob e calibrat io n
Before performing the calibration, you must modify the PPM VALUES SCALE
parameter (see relative menu) based on the chlorine probe used.
See the instructions attached to your probe for the preliminary connection
and preparation operations of the sensor and relative maintenance.
To perform the calibration operations, you must have chlorine-free water and
then the same water with a known content of chlorine.
Attention: this procedure requires that the device be connected to an operating
Chlorine probe installed on the system. The measurement for the calibration must be
made using the plant’s water.
During the calibration, the Chlorine value (PPM) displayed on the left of the screen
is the reading value of the probe, while that displayed on the right of the screen is the
value of the solution of reference.
Install an “active carbon lter” upstream of the probe and have water flow in it for at
least 10 minutes, in order to eliminate traces of chlorine and to perform the calibration of
the rst point.
For the second point, add product and use a photometer or a DPD system to read
the PPMvalues. Then modify the valueof reference according to thatread by the manual
measurement. The following is the sequence of operations to calibrate the probe.
Cl procedure:
• Install the chlorine probe in the probe holder, ow water through the plant,
connect the probe electrically and wait for it to polarise (approximately 2 hours –
see the relative probe manual)
• Install an “active carbon lter” upstream of the plant and have water ow in it for
about 30 minutes
• Wait for the value at the left of the screen to stabilise
• Conrm by pressing OK
• Wait 90 seconds (according to displayed countdown)
• For the second point, remove the “active carbon lter” and use a DPD system to read the chlorine in the plant. Insert the read
value, shifting by using the UP/DOWN arrows (changing the value on the right of the screen) and conrm by pressing OK.
• Wait 90 seconds (according to displayed countdown)
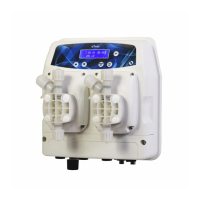
MANUAL MODE SETTING MENU
This configuration is present in all versions. The dosing pump operates at a frequency pre-established by the user
and is included in the following ranges:
• 0 ÷ 120 pulses / minute (electromagnetic pump)
• 0 ÷ 100% (peristaltic pump) (motor cycle time 300s.)
During the operational phase of the manual function, it is possible to display the pulses / minute (electromagnetic pump), the percentage
of dosage (peristaltic).
To enter the manual function, place the instrument in PAUSE mode, by pressing the keys simultaneously
.
Press UP arrow to put the LEFT pump in hand, or the DOWN arrow for the RIGHT pump.
Only one pump or both can be placed in MANUAL at a time.
Use the arrows to make the adjustment. Press the OK button and then the ESC button. The selected pump will go to the frequency /
percentage established by the user.
To exit the MANUAL function, and return to the instrument function (pumps controlled by the measurement of the probes),
just press the ESC key.