ETC Setup Guide
Eos Rackmount Devices
Eos Rackmount Devices Page 2 of 12 ETC
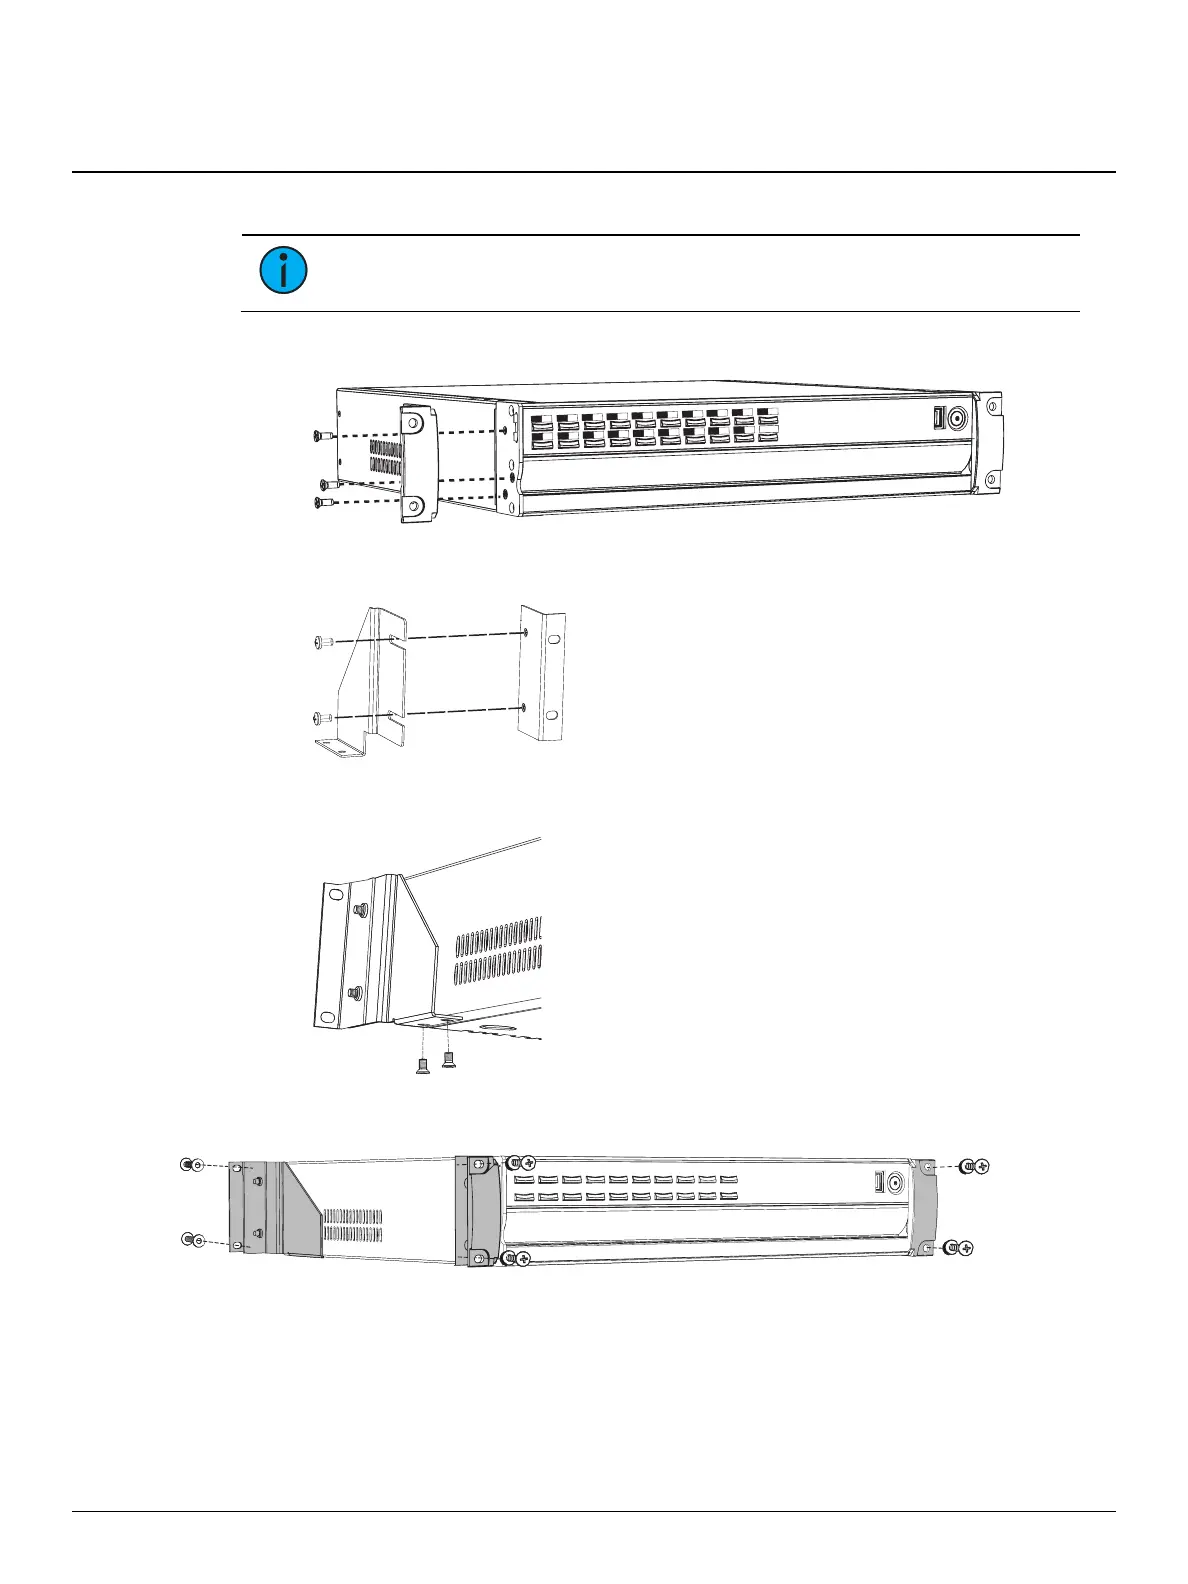
Installing Mounting Hardware
Note:
If you wish to change the label strips of an Ion Xe RPU, you must do
so before attaching the rack mounting brackets.
1. Align a front bracket to the appropriate side of the unit and secure using three M5 x 12mm
screws.
Primary
Backup
Client
Master
Sync
Of
fline
2. Repeat to install the opposite side front bracket.
3. Attach a rear bracket to a rail adapter with two 10-30 x 1/2 screws.
4. Align the new rear bracket assembly to the appropriate side of the unit and secure using two
6-32 x 1/4 screws.
5. Repeat to assemble and install the opposite side rear bracket assembly.
6. Use the remaining hardware to secure the unit into the 19" rack enclosure.
Primary
Master
Backup
Sync
Client
Of
fline
Desktop Use - Installing Rubber Feet
All Eos Family rackmount devices also ship with four rubber feet for desktop use.
1. Locate the four rubber feet and four accompanying M3-0.5 x 6mm screws.
2. Align a foot with one of the four recessed circles in each corner of the bottom of the device,
and secure with one M3-0.5 x 6mm screw.
3. Repeat to install the other three feet.
 Loading...