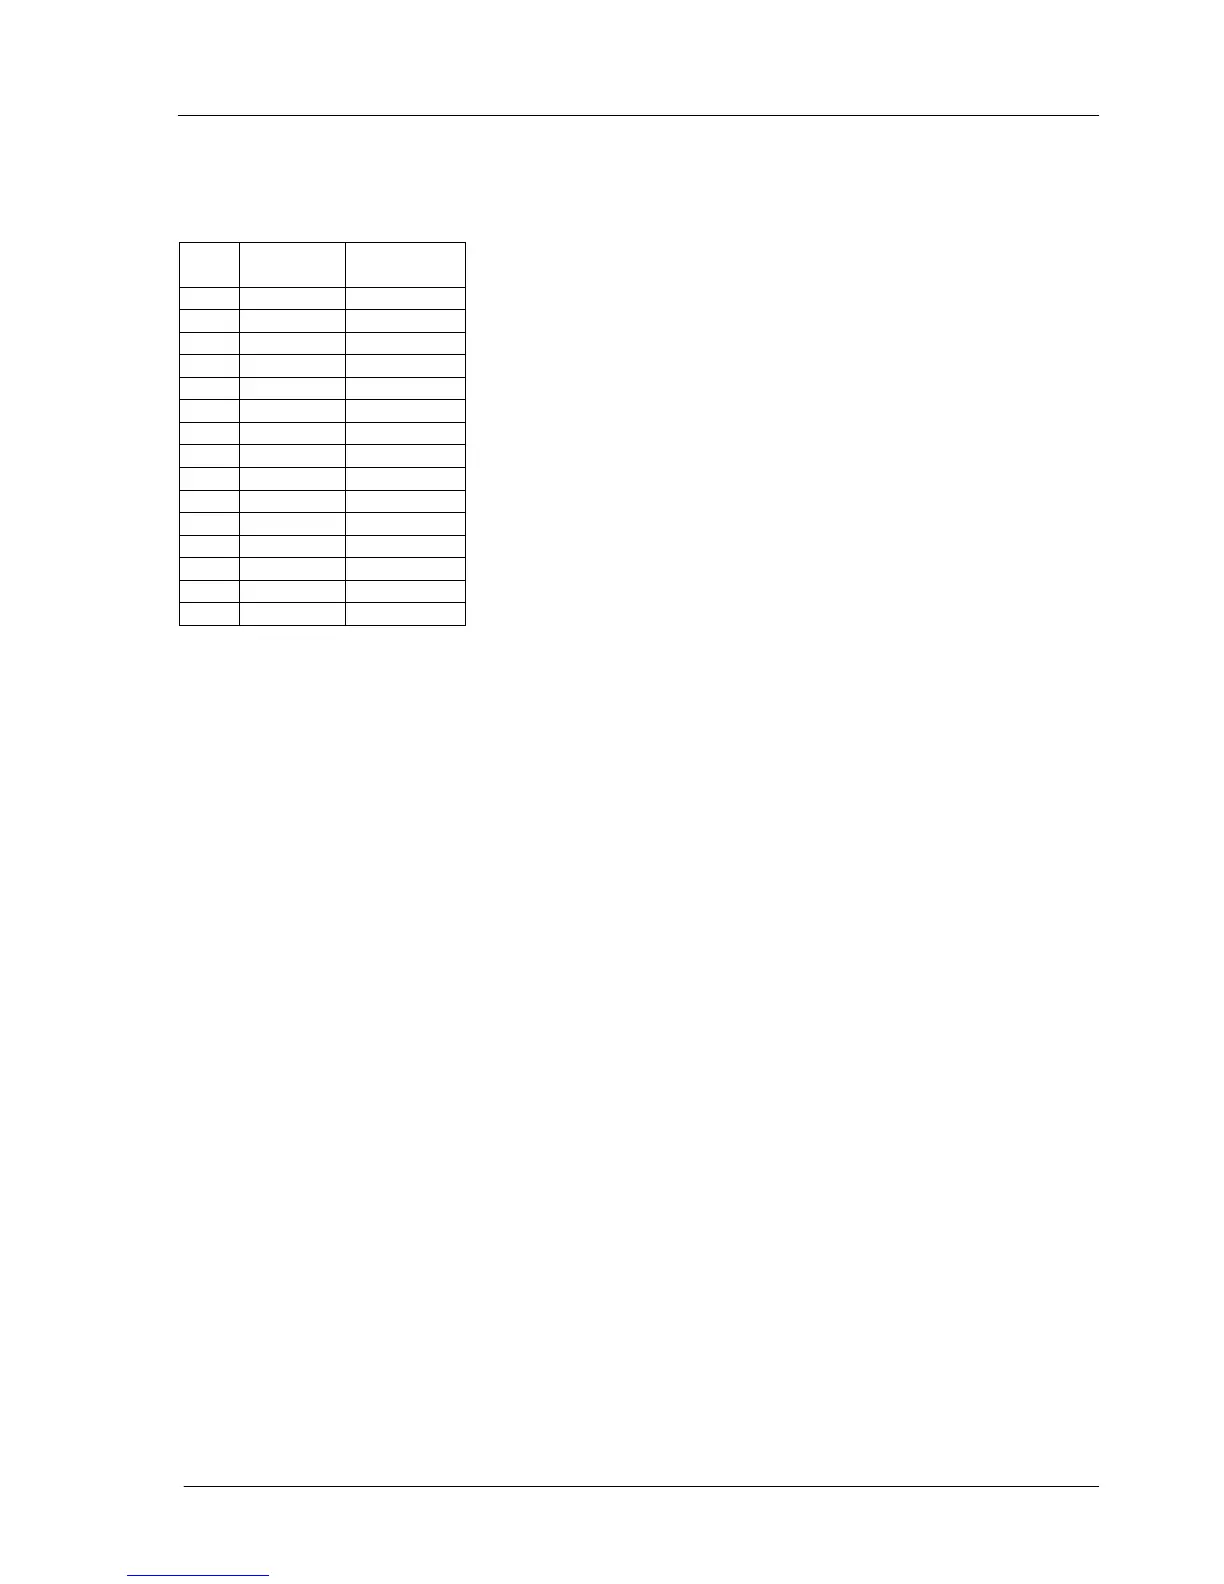
kW
Ethos 54C
kW
99% 36 54
95% 34 51
90% 32 49
85% 31 46
80% 29 43
75% 27 41
70% 25 38
65% 23 35
60% 22 32
55% 20 30
50% 18 27
45% 16 24
40% 14 22
35% 13 19
30% 11 16
1. An OpenTherm® clock thermostat with a built-in outside temperature control and outside temperature
sensor**
Connect the OpenTherm® thermostat to terminals 1 and 2 of the terminal block in the boiler.
Connect the outside temperature sensor to terminals 5 and 6 of the terminal block in the boiler. Except for adjusting
the combustion line, which is pre-programmed by the manufacturer, no parameters have to be modified.
** The proper operation of this installation depends on the OpenTherm® room thermostat.
If this thermostat supports burner line control, the outside temperature is processed and set by the thermostat control.
2. Connecting a room or clock thermostat to the boiler
• Connect the room thermostat to terminals 3 and 4 of the terminal block in the boiler.
• Except for adjusting the values pre-programmed by the manufacturer, no parameters have to be modified.
3. Connecting an OpenTherm® (clock) thermostat to the boiler
• Connect the OpenTherm® thermostat to terminals 1 and 2 of the terminal block in the boiler.
• Except for adjusting the values pre-programmed by the manufacturer, no parameters have to be modified.
5.6 Filling and bleeding the boiler and installation
Fill the central-heating boiler and heating installation by using the filling and drain cock in the installation.
The filling pressure must be 1 to 1.5 bar.
The following points must be considered to prevent corrosion of the central heating installation:
a. The CH system water should be treated to give neutral pH value, +/-7. Only use approved additives.
b. Thoroughly flush the central heating installation
c. If plastic pipes are used, they must be of an oxygen diffusion barrier and be suitable for central heating systems, in
according with DIN 4726/4729. If they are not, make a separation between the boiler circuit and the circuit with
plastic pipes.
d. Check the circuit for leaks.
After filling the installation and boiler, bleed the heat exchanger once before the first commissioning. To do so, open
the bleeder on the upper left side one full turn. As soon as water starts to pour out of the bleeder, close it again.
The wall boiler is equipped with an automatic bleeder at the top of the circulation pump.
Shortly after commissioning the appliance, check the filling pressure. If necessary, add water to maintain the
required pressure. The wall boiler's electric control has a special start-up programme for bleeding the appliance. This