12
After Sales Support
(AU) 1300 886 649 (NZ) 0800 836 761 | info@tempo.org
Getting Started (Cont.)
• Drill four holes in the wall, insert the four wall plugs into the holes, then use
the screws to attach the wall-mounting bracket to the wall.
• Attach the lower (small) fixing bracket to the base of the flame effect heater
using the two small black screws supplied; ensure the bracket is fitted so
that it is level with the back.
Wall-mounting the heater body
• Carefully lift the heater up, ensuring that the top rear ledge of the heater
engages with the wall-mounting bracket (see the section circled in Fig. 3)
and is sitting centrally. This process should be carried out by two people
to avoid injury or damage to property or the appliance.
• Gently bring the heater down against the wall.
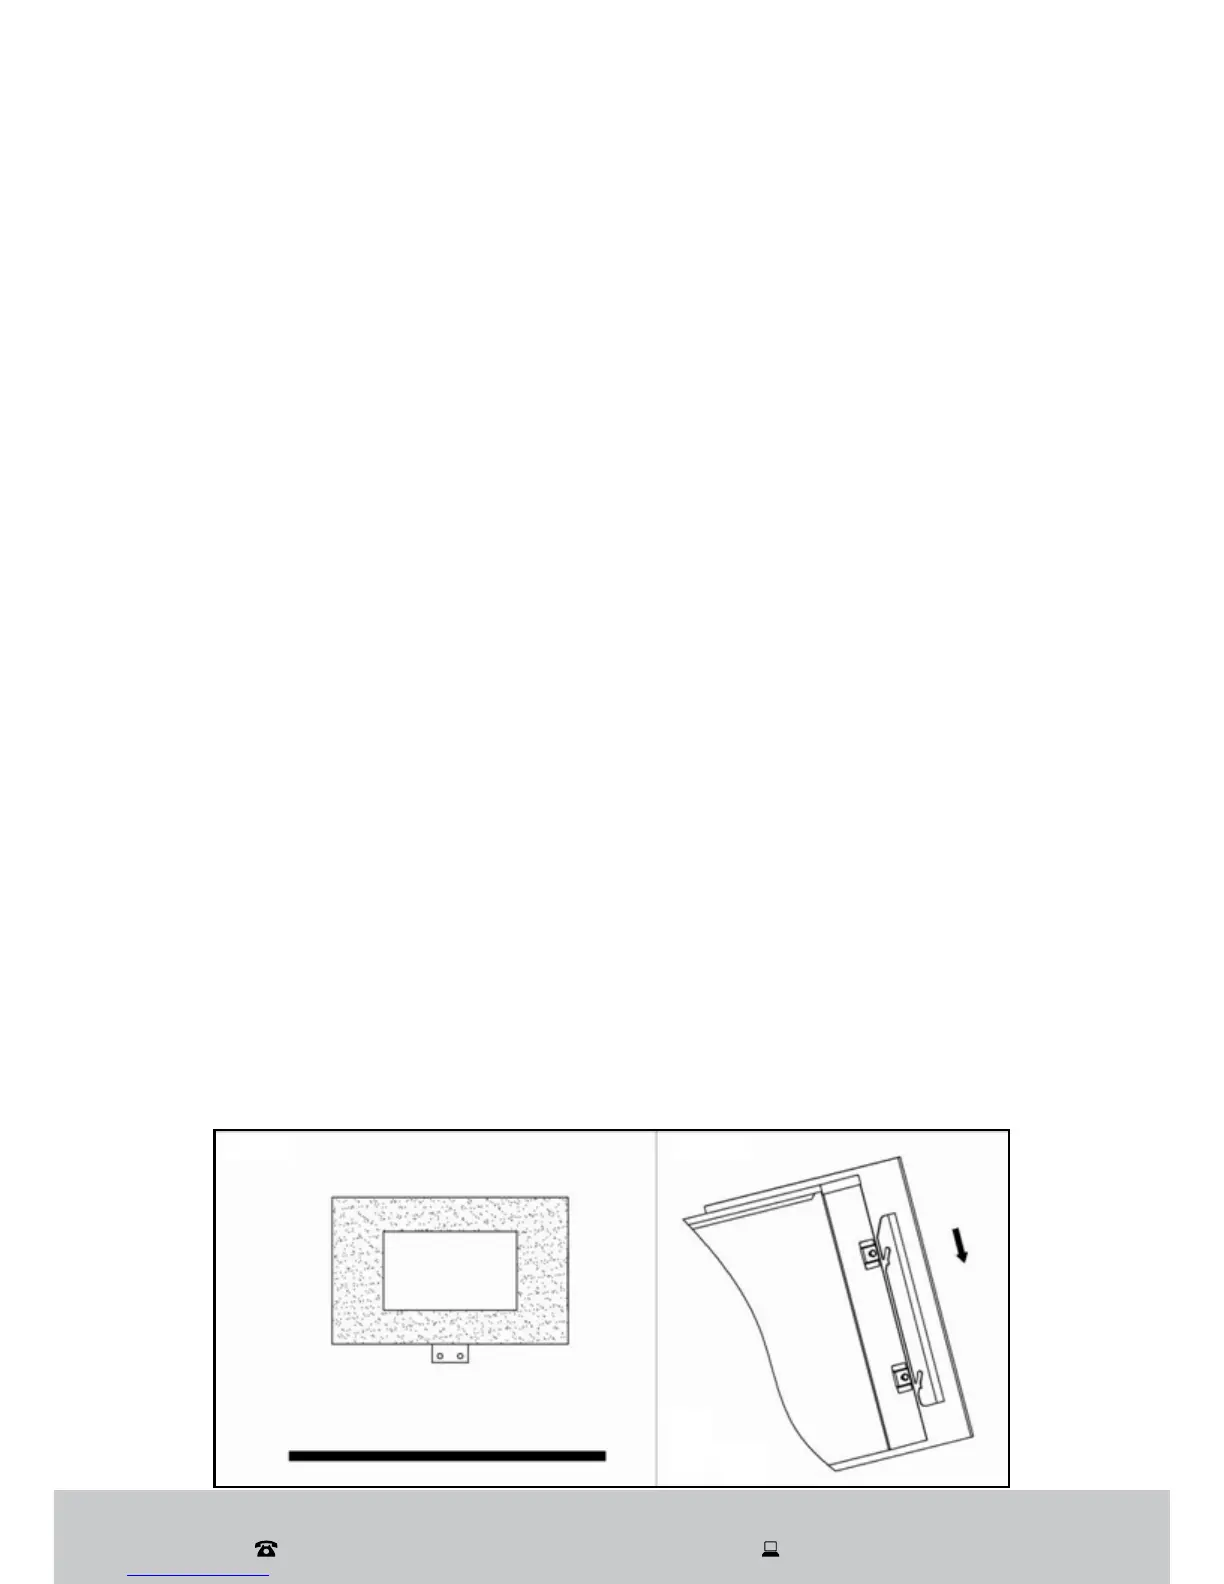
• Mark the positions for the two screws holes in the lower fixing bracket on the
wall (Fig. 4), then remove the heater.
• Drill two holes in the wall with an electric drill and a No 6 drill bit and insert
two wall plugs into the holes.
• Refit the heater to the wall and fasten the bottom fixing bracket to the wall
using the two screws provided to permanently fix the heater in place.
Finishing the installation
• Unpack the pebbles from the bag and place them along the light unit in the
desired position.
• Before attaching the glass panel, make sure the inside of the panel is clean
and free of fingerprints. Reinstall the panel over the front of the heater,
aligning the slots in the brackets at each side of the panel with the lugs on
the sides of the heater (Fig. 5). Again, two people will be required for this
operation. Fasten the glass panel using the small screw you removed at
the start of the installation process (see Fig. 2). Then remove the protective
plastic film from the glass panel and wipe off any fingerprints.
Fig. 4 Fig. 5