14
After Sales Support
(AU) 1300 886 649 (NZ) 0800 836 761 | tempo.org/support
Installation
Installation of the indoor unit
• Before starting installation, decide on the position of the indoor and outdoor
units, taking into account the minimum space required around the units.
• Install the indoor unit in the room to be air conditioned.
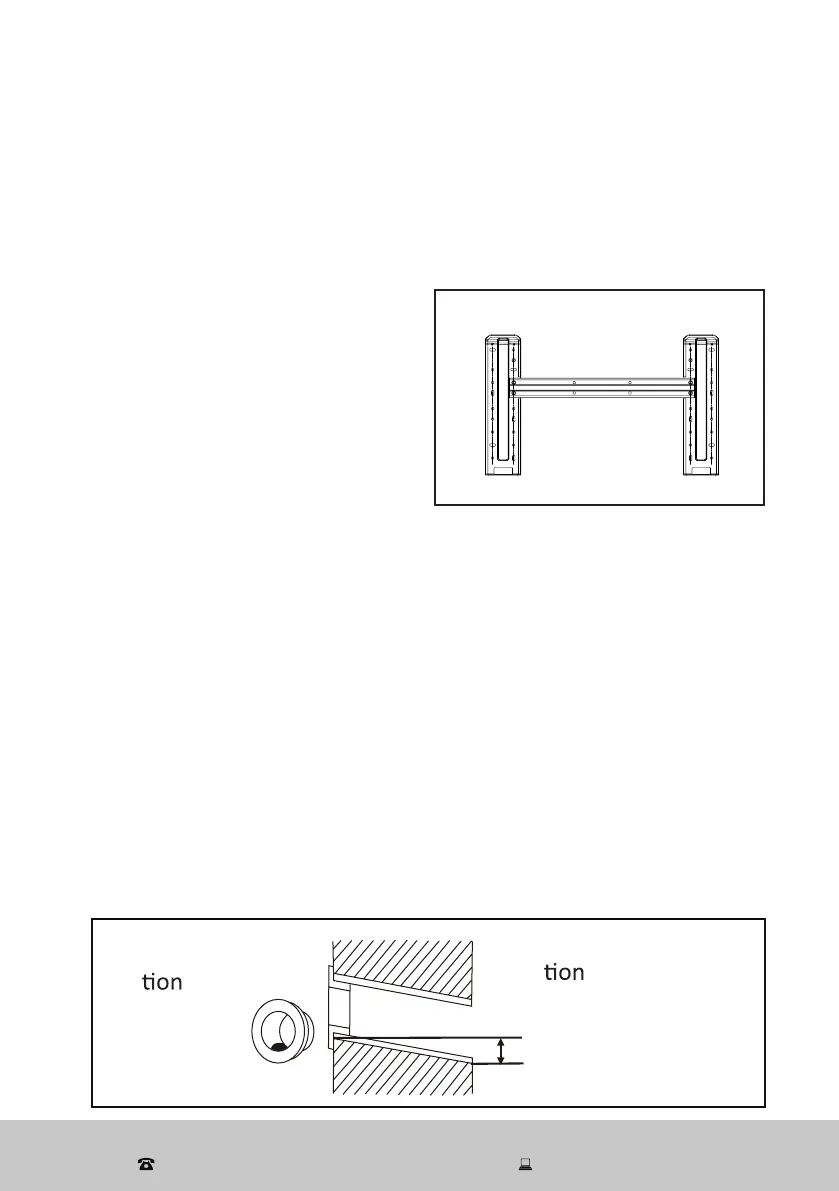
Installing the mounting plate
• Remove the mounting plate from the
back of the indoor unit.
• Use a spirit level to put the mounting
plate in a perfectly level position
vertically and horizontally.
• Drill 32 mm deep holes in the wall to
fix the plate in place. Use a drill bit
to fit the plugs supplied.
• Insert the plastic anchors into the
hole.
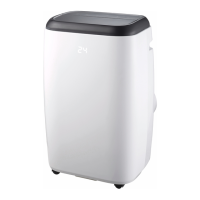
Drilling a hole in the wall for the piping
• Decide where to drill the hole in the wall for the piping, if necessary, based
on the position of the mounting plate.
• Drill the hole (70 mm in diameter) in the wall at a slight downward slant
towards the exterior side (Fig. 8).
• Install a wall sleeve and a wall sleeve cover (optional products) through the
hole in the wall to keep the connection piping and wiring intact and clean.
CAUTION! The hole must slope downwards towards the exterior.
Keep the drain pipe down towards the direction of the wall hole, otherwise
leakage may occur.
70 mm
• Fix the mounting plate by using the provided tapping screws.
• Make sure that the mounting plate is firmly fixed in place, and can withstand
the weight of the indoor unit.
Wall sleeve
(Op
al)
5-10mm
Wall sleeve Cover
(Op
al)
Outdoor
Indoor
Fig. 7
Fig. 8