19
After Sales Support
(AU) 1300 886 649 (NZ) 0800 836 761 | tempo.org/support
Installation of the outdoor unit
• The outdoor unit should be installed on a flat, even area on the ground
where it can operate free of vibrations. It may also be installed on a solid
wall and fastened securely using suitable brackets (not supplied).
• Before connecting pipes and cables, decide on the best position on the
wall, leaving enough space for easy maintenance.
• Fasten the support to the wall using screw anchors that are suited to the
type of wall being used.
• Use the largest size wall anchors that will suit the size and weight of the
unit, keeping in mind that the mounting will need to support the weight and
vibration of the unit for many years to come, without loosening.
• The unit must be installed following all relevant local regulations.
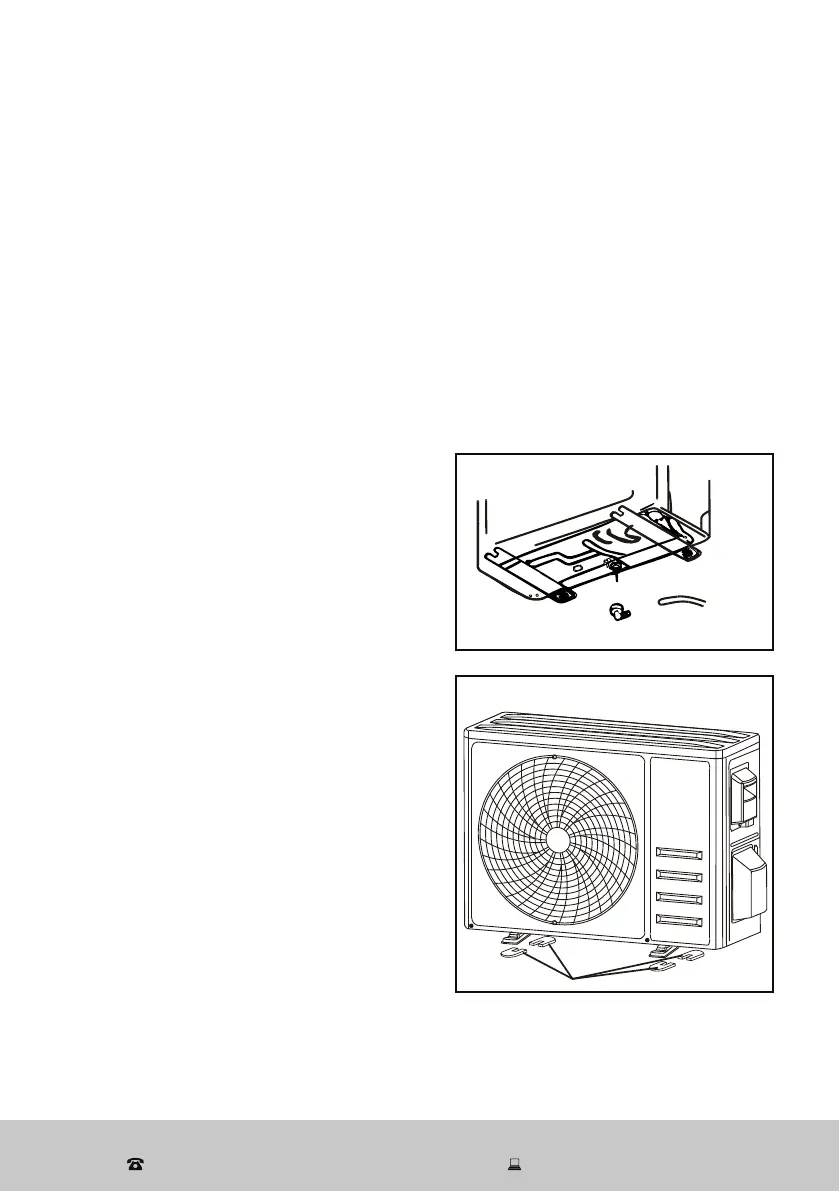
Water drainage from the outdoor
unit
Condensed water and ice formed in the
outdoor unit while in heating mode can
be drained away through a drain pipe.
• Fasten the drain port in the 25mm
hole placed in the part of the unit, as
illustrated (Fig. 17).
• Connect the drain port and the drain
pipe.
• Make sure that water is drained into a
suitable location.
• Optionally, you may also like to attach
four rubber gaskets to the base of
the appliance, to help cushion any
vibrations (Fig. 18).
Installation (Cont.)
Drainage joint
Drainage hose
Fig. 17
Fig. 18