18
After Sales Support
(AU) 1300 886 649 (NZ) 0800 836 761 | tempo.org/support
Installation (Cont.)
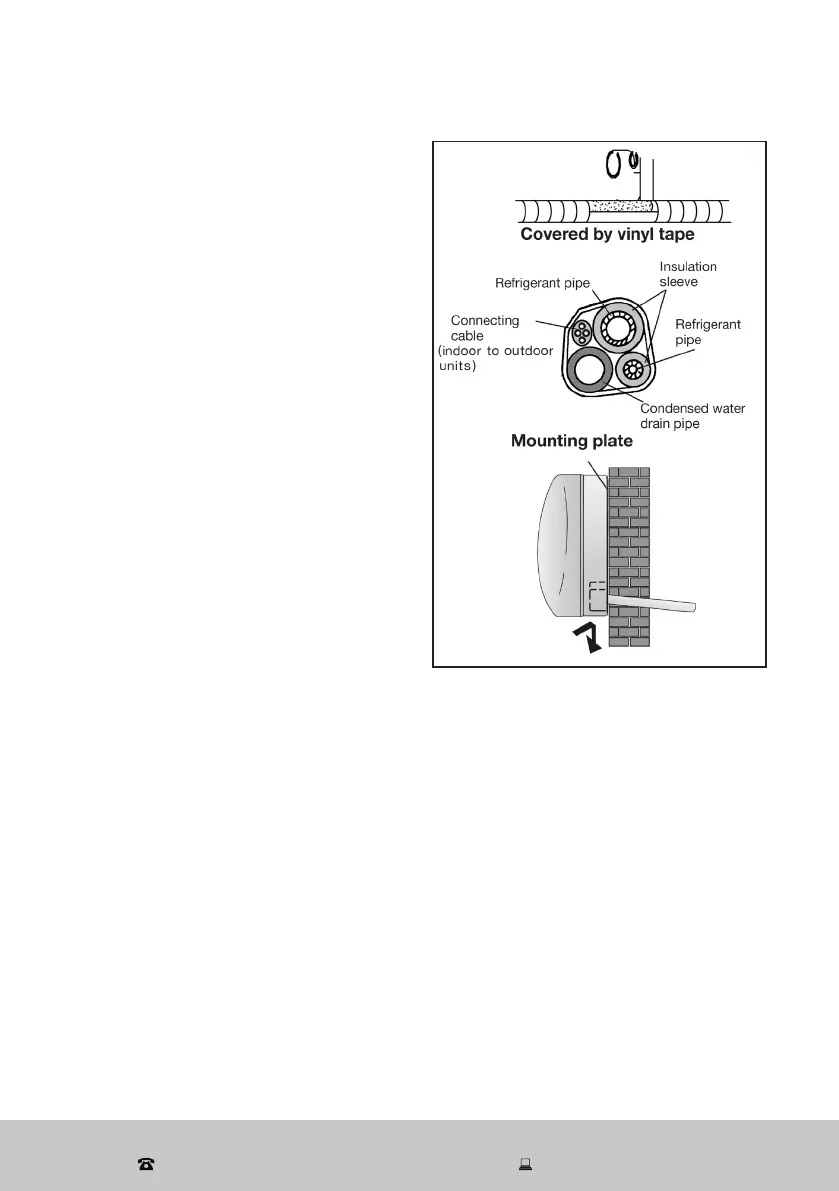
After having connected the pipe
according to the instructions, install
the connection cables, then the drain
pipe (Fig. 16). After connection, lag
the pipe, cables and drain pipe with
the insulating material.
• Arrange the pipes, cables and drain
hose as shown in Fig. 16.
• Lag the pipe joints with insulating
material, securing it with vinyl tape.
• Run the bound pipe, cables and
drain pipe through the wall hole
and hook the top of indoor unit on
the mounting plate.
• Apply slight pressure to the left
and right sides of the indoor unit,
ensuring it is hooked firmly in
place.
• Push down the bottom of indoor
unit until it attaches to the hooks of
the mounting plate, and make sure
it is firmly hooked in place.
• Sometimes, if the refrigerant pipes were already embedded in the wall, or if
you want to connect the pipes and wires on the wall, follow the instructions
below:
• Hook the top of the indoor unit on the mounting plate without piping
and wiring.
• Lift the indoor unit opposite the wall, unfold the bracket on the
mounting plate. Use this bracket to prop up the indoor unit.
• Follow the same steps for connecting the refrigerant piping, wiring, and
drainage hose, and wrap them as outlined above.
Fig. 16