22
After Sales Support
(AU) 1300 886 649 (NZ) 0800 836 761 | tempo.org/support
Installation (Cont.)
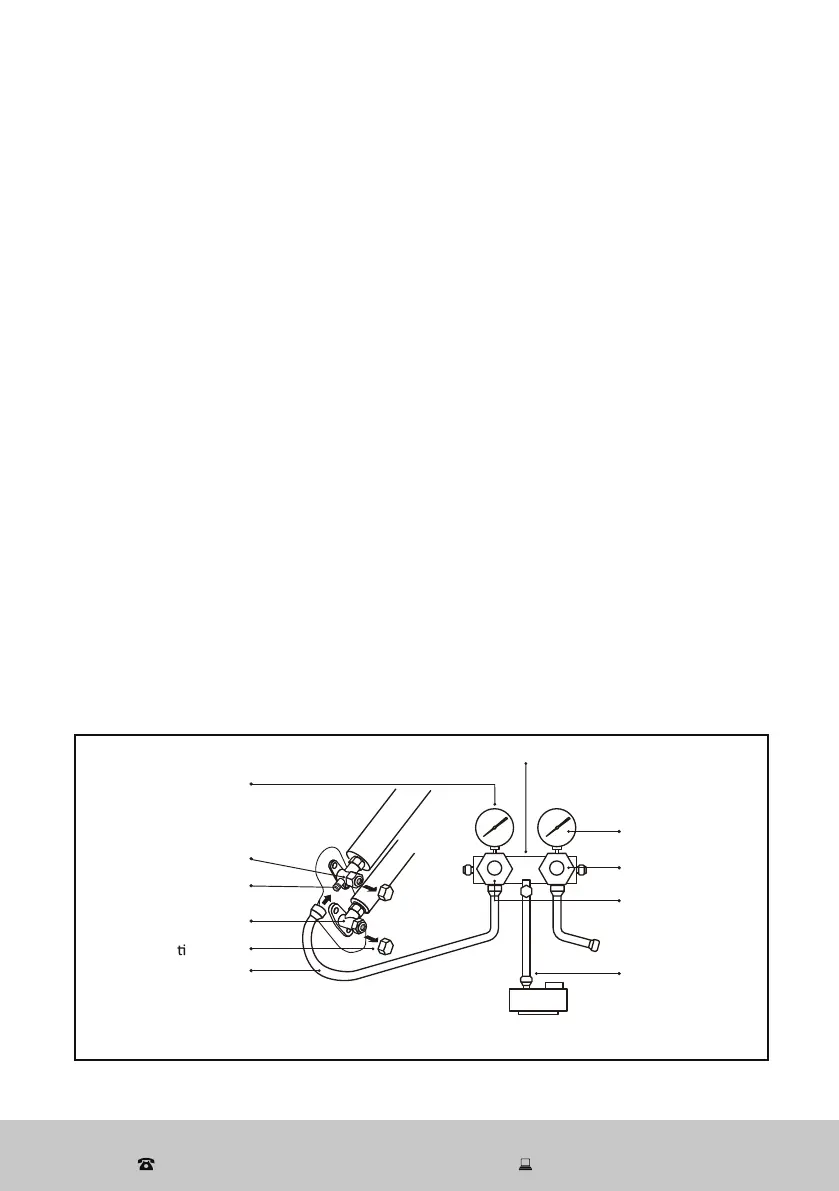
Bleeding
Air and humidity left inside the refrigerant circuit can cause compressor
malfunction. After having connected the indoor and outdoor units, bleed the
air and humidity from the refrigerant circuit by using a vacuum pump (Fig. 21).
Detailed instructions follow below.
• Use a spanner to remove the protective caps from the service port, as well
as the low and high pressure valves of the outdoor unit.
• Connect the pressure hose of manifold gauge to the service port on the
outdoor unit’s low pressure valve.
• Connect the charge hose from the manifold gauge to the vacuum pump.
• Open the low pressure valve of the manifold gauge and close the high
pressure valve.
• Do not let this system run for more than 15 minutes, and ensure the
compound gauge indicates -0.1 MPa (-76 cm Hg)
• Close the low pressure valve of the manifold gauge and turn off the
vacuum.
• Hold the pressure for five minutes, ensuring that the rebound of compound
gauge pointer does not exceed 0.005 MPa.
• Open the low pressure valve counterclockwise 1/4 turn with hexagonal
wrench to let a little refrigerant fill in the system. Close the low pressure
valve after five seconds and quickly remove the pressure hose.
• Check all indoor and outdoor joints for leakage with soapy water or leak
detector (see page 24 for instructions on leak detection).
Compound gauge
Low pressure valve
Valve protec ve caps
Pressure hose
Pressure gauge
High pressure valve
Charge hose
High pressure valve
Low pressure valve
Vacuum pump
Service port
Manifold gauge
Fig. 21