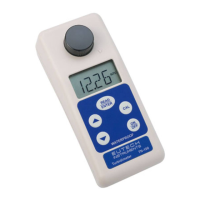
Instruction Manual TN-100/ T-100
6
2.3 Calibration Procedure
1. Place TN-100/ T-100 turbidimeter on a flat and level surface.
2. Insert the CAL 1 standard (800 NTU) into the sample well, aligning the mark on
the vial with the mark on the meter. See
Figure 10 on page 12.
3. Press down vial until it snaps fully into the instrument.
4. Cover the vial using the light shield cap.
5. Press ON/OFF key to switch the on the meter. The meter goes to measurement
mode after the power-up sequence.
6. Select the calibration function of the instrument by pressing the CAL key once.
The “CAL” annunciator blinks momentarily and the meter prompt for the first
calibration standard “CAL 1 800 NTU”.
7. Press READ/ENTER key.
8. The “CAL 1 800 NTU” annunciator blinks for about 12 seconds while the
instrument performs calibration of CAL 1 point. When the instrument has
completed calibration for this point, it prompts you to insert the next calibration
standard into the sample well “CAL 2 100 NTU”.
9. Repeat the calibration for CAL 2, CAL 3 & CAL 4 calibration standards.
10. After you successfully calibrate the CAL 4 standard (0.02 NTU), the display
shows “STbY”.
11. The meter is now ready for measurement.
Figure 5 shows the complete calibration sequence.
NOTES:
1. If you wish to exit the calibration mode you may do so at the end
of any step by pressing the CAL key. The meter accepts only the
values calibrated prior to exiting.
2. You can skip a calibration point by pressing ▲ or ▼ keys and
move on to the next calibration point.
3. After a successful calibration of one point, the meter
automatically selects the next calibration point. The meter
automatically exits calibration mode after the fourth calibration
point.
4. If an error occurs during calibration, the display shows an error
message. The meter aborts calibration and returns to the
measurement mode without saving the last calibration value.
5. For a list of error messages, refer to Section 4: Troubleshooting
Guide on page 15.

 Loading...