PAGE
17/18
www.evb.com
3.7.5. Set the Operating Current
After installation, users can set the maximum operating current of the EV charger in the APP, Please refer to APP manual for details.
●
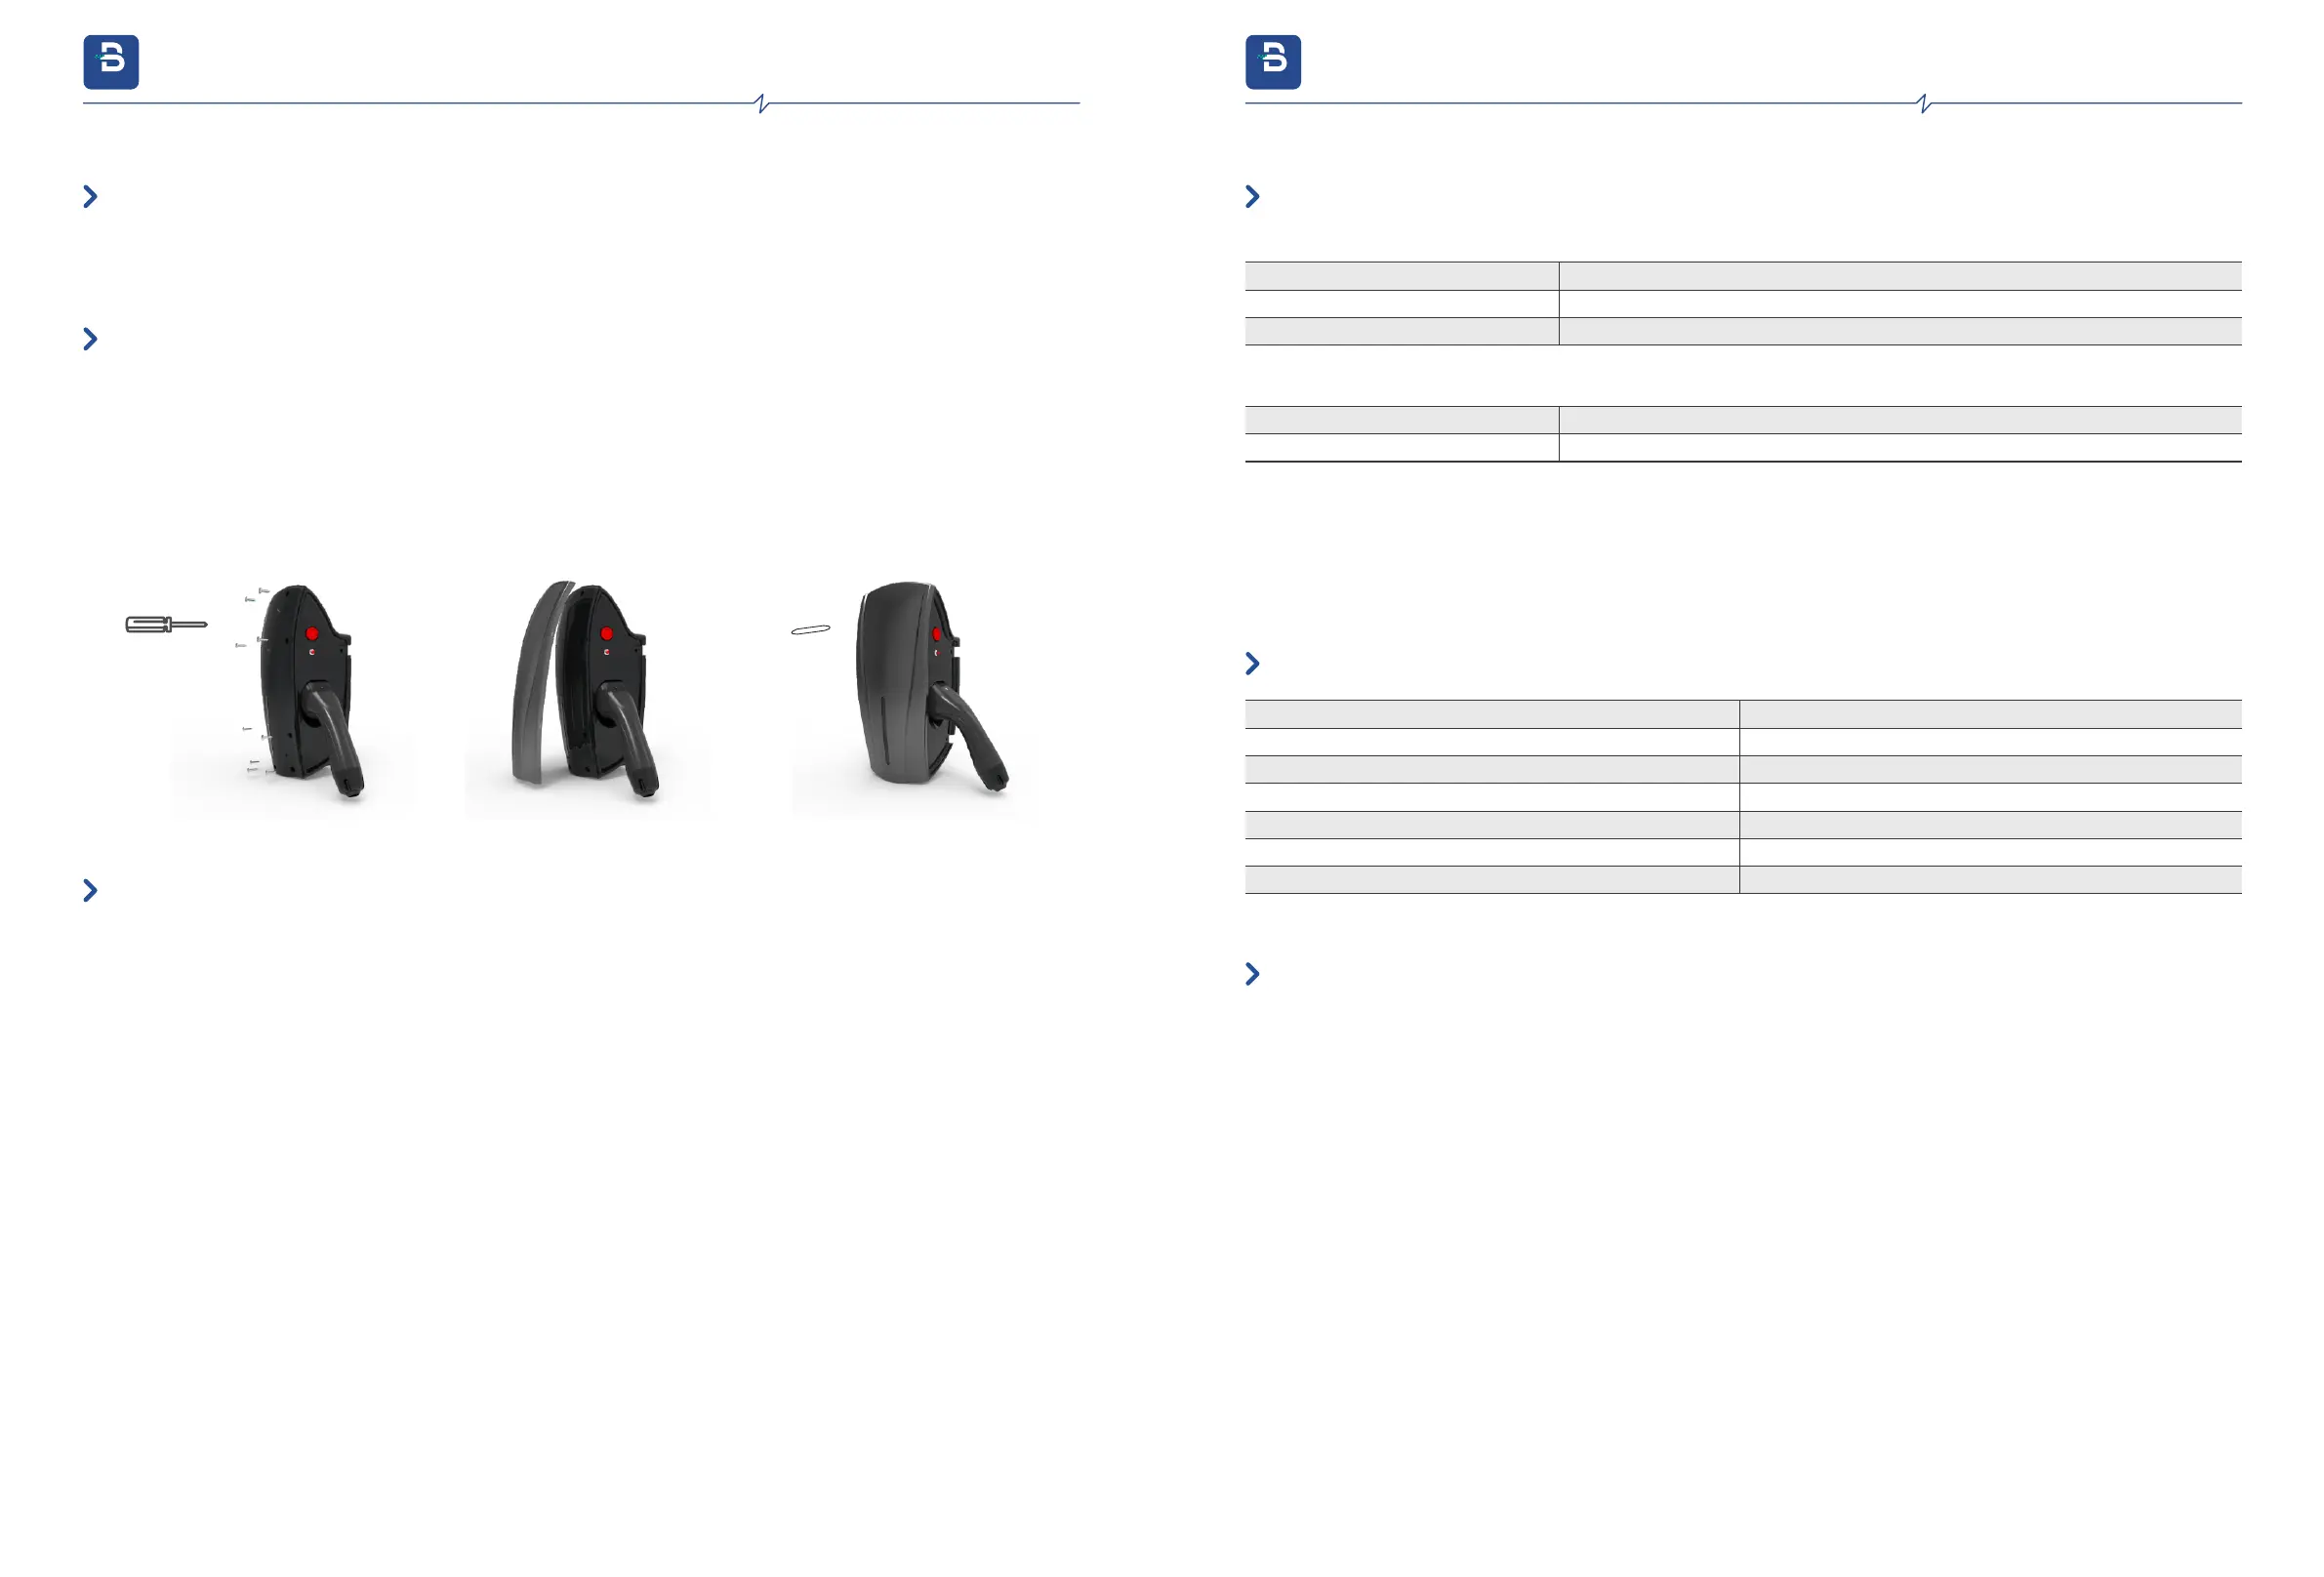
①. Use a screwdriver to lightly secure the sealing cover by installing only the top screws at (1.5NM-2.0NM )torque.
②. After sealing cover fixing, put the facia on and fix it on the sealing cover.
③. If you need to open the front cover, change the internal settings, please use the ④plastic lifter to unclench along the edge of the cover.
④. Recommend to install a circuit breaker 40A/2P 30MA.
●
●
●
●
①
②
③
④
3.7.6. Reinstall the Sealing Cover and Turn on Power
3.8 SIM Card Installation
Note:Ifyouneedtouse4Gmode,pleaseinstallaMicroSIMcard
●
Rest button on PCB Long press for 5s Reset the charger password (Wi-Fi Ap Password and OCPP configuration Password)
To restore the charger to be default settings, after press the emergency stop button and long press the reset button for 20S to achieve.
Press the emergency button while powering on again the EV charge. Then start the OCPP configuration process.
Press
Long Press
Leakage test
WPS mode works, search for WPS and pair.
●
●
●
Function test button
●
Press
Button ejecting
Button ejected
Emergency stop button
Stop the charging
Fixing faults
In operating
4.1. Buttons On Charger
●
4.2. Buzzer
Swipe the RFID card to start the authentication successfully
One Short Beep
Two Short Beeps
Five Short Beeps
One Long Beep
One Long Beep
Two Short Beeps
One Long Beep
Swipe the RFID card to stop the authentication successfully
RFID card authentication failed
Enter server configuration mode
Server parameters are configured successfully
Server parameter configuration failed
Leakage test in progress
4.3. Dynamic Load Balancing Kit
The Dynamic Load Balancing Kit is suitable for home charging use. Connect the DLB kit with the charger, to active the DLB function
automatic. Disconnect the DLB kit with the charger, to off-line the DLB function automatic.
●
4. Operating instructions
evb.com
3. Installation Instructions
evb.com