www.evb.com
3.5. Power Supply
●
230V single-phase power supply
For single-phase EV charger, a single-phase wire (L), Neutral and earth wire must be connected. The phase
voltage between the Line and Neutral wires should be 230V.
For 3-phase EV charger, connect the single phase wire (L1), the neutral wire and the earth wire do not connect
the other phase wires (L2 or L3). The phase voltage between the line and neutral wires should be 230V.
400V three-phase power supply with neutral line
If three phases are applied, all three phases (L1, L2 and L3) and the neutral line should be connected to each
other and the voltage of each phase to the neutral line should be 230V.
●
●
L
N
PE
230V
L1
L2
L3
230V
N
PE
230V
L1
L2
L3
230V
N
PE
400V
230V
230V
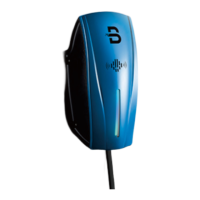
3.6. Accessories List
X1
Water-proof cover
① ② ③ ④
⑤ ⑥ ⑦ ⑧
⑨ ⑩
EV charger
X1
Wire box (optional) Mounting bracket RFID card (optional)
X1 X1 X2
M32*1.5 cable gland
X1
M6*8 screws 8*40 socket head
screws and anchorings
X4 X6
X1
Position template
X1
DLB box (optional) Plastic lifter
X1 X1
11
Note:CardtypesupportedbyRFID:RFcardISO14443TypeA,MIFARE®ONE(MF1)card,with theread-writefrequencyof13.56MHz±7K.
wall
≥0.5M
~1.2M
Floor Level
Drill
Side of wall
The 6 points
on the position
plate
wall
screwdriver
Mounting
bracket
8*40
Expansion bolts
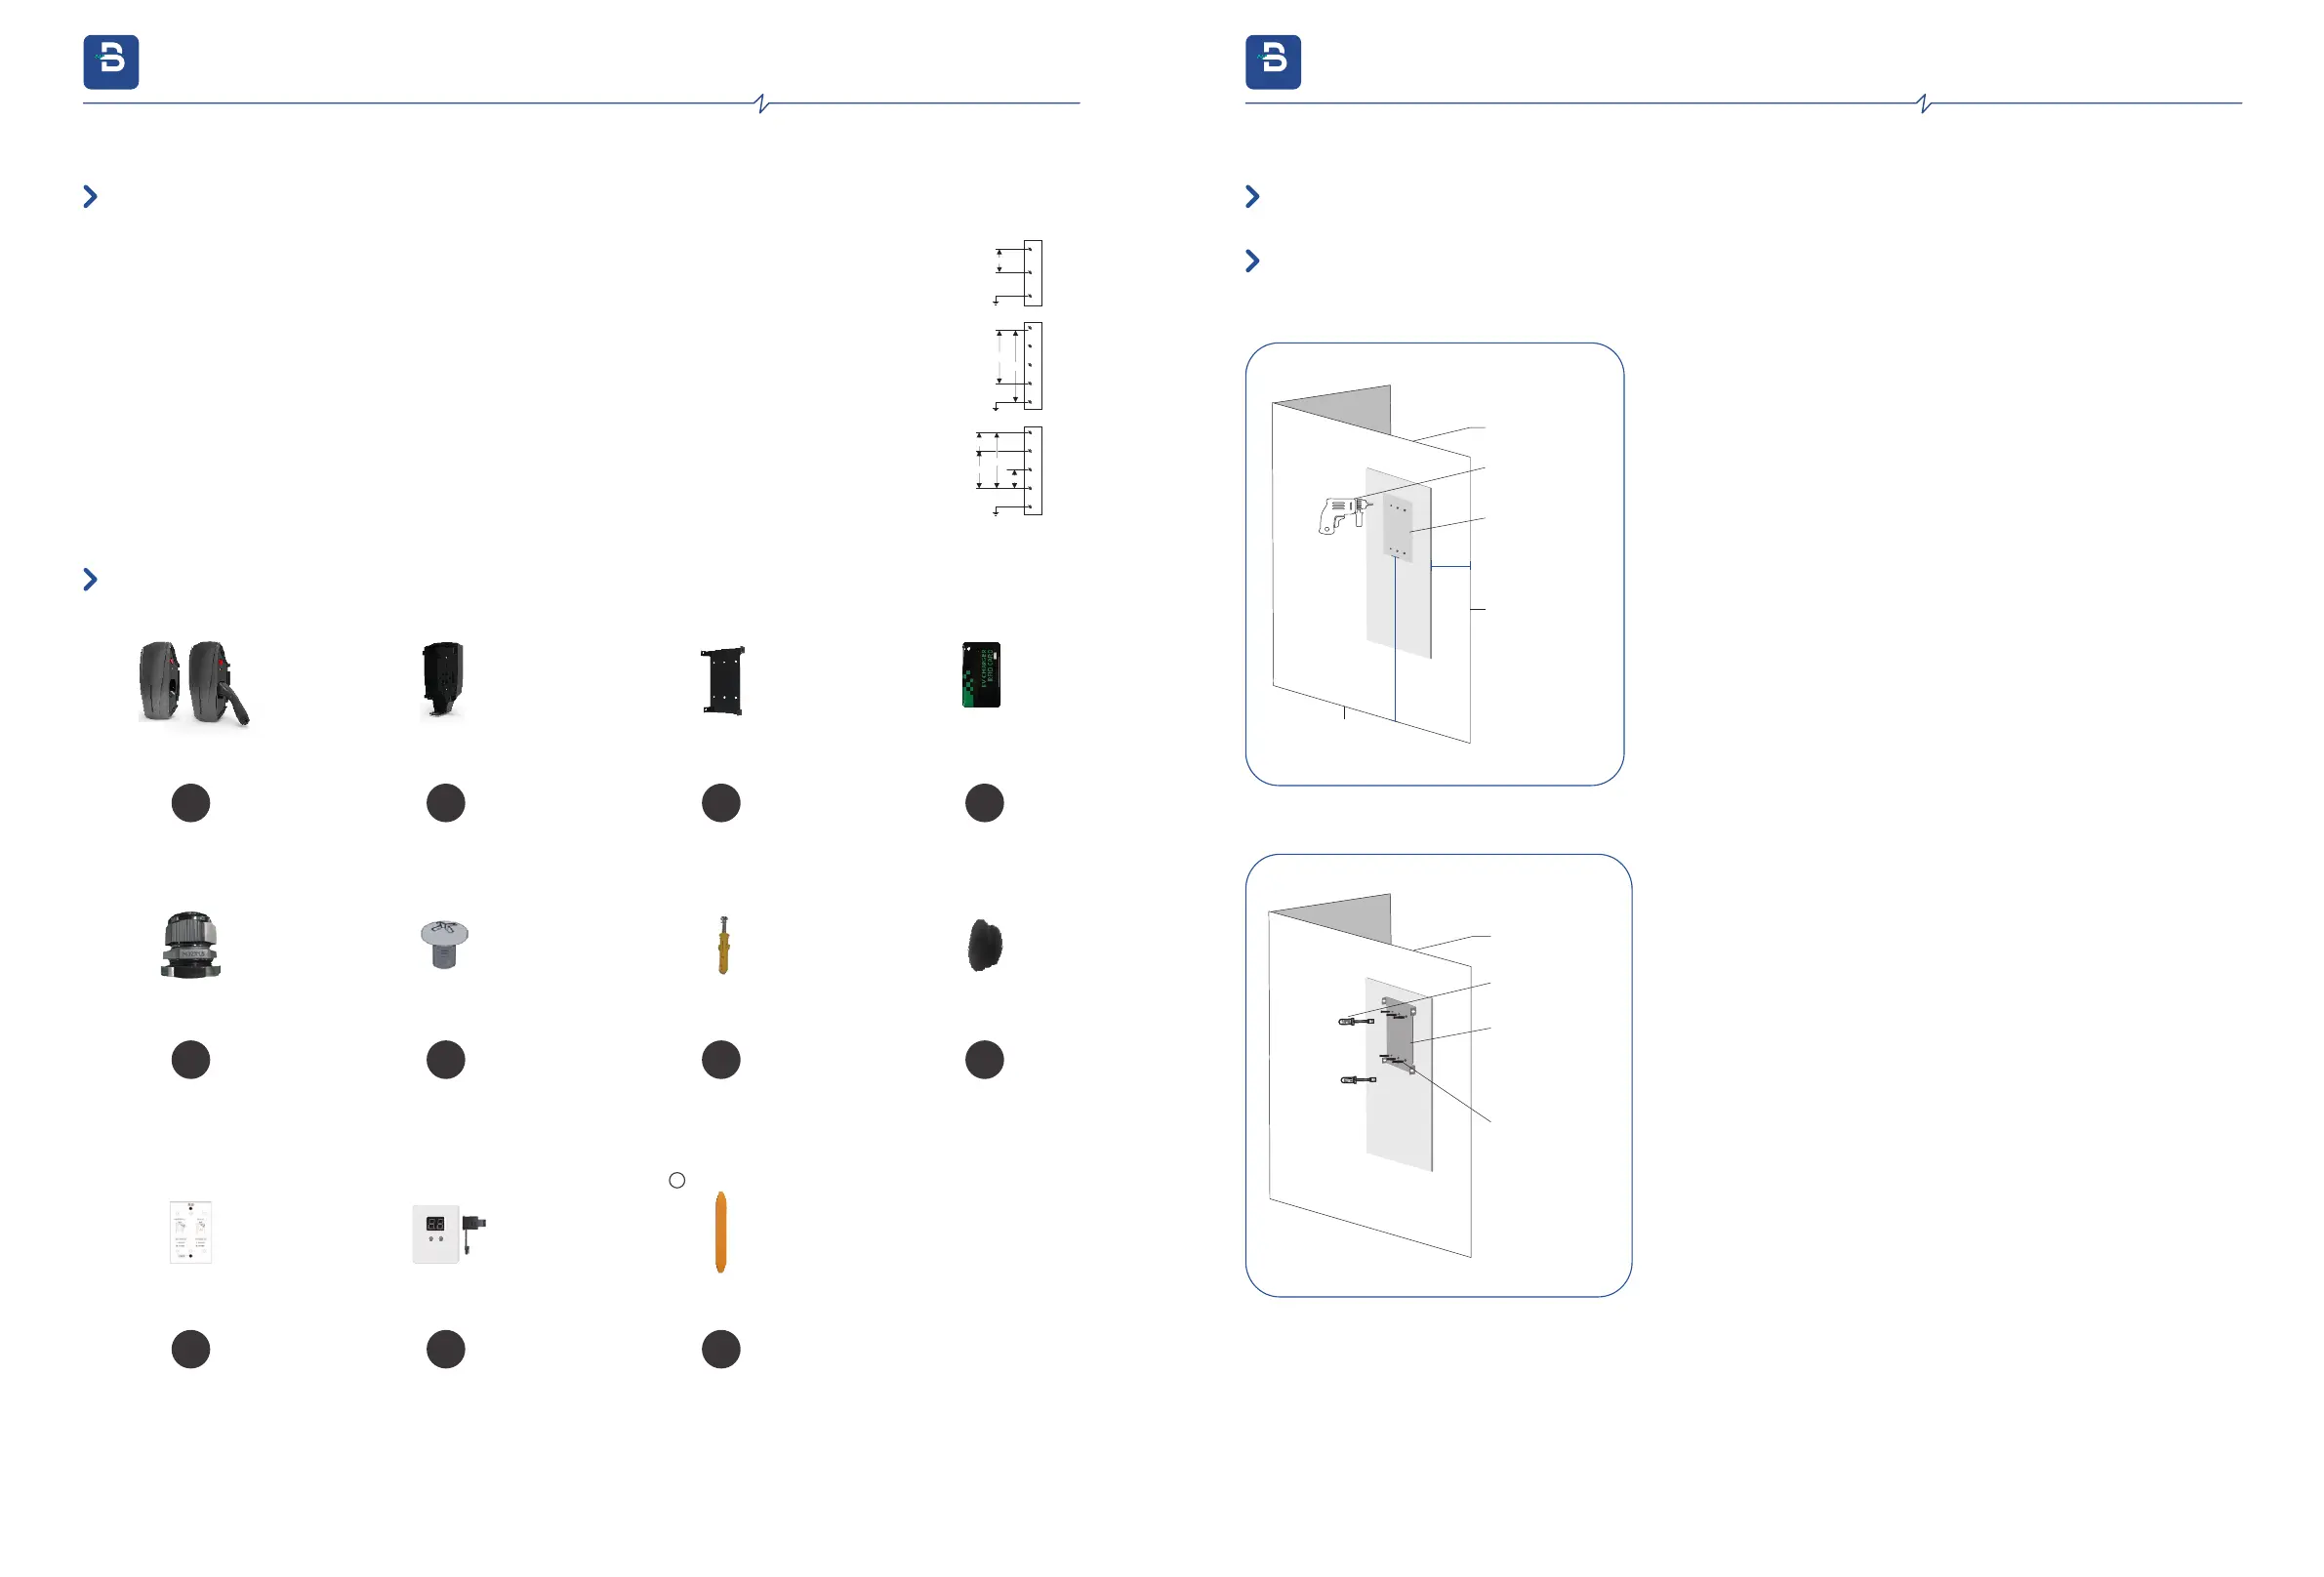
Step 1
Position
The bottom of the ⑨ positioning plate is 1.2 m away (recommended), if the
EV charger is installed close to the edge of the wall, the positioning plate
should be more than 0.5 m away from the edge of the wall.
Drilling pilot holes
Drilling the holes according to the instruction on the Position template
for different installation and wiring ways.
PAGE
09/10
Step 2
Install the Mounting bracket
Put the 8*40 Socket head screws' anchoring into the holes, and use the screw
driver make the 6pcs 8*40 Socket head screws to fix the Mounting bracket on the
wall .
3.7.1. Step-by-step Installation Instructions (bottom entry wiring)
3.7. Installation Step
3. Installation Instructions
evb.com
3. Installation Instructions
evb.com