PAGE
11/12
www.evb.com
Step 3
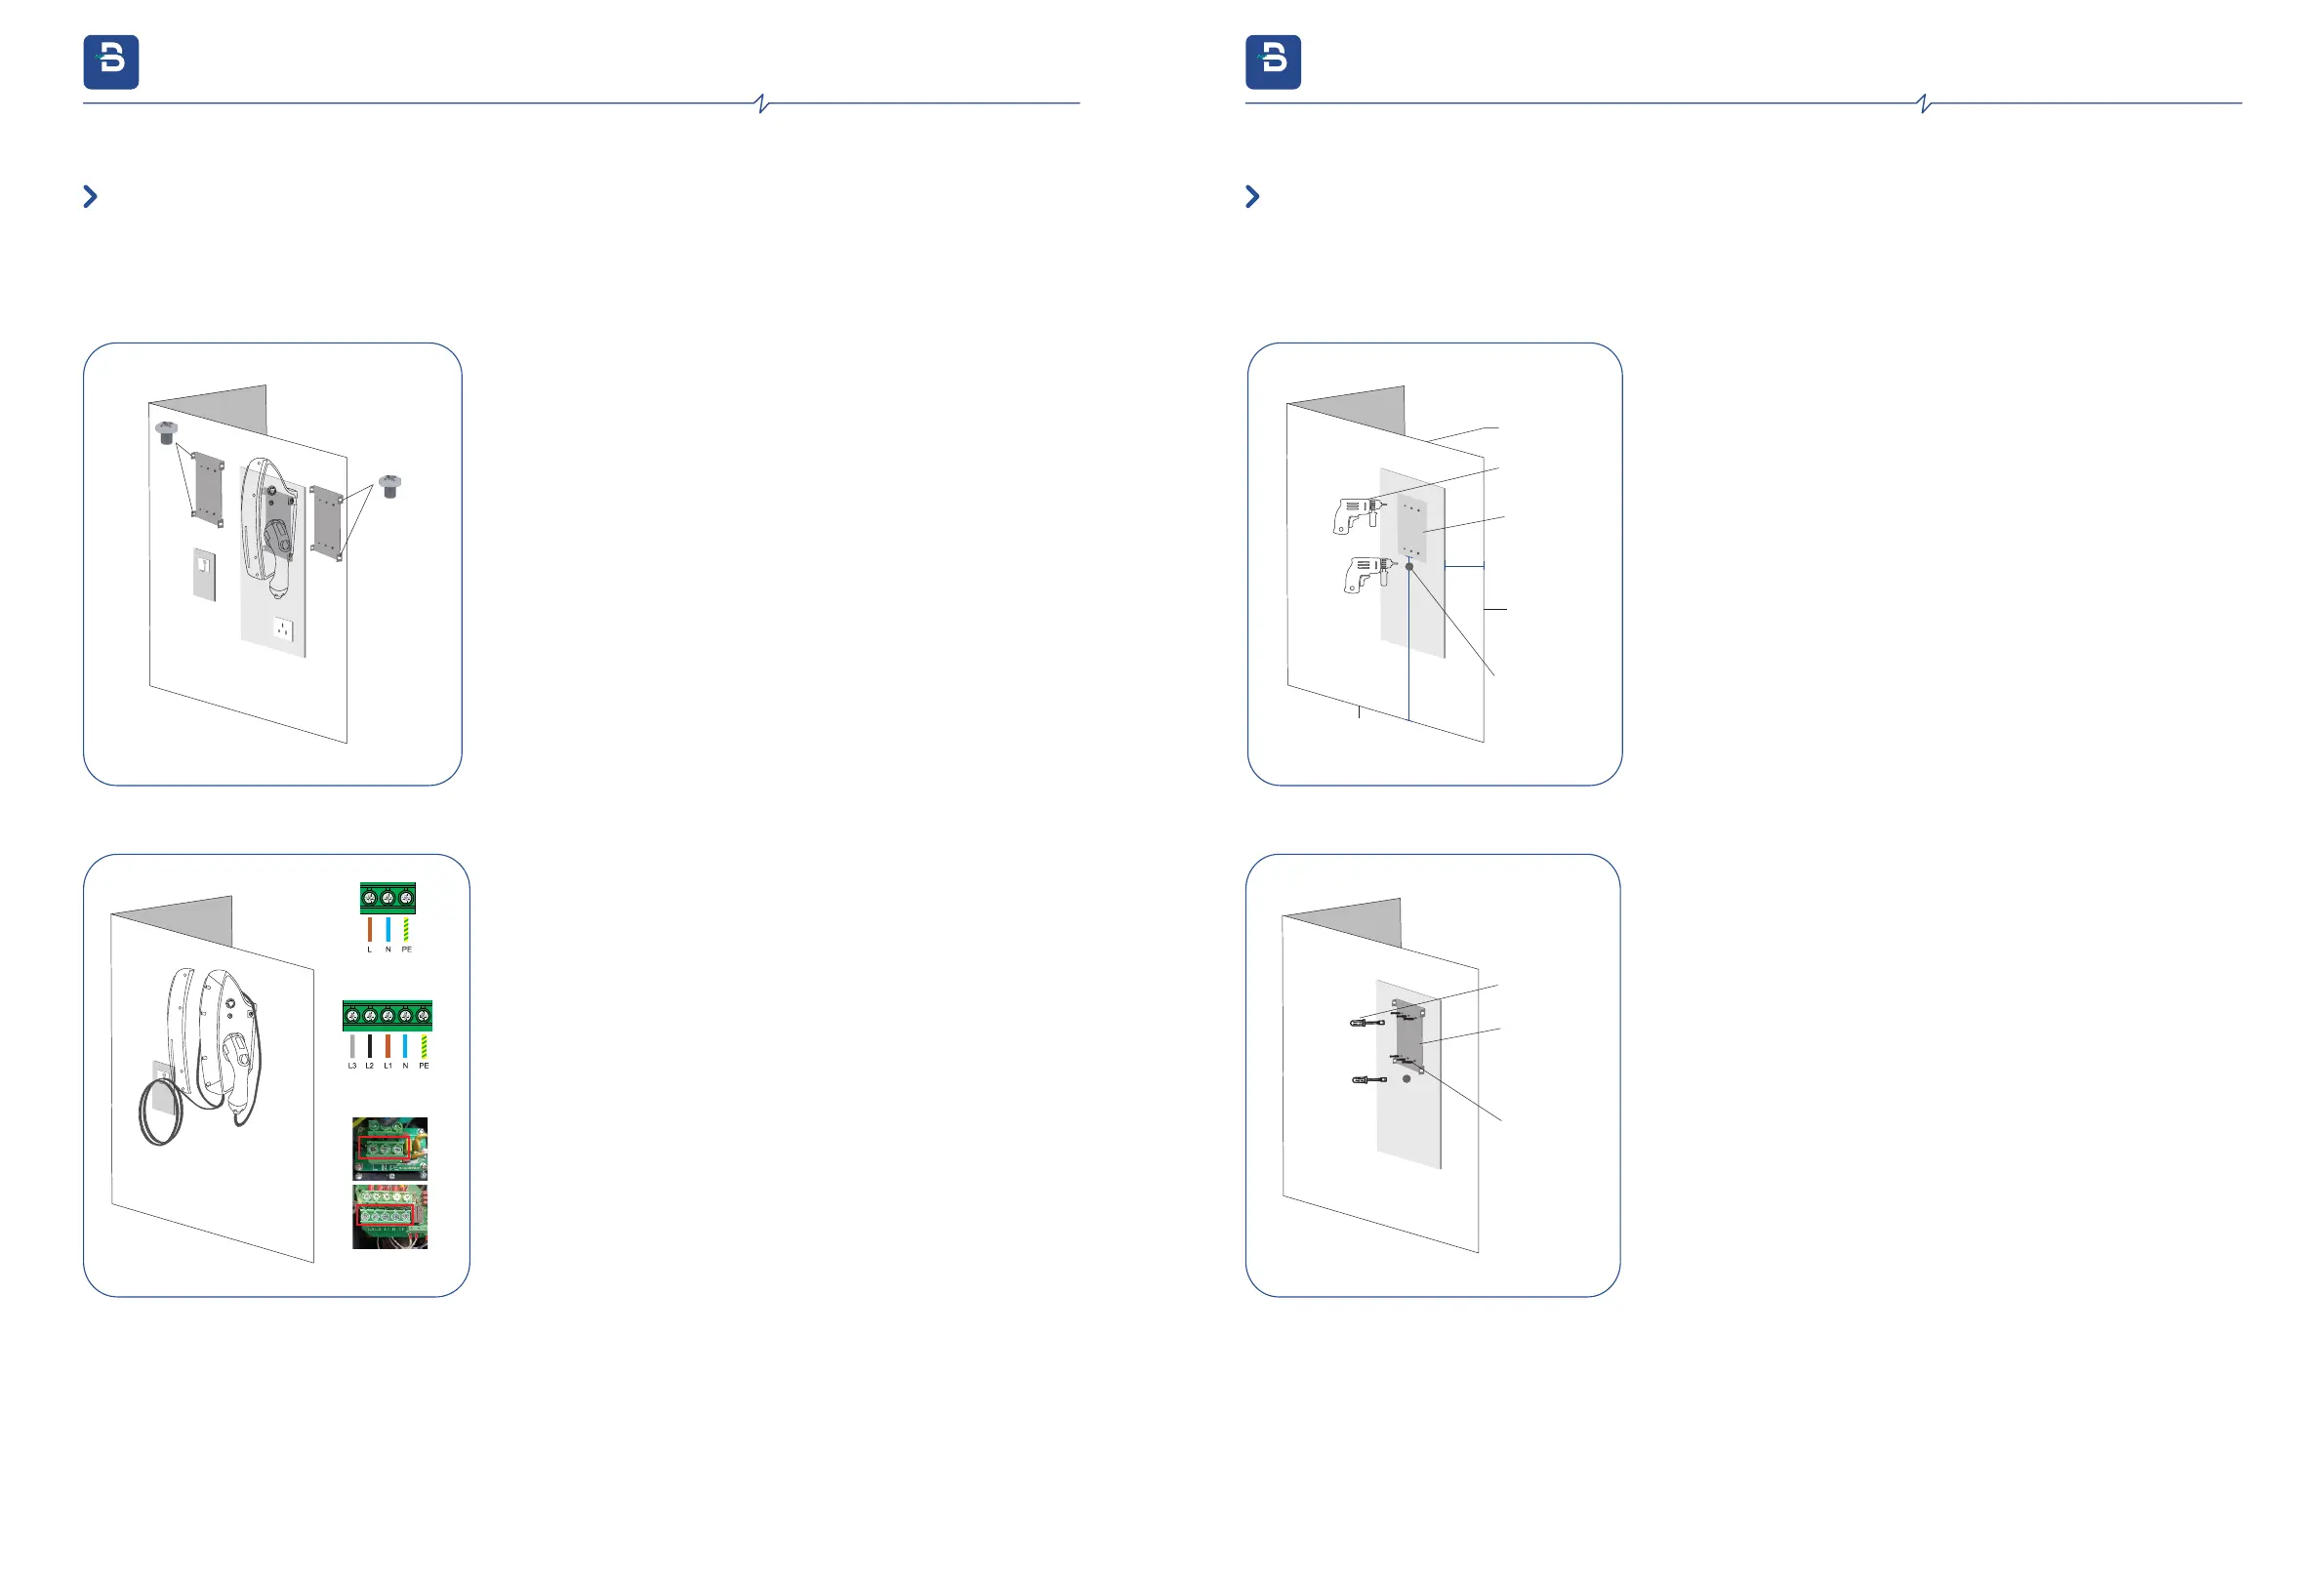
Install the EV Charger to the mounting plate
Align the side hole of EV charger to the panel's side holes.
Installation
Use the 4pcs M6*8 screws to fix the EV charger to the mounting plate as
picture shows (Screws torque 1.5NM-2.0NM).
Step 4
Wiring
Note: Consult with your local electrician or refer to your local code for
proper wire sizing appropriate for the currents in your EV Charger.
Note: It is the installer's responsibility to identify whether additional
grounding is required to ensure that local regulations are met. Grounding must
be installed at the power source and not at the cable entry to the EV
Charger.
As the picture at left shows, use the screwdriver loosing the screws on the
EV charger cover. Wire the cable to the according terminal.
Left hole position
Right hole
position
M6*8 bolts
Wiring diagram
Single-phase
wiring diagram
Three-phase
wiring diagram
3.7.1. Step-by-step Installation Instructions (bottom entry wiring)
Note: The torque applied to the screws should be 1.8N-m to
2.2N-m
Step 1
Position
The bottom of the ⑨ positioning plate is 1.2 m away (recommended), if the
EV charger is installed close to the edge of the wall, the positioning plate
should be more than 0.5 m away from the edge of the wall.
Drilling pilot holes
Drilling the holes according to the instruction on the Position template
for different installation and wiring ways.
Step 2
Install the Mounting bracket.
Put the 8*40 socket head screws' anchoring into the holes, and use the screw
driver make the 6pcs 8*40 Socket head screws to fix the mounting bracket on
the wall .
wall
≥0.5M
~1.2M
Floor Level
Drill
Side of wall
The 6 points
on the
position plate
Hole for rear entry
(not limited to the
wall only)
screwdriver
8*40
Expansion bolts
Mounting
bracket
3.7.2. Step-by-step Installation Instructions (rear entry wiring)
3. Installation Instructions
evb.com
3. Installation Instructions
evb.com