3
2
G
F1
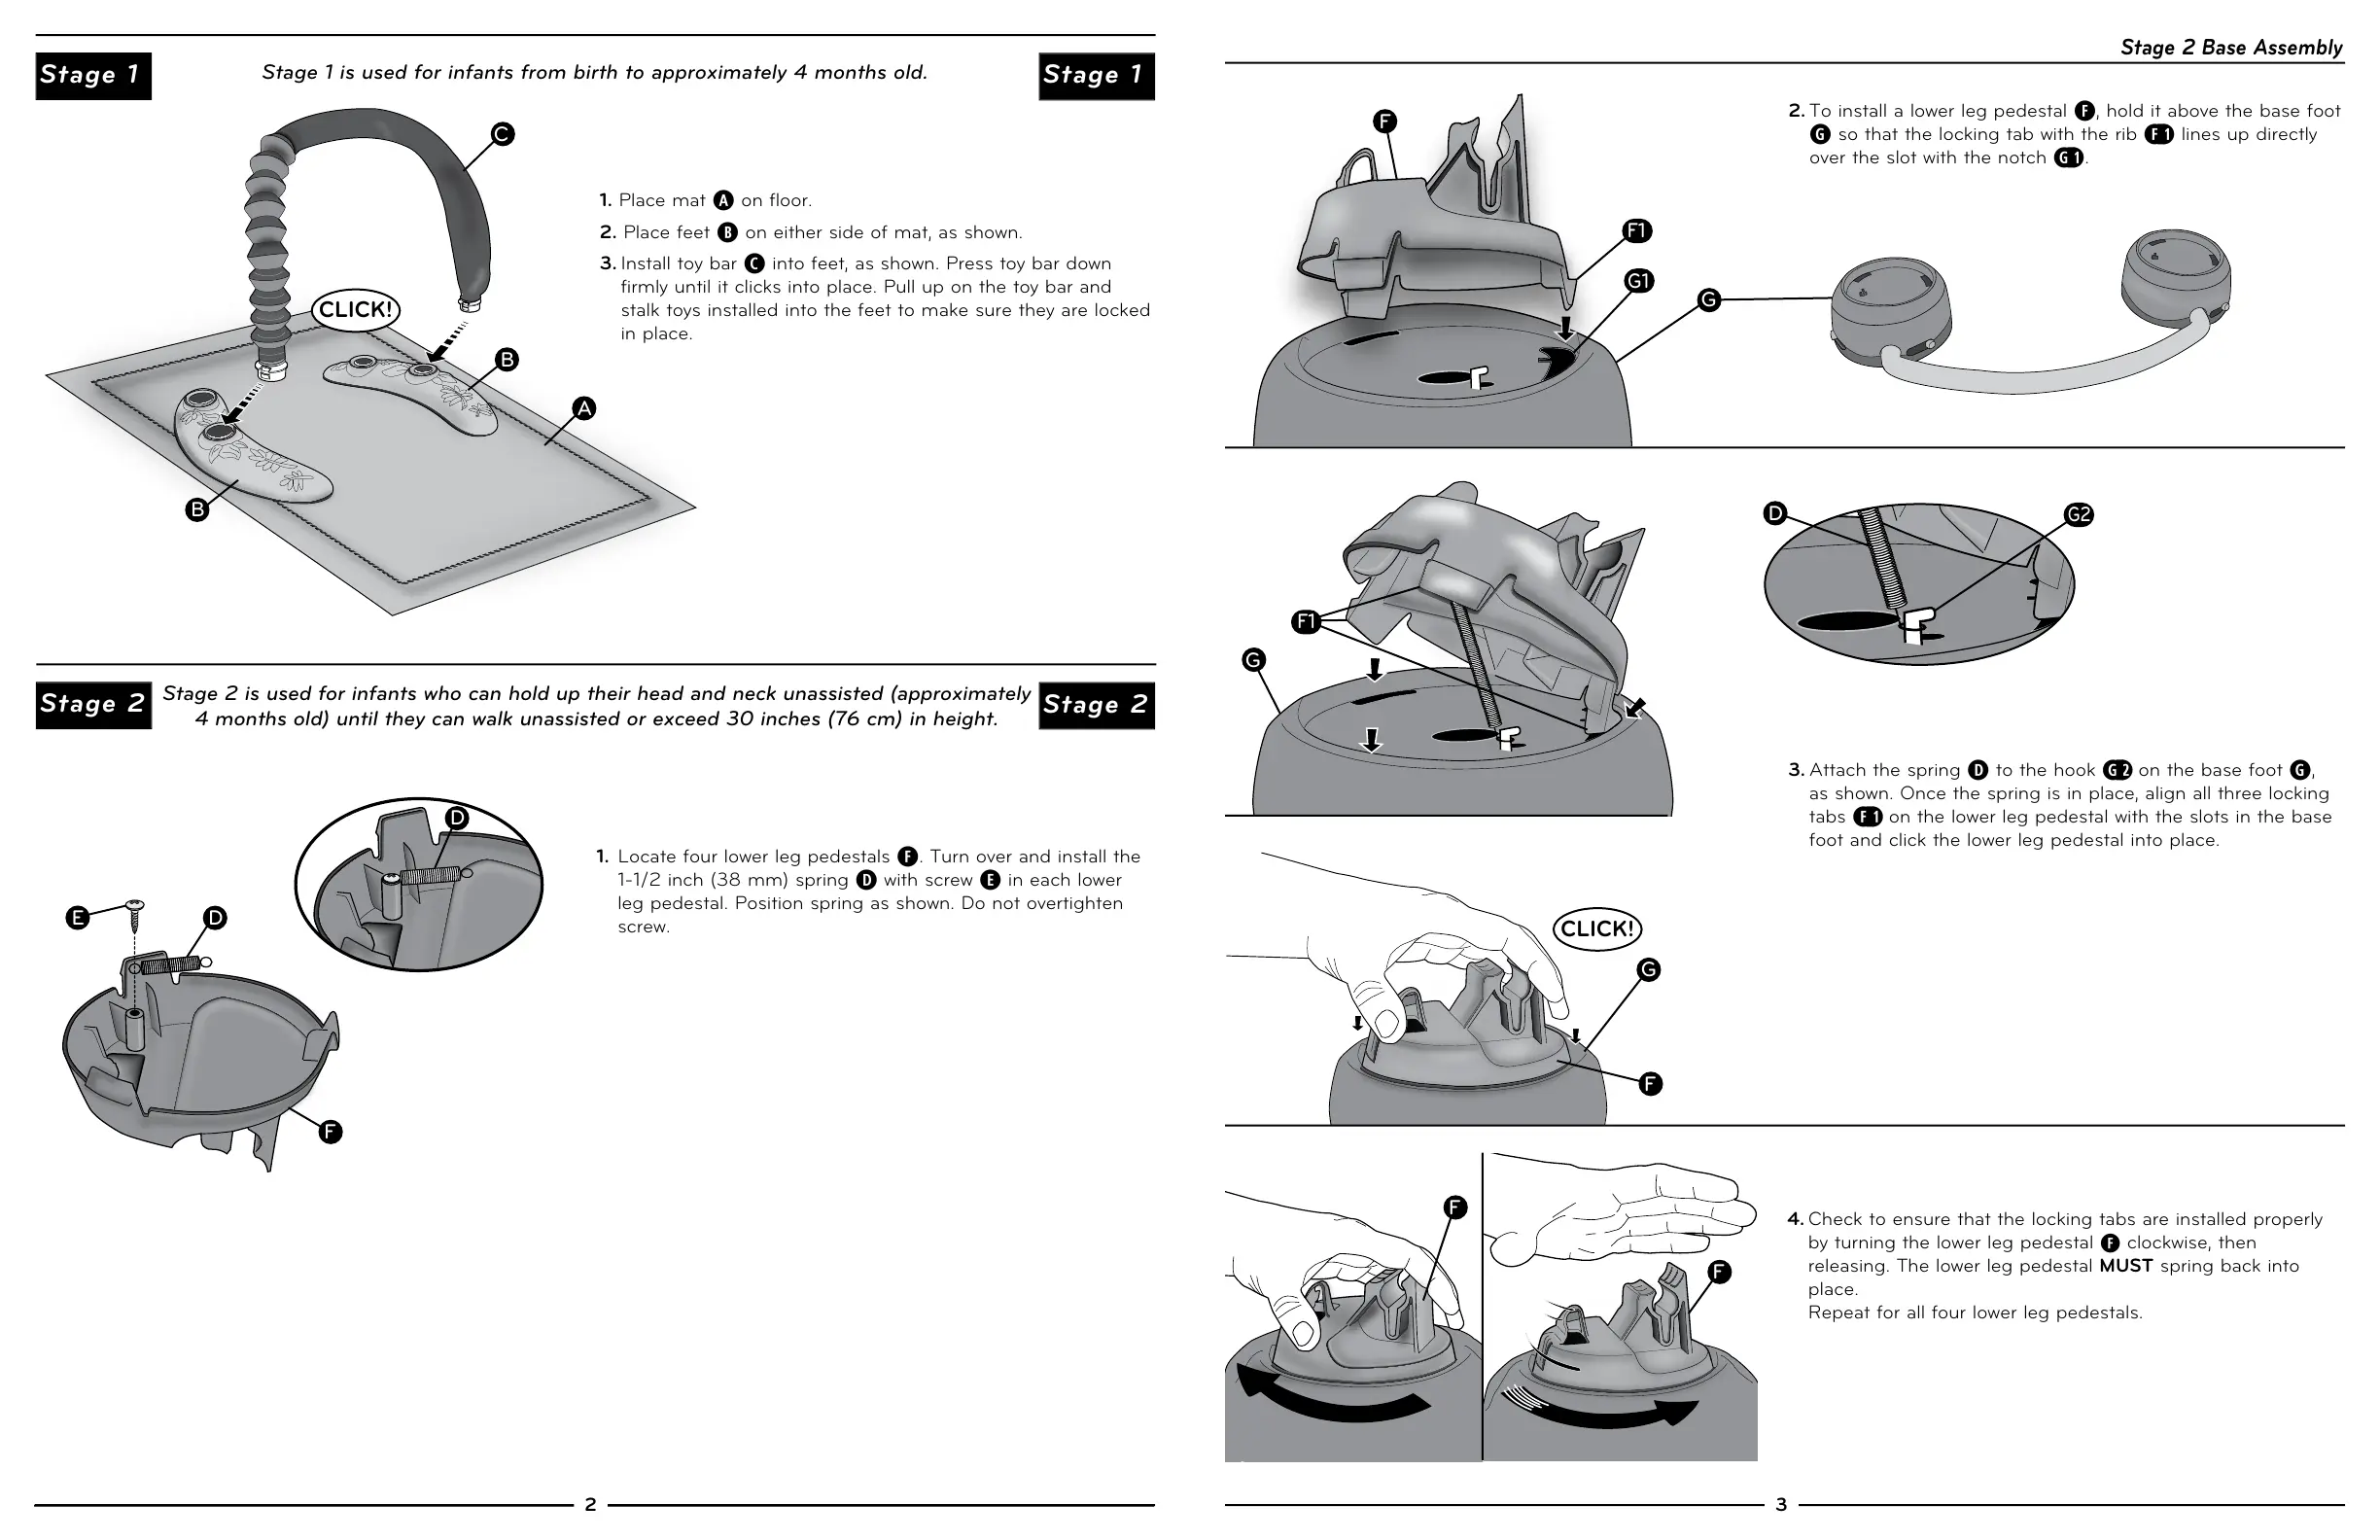
1. Locate four lower leg pedestals
F
. Turn over and install the
1-1/2 inch (38 mm) spring
D
with screw
E
in each lower
leg pedestal. Position spring as shown. Do not overtighten
screw.
2. To install a lower leg pedestal
F
, hold it above the base foot
G
so that the locking tab with the rib
F> !
lines up directly
over the slot with the notch
G> !
.
E
D
D
1. Place mat
A
on floor.
2. Place feet
B
on either side of mat, as shown.
3. Install toy bar
C
into feet, as shown. Press toy bar down
firmly until it clicks into place. Pull up on the toy bar and
stalk toys installed into the feet to make sure they are locked
in place.
A
C
B
B
Stage 1 is used for infants from birth to approximately 4 months old.
Stage 1
Stage 2 is used for infants who can hold up their head and neck unassisted (approximately
4 months old) until they can walk unassisted or exceed 30 inches (76 cm) in height.
F
F
F1
G1
G
Stage 2 Base Assembly
3. Attach the spring
D
to the hook
G> @
on the base foot
G
,
as shown. Once the spring is in place, align all three locking
tabs
F> !
on the lower leg pedestal with the slots in the base
foot and click the lower leg pedestal into place.
D
G2
Stage 1
Stage 2
Stage 2
4. Check to ensure that the locking tabs are installed properly
by turning the lower leg pedestal
F
clockwise, then
releasing. The lower leg pedestal MUST spring back into
place.
Repeat for all four lower leg pedestals.
G
F
F
F
CLICK!
CLICK!
 Loading...