5
4
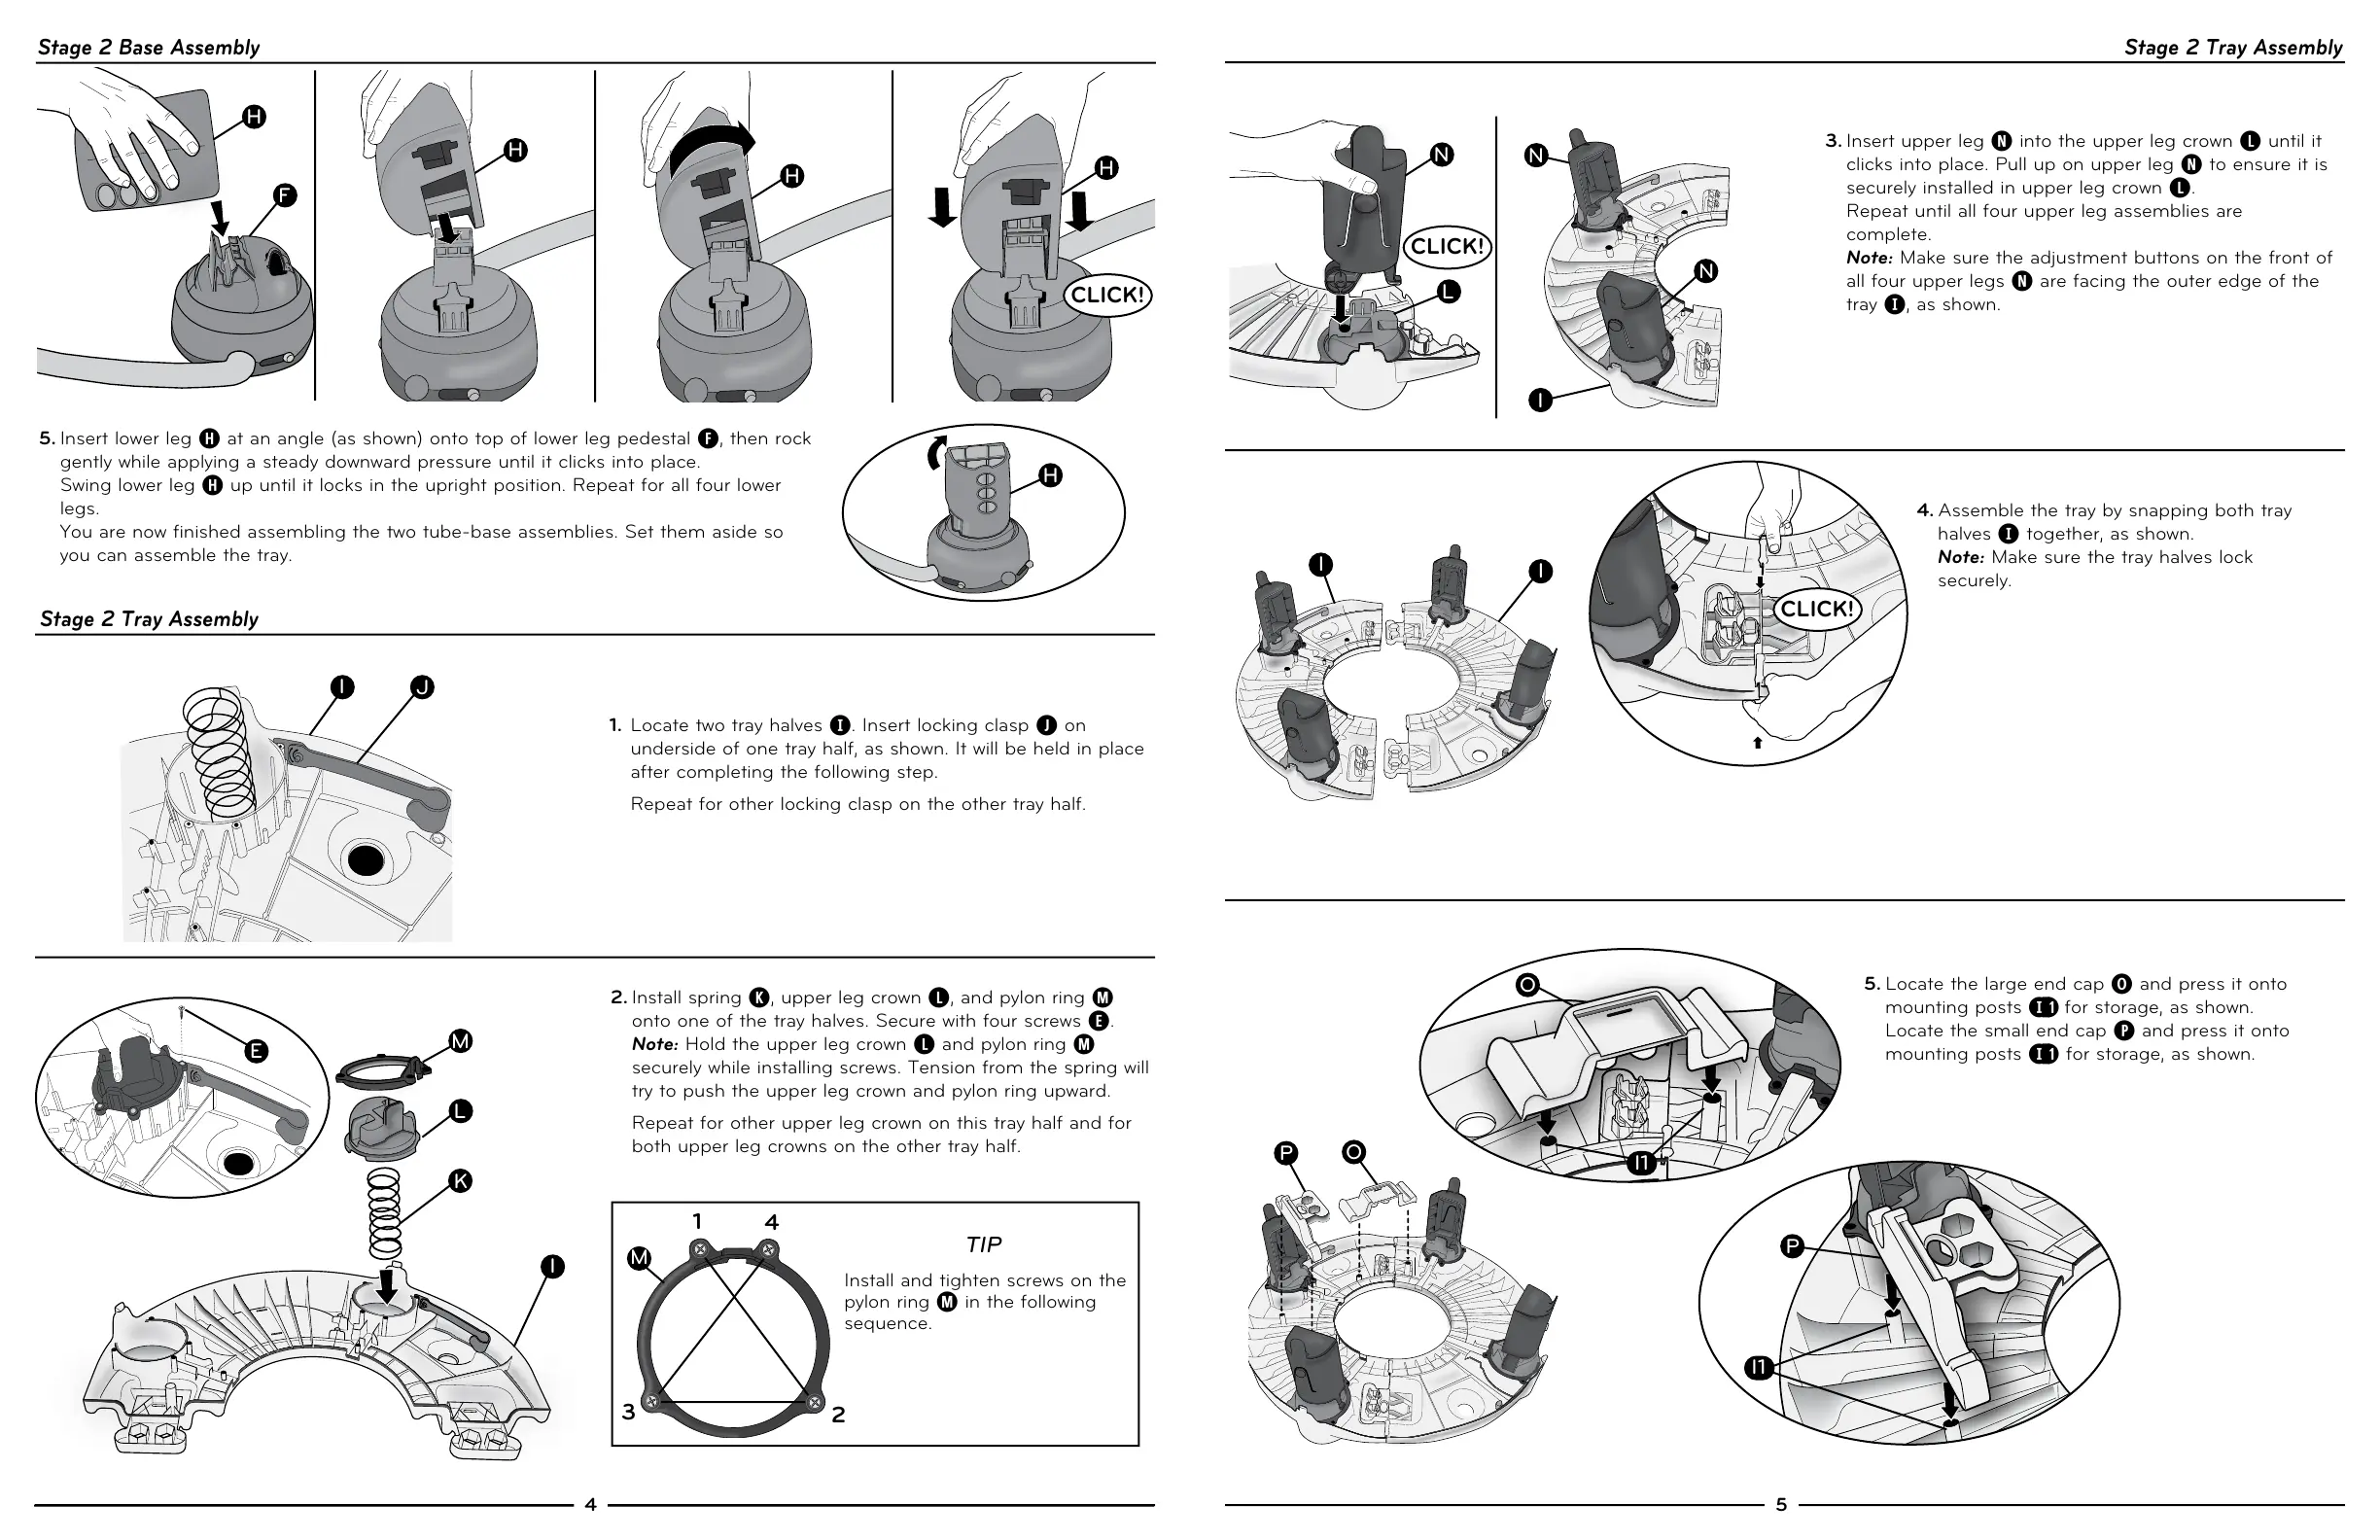
2. Install spring
K
, upper leg crown
L
, and pylon ring
M
onto one of the tray halves. Secure with four screws
E
.
Note: Hold the upper leg crown
L
and pylon ring
M
securely while installing screws. Tension from the spring will
try to push the upper leg crown and pylon ring upward.
Repeat for other upper leg crown on this tray half and for
both upper leg crowns on the other tray half.
1. Locate two tray halves
I
. Insert locking clasp
J
on
underside of one tray half, as shown. It will be held in place
after completing the following step.
Repeat for other locking clasp on the other tray half.
I
L
K
E
Stage 2 Tray Assembly
Stage 2 Tray Assembly
H
M
Install and tighten screws on the
pylon ring
M
in the following
sequence.
TIP
1
2
3
4
M
Stage 2 Base Assembly
3. Insert upper leg
N
into the upper leg crown
L
until it
clicks into place. Pull up on upper leg
N
to ensure it is
securely installed in upper leg crown
L
.
Repeat until all four upper leg assemblies are
complete.
Note: Make sure the adjustment buttons on the front of
all four upper legs
N
are facing the outer edge of the
tray
I
, as shown.
I
N
N
N
L
F
H
H
H
H
5. Insert lower leg
H
at an angle (as shown) onto top of lower leg pedestal
F
, then rock
gently while applying a steady downward pressure until it clicks into place.
Swing lower leg
H
up until it locks in the upright position. Repeat for all four lower
legs.
You are now finished assembling the two tube-base assemblies. Set them aside so
you can assemble the tray.
I
I
4. Assemble the tray by snapping both tray
halves
I
together, as shown.
Note: Make sure the tray halves lock
securely.
O
I1
O
P
I1
P
5. Locate the large end cap
O
and press it onto
mounting posts
I> !
for storage, as shown.
Locate the small end cap
P
and press it onto
mounting posts
I> !
for storage, as shown.
I
J
CLICK!
CLICK!
CLICK!
 Loading...