CLEANING
The appliance should be disconnected from the power outlet or turned off at your isolation switch before
commencing any cleaning process. Excess spillage must be removed before cleaning.
Cleaning the oven exterior:
Before starting to clean your oven, be sure that all control buttons are off and your appliance has cooled off. Unplug
the appliance. Do not use cleaning materials containing particles that might scratch the enamelled and painted
parts of your oven. Use cream cleaners or liquid cleaners, which do not contain particles. As these cleaners may
damage the surfaces, do not use caustic creams, abrasive cleaning powders, rough wire wool or hard tools. In the
event of any excess liquids spilling over your oven surface during cleaning, clean up immediately so as to prevent
possible damage to the enamel or metal surface. Do not use steam cleaners for cleaning the oven.
Cleaning the interior of the oven:
Make sure to unplug the oven (or fully disconnect from the power source) before starting to clean it. You will obtain
best results if you clean the oven interior while the oven is slightly warm (the oven should not be operating). For
the, remove the wire side racks first. Wipe your oven with a soft piece of cloth (e.g. dish cloth) dampened with warm
soapy water after each use, rinse cloth in warm water then wipe oven again and then finish by wiping with a dry
cloth. For a complete cleaning process, use dry and powder type oven cleaners, following the oven cleaning
product’s instructions. Failure to clean the appliance properly & allowing fat & grease to build up can potentially
cause a fire hazard.
For a more thorough clean, you can remove the oven door, proceed as follows:
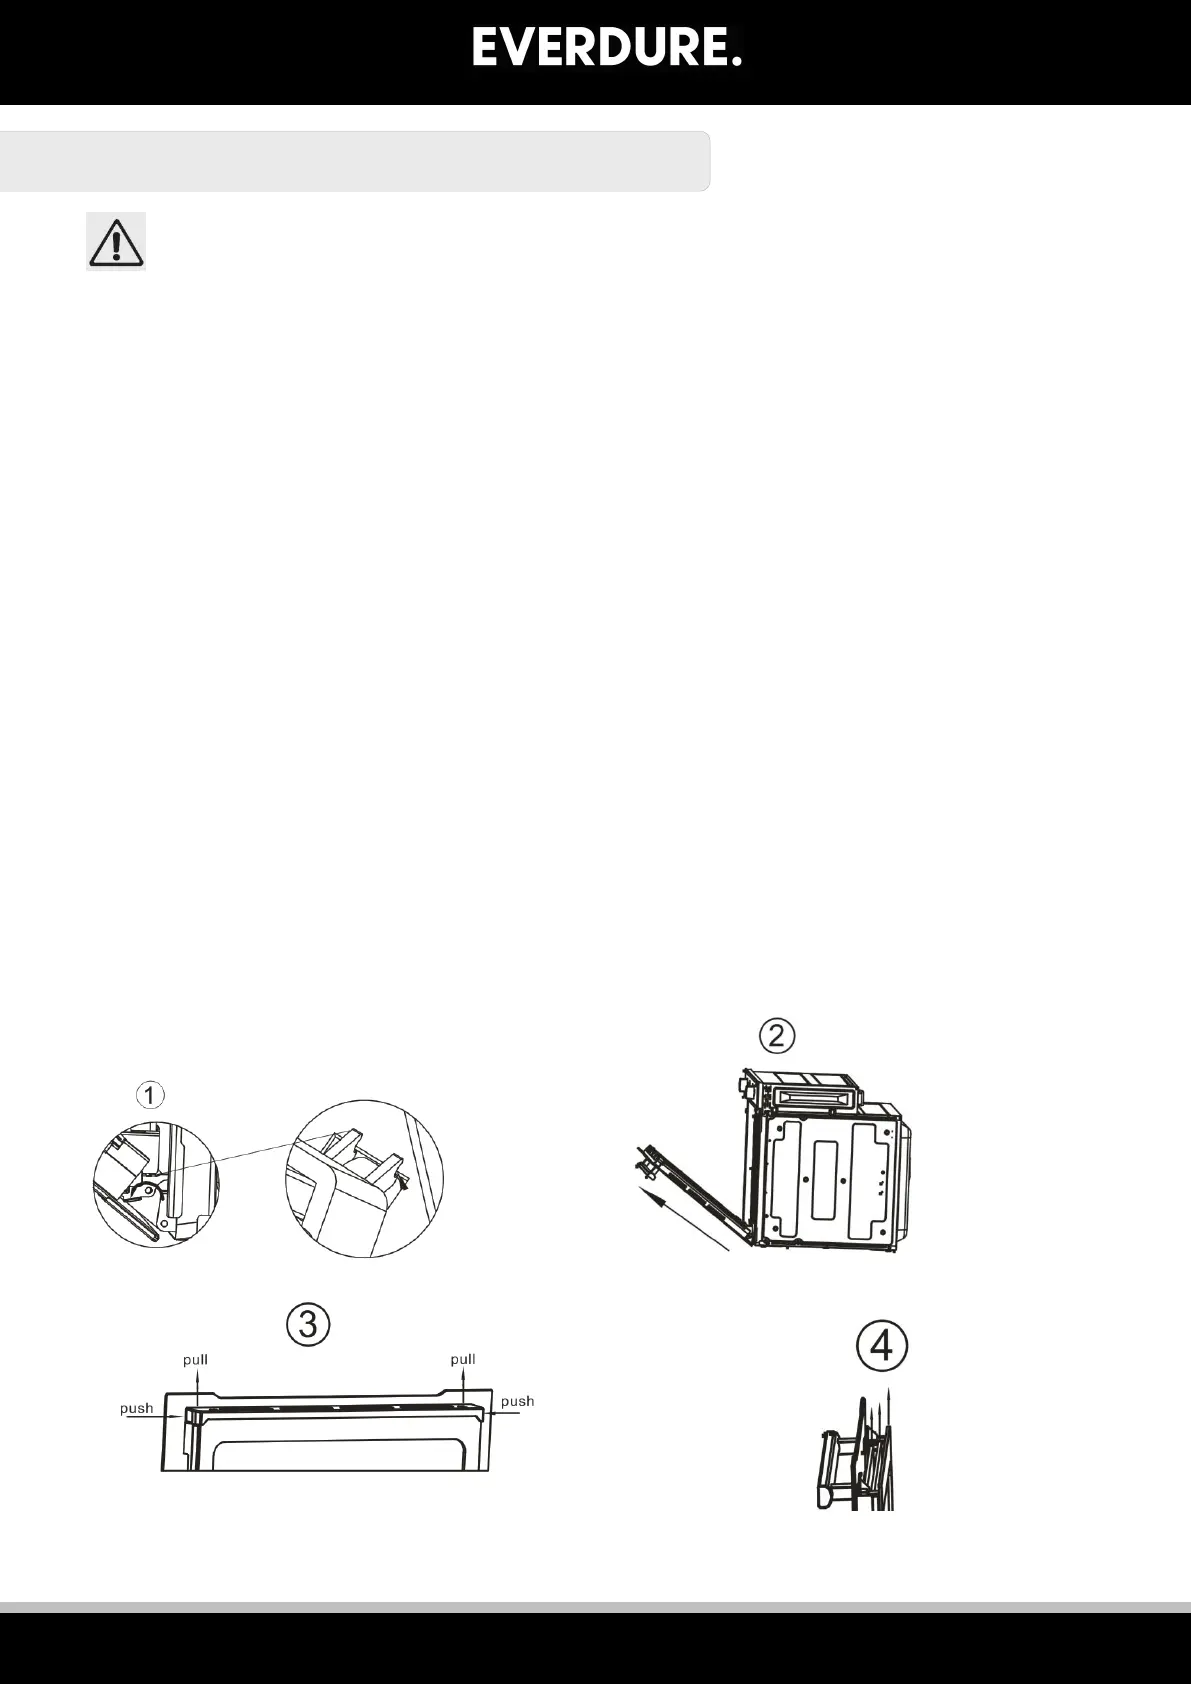
Open the door fully
1. Lift up and turn the small levers situated on the two hinges, be sure the lockers must be on position shown on
step.1
2. Pull the door towards you, pulling it out of its seat;
3. Push the latch on both side and pull the bar out.
4. Remove the door glass accordingly
5. Assembly the door by following the above procedures backwards.
 Loading...