This document provides installation, operation, and maintenance instructions for the Everdure RIES912 rangehood.
Function Description:
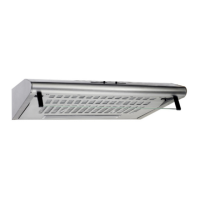
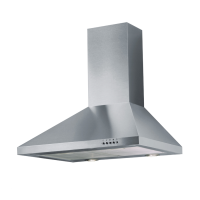
The Everdure RIES912 is a rangehood designed to extract cooking fumes, odors, and steam from the kitchen. It features a fan system with multiple speed settings and integrated lighting to illuminate the cooking surface. The rangehood is intended for indoor use and is part of the Everdure Kitchen Community's range of cooking appliances. Its primary function is to maintain air quality in the kitchen by removing airborne particles and gases generated during cooking, thereby preventing their spread throughout the home and reducing grease buildup on kitchen surfaces. The rangehood can be connected to an external air outlet for ducted extraction.
Important Technical Specifications:
- Model: RIES912
- Voltage: 220-240V 50Hz
- Lamp Max: 4 x 1.5W LED
- Rated Input Power: 196W
- Minimum Distance above Cooking Surface: 65cm
- Maximum Distance above Cooking Surface: 75cm
- Ceiling Bearing Capacity: At least 120kg
- Ceiling Thickness: ≥30mm
- Duct Diameter: 150mm (for external air outlet)
- Light Type: 12V DC 1.5W MAX LED light
Usage Features:
The rangehood is operated via five touch buttons located on its control panel:
- Power Button: Turns the rangehood on or off.
- Low Fan Button: Sets the fan to low speed for light cooking.
- Medium Fan Button: Sets the fan to medium speed for moderate cooking.
- High Fan Button: Sets the fan to high speed for heavy cooking or strong odors.
- Light Button: Turns the integrated LED lights on or off to illuminate the cooking area.
The user manual emphasizes the importance of reading the instructions thoroughly before use to ensure proper installation and safe operation. It highlights that the appliance must be installed correctly and that safety instructions should be followed to avoid misuse and hazards.
Installation Process:
- Mounting the V-Flap: The two half-parts of the V-flap (2) are mounted onto the rangehood body (6). Pins (3) are inserted, and axial rods (4) are inserted into holes (5) on the rangehood body. This process is repeated for both halves.
- Rangehood Placement: The rangehood should be positioned at a minimum distance of 65cm and a maximum distance of 75cm above the cooking surface for optimal effect.
- Ceiling Preparation: The ceiling must be capable of bearing at least 120kg and have a thickness of at least 30mm. A 170mm round hole needs to be drilled in the ceiling.
- Hanging Board Installation: Twelve holes are drilled in the ceiling according to the hanging board. ST640mm big flat screws are used to fix the hanging board to a wooden ceiling (or 8pcs exploded screws for a concrete ceiling). M410 big flat screws and M4 nuts with gaskets connect the angle iron to the hanging board, and additional M4*10 big flat screws and M4 nuts connect the angle iron to another angle iron, ensuring an overlap length of at least 100mm.
- Expansion Pipe: One end of the expansion pipe is guided through the 170mm hole in the ceiling.
- Chimney Installation: Four ST4*8 big flat screws connect the inside chimney to the hanging board. The outside chimney is then put on, and a hook is used to temporarily hold it up for subsequent installation steps.
- Glass Canopy: The glass canopy is affixed to the rangehood body using four glass screws.
- Rangehood Body Attachment: The rangehood body is attached to the angle iron using 16pcs M4*10 flat screws.
- Expansion Pipe Connection: The expansion pipe is attached to the outlet, ensuring all fittings are properly secured.
Hints for Exhaust Duct Installation:
- Keep the expansion pipe short and straight.
- Do not reduce the size or restrict the expansion pipe.
- Install the expansion pipe pulled taut to minimize pressure loss.
- Failure to follow these instructions will reduce performance and increase noise levels.
- Installation must be carried out by a qualified electrician or competent person.
- Do not connect the ducting system to existing ventilation systems used for other appliances (e.g., warmer tube, gas tube, hot wind tube).
- The angle of the expansion pipe bend should not be less than 120°; it should be directed horizontally or upwards from the initial point to an outer wall.
- Ensure the cooker hood is level after installation to prevent grease collection.
- The expansion pipe selected must comply with relevant standards and be fire retardant.
Troubleshooting:
The manual includes a troubleshooting guide for common issues:
- Light on, but motor does not work: Check if the fan switch is off, or if the fan switch or motor has failed. Solutions include selecting a fan switch position or contacting the Service Department.
- Light does not work, motor does not work: Check for blown house fuses or a loose/disconnected power cord. Solutions include resetting/replacing fuses, refitting the power cord, or switching the power outlet on.
- Oil leakage: This could be due to a one-way valve or air ventilation entrance not being tightly sealed, or leakage from the connection of the U-shaped section and cover. Solutions involve sealing the one-way valve or the U-shaped section.
- Lights not working: Indicates broken/faulty globes. Solution is to contact the Service Department.
- Insufficient suction: The distance between the rangehood and the gas top might be too far. Solution is to refit the rangehood to the correct distance.
- Rangehood inclines: The fixing screw might not be tight enough. Solution is to tighten the hanging screw and make it horizontal.
Maintenance Features:
- Safety Precaution: Always ensure the rangehood is turned off at the power point before cleaning or performing any maintenance.
- Cleaning:
- Do not use abrasive cleaners. Warm soapy water and a cloth are recommended.
- Regular cleaning is essential to prevent grease and fat buildup, which can pose a fire hazard.
- The metal filter mesh must be cleaned regularly (every 4-6 weeks, depending on usage frequency) to maintain efficiency and prevent grease buildup. Filters can be cleaned with warm soapy water or a cloth.
- Replacing the Lights:
- Unplug the appliance from the power source.
- Remove the grease filter.
- Press the spring splinter on both sides of the LED light until it is released.
- Gently pull out the light connecting wire and dismantle the terminal.
- Reverse the procedure to install a new 12V DC 1.5W MAX LED light.
The manual stresses the importance of retaining these instructions, proof of purchase, and other relevant documents for future reference. It also states that Everdure reserves the right to alter specifications or appearances without notice due to continuous product development. All packaging should be removed and disposed of responsibly, with recycling encouraged where facilities are available.